Beginner’s Setup Guide for Advanced Order Export for WooCommerce
Table of Contents
How to install Advanced Order Export for Woocommerce (Pro)
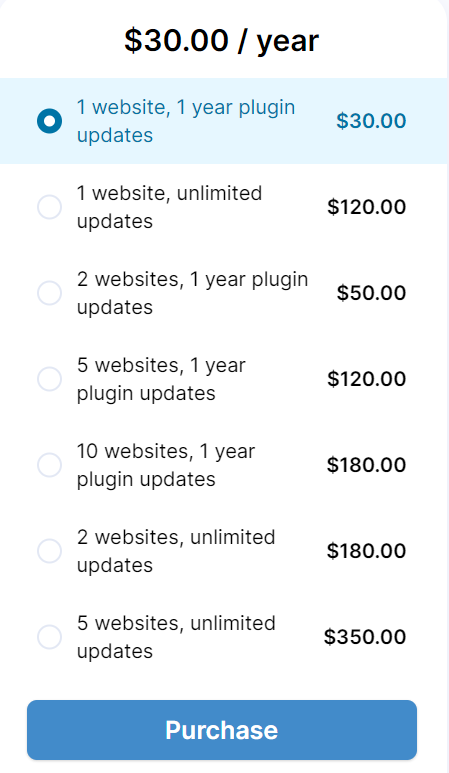
Before installing the plugin, you need to buy it on our website. Select the appropriate tariff and click on the “Purchase” button.
After payment, you will receive an email with the plugin archive and activation key.
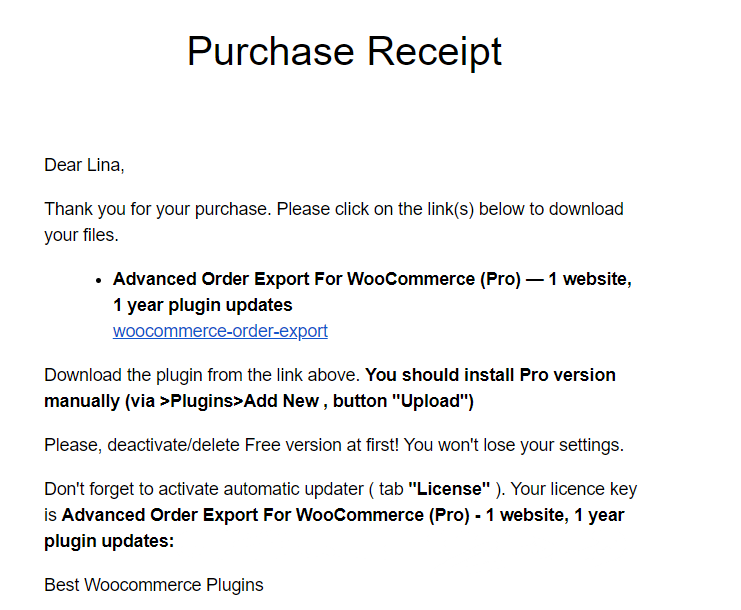
As stated in the instructions, first we will remove the free version of the plugin, if it was installed earlier.
Next, go to the “Plugins” tab and click on “Add new”.
At the top of the page, click on “Upload” and choose the plugin archive. The plugin will appear in the “All plugins” tab. Activate it.
How to set up Advanced Order Export for Woocommerce (Pro)
We wrote about how to configure the plugin in this article. The settings are the same in both versions.
How to save report settings to your own Profile in Advanced Order Export for Woocommerce (Pro)
Once you’ve set up your report, you can save them to your Profiles.
To do this, click on the “Save as a profile” button.
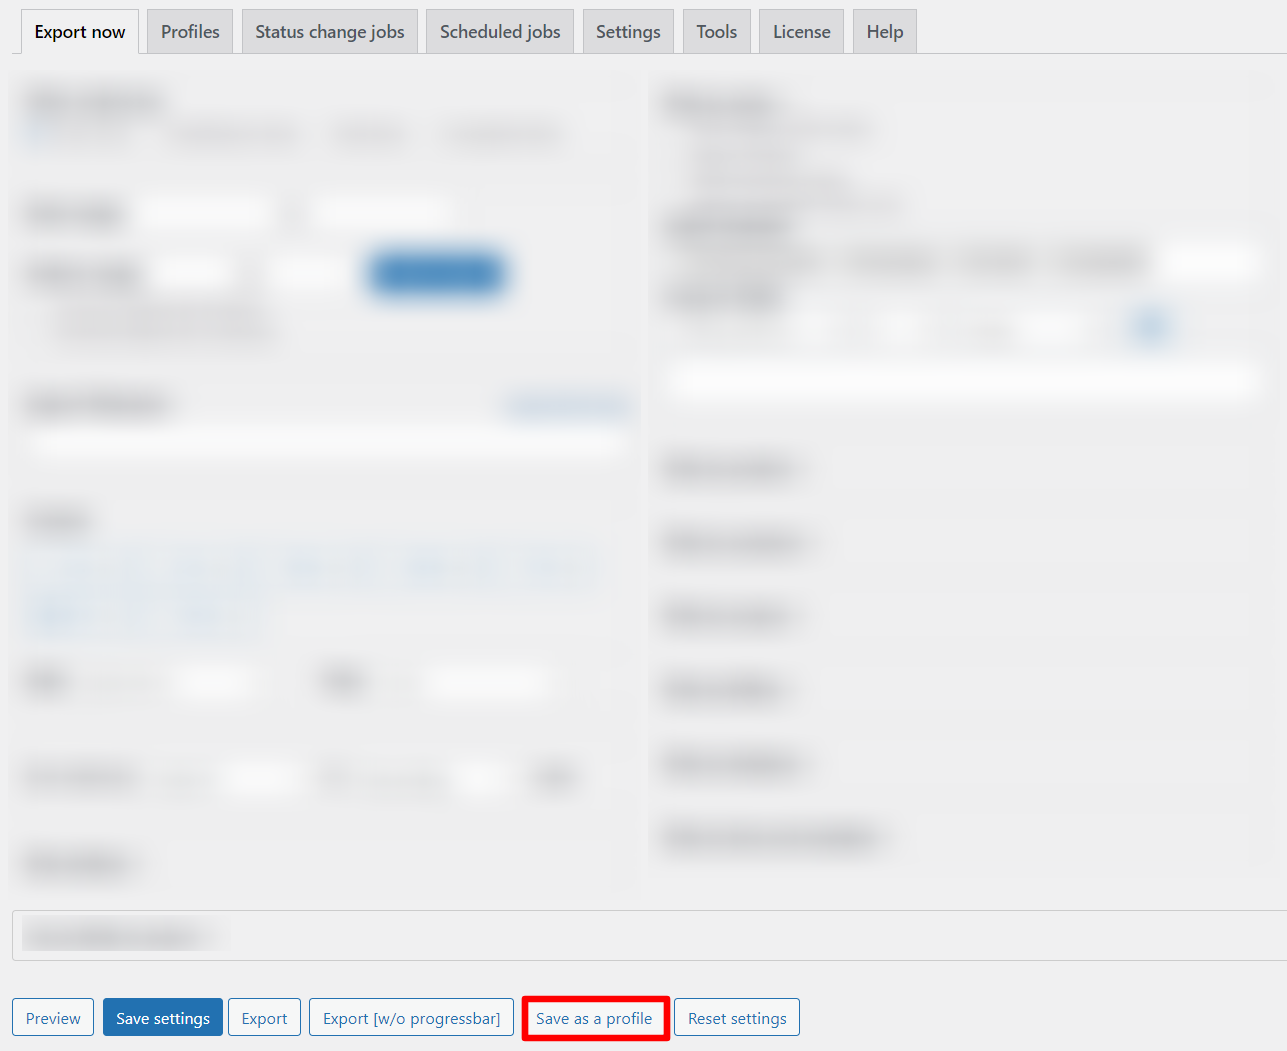
You can create several such settings for different types of reports.
How to configure Status Change Jobs in Advanced Order Export for Woocommerce (Pro)
The “Status change jobs” tab enables you to automatically export orders whose status has been modified to the designated location.
For example, let’s take the First situation from the last article.
There are two ways to create a job in the “Status change jobs” tab:
- On the “Profiles” tab, you can click on the “Copy to a Status change jobs” button.
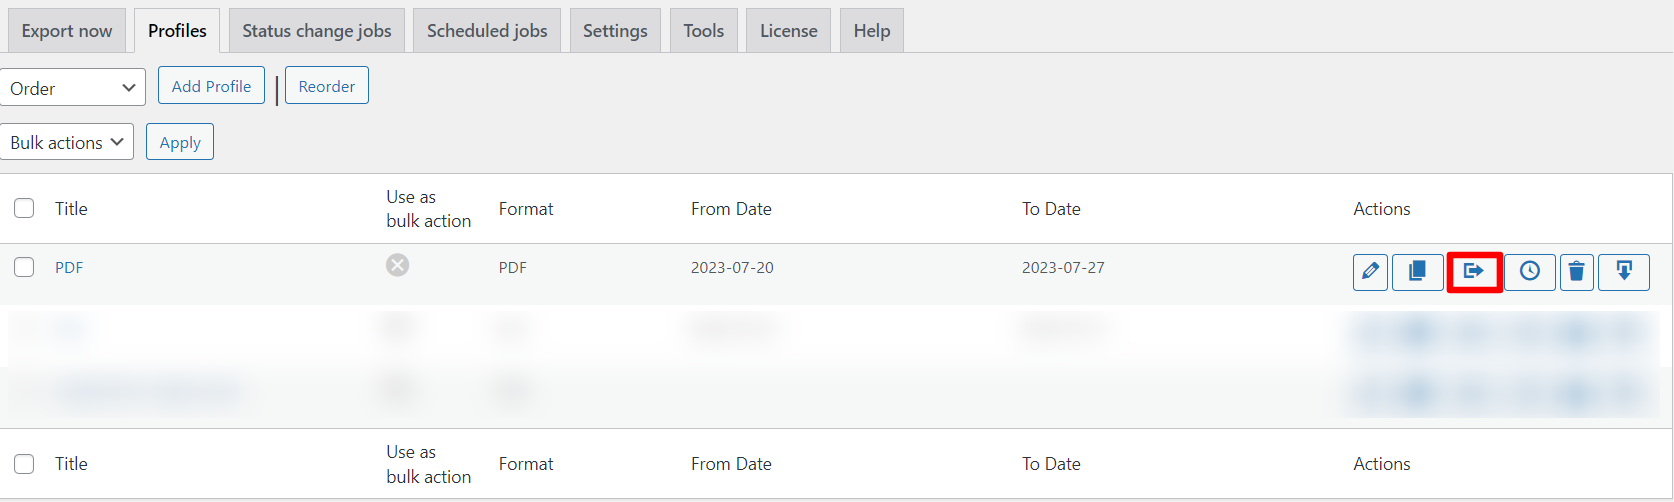
- On the “Status change jobs” tab you can click on the “Add job” button.

Then click “OK” on the message window.
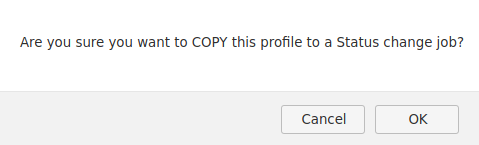
In both cases, at the end you will see the window with the status job settings.
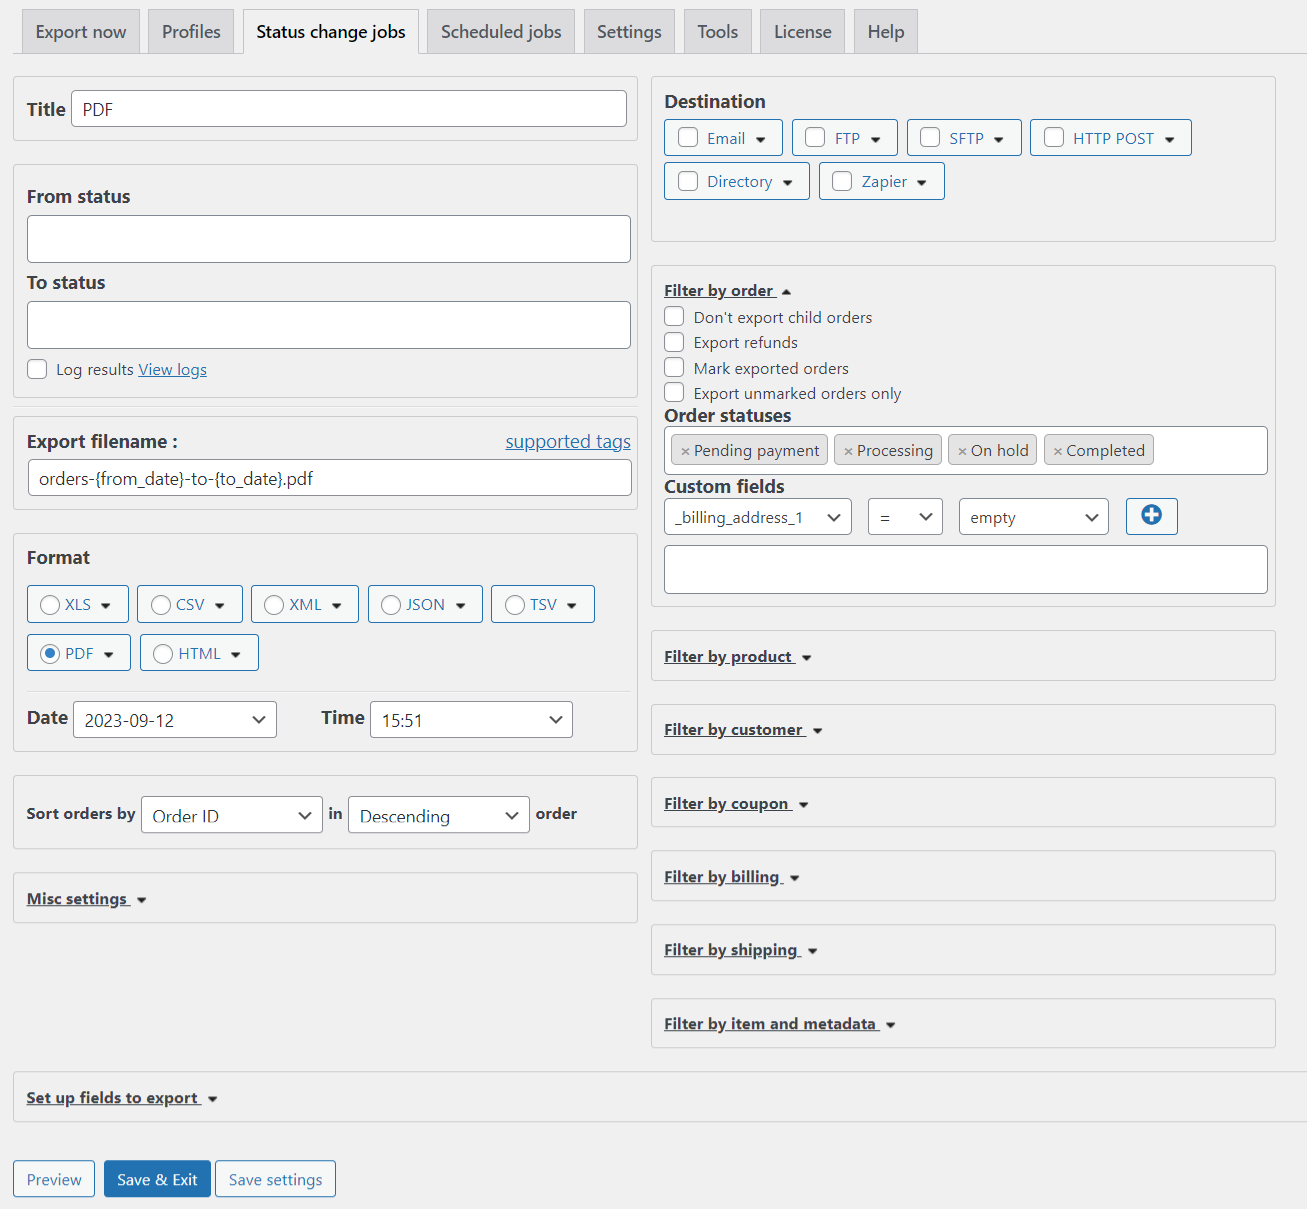
If you have already set up your “Profile” earlier, then you only need to specify “From status” and “To status” for the jobs. Let’s select the statuses “Processing” and “On hold” in the line “From statuses” and “Completed” in the “To status”.

Save settings.
How to configure Scheduled Jobs in Advanced Order Export for Woocommerce (Pro)
You can configure the “Scheduled Jobs” tab to have reports exported on a schedule.
There are two ways to create a job in the “Scheduled Jobs” tab:
- On the “Profiles” tab, you can click on the “Copy to a Scheduled Jobs” button.

- On the “Scheduled Jobs” tab you can click on the “Add job” button.

In both cases, finish setting up the scheduled job on this window.
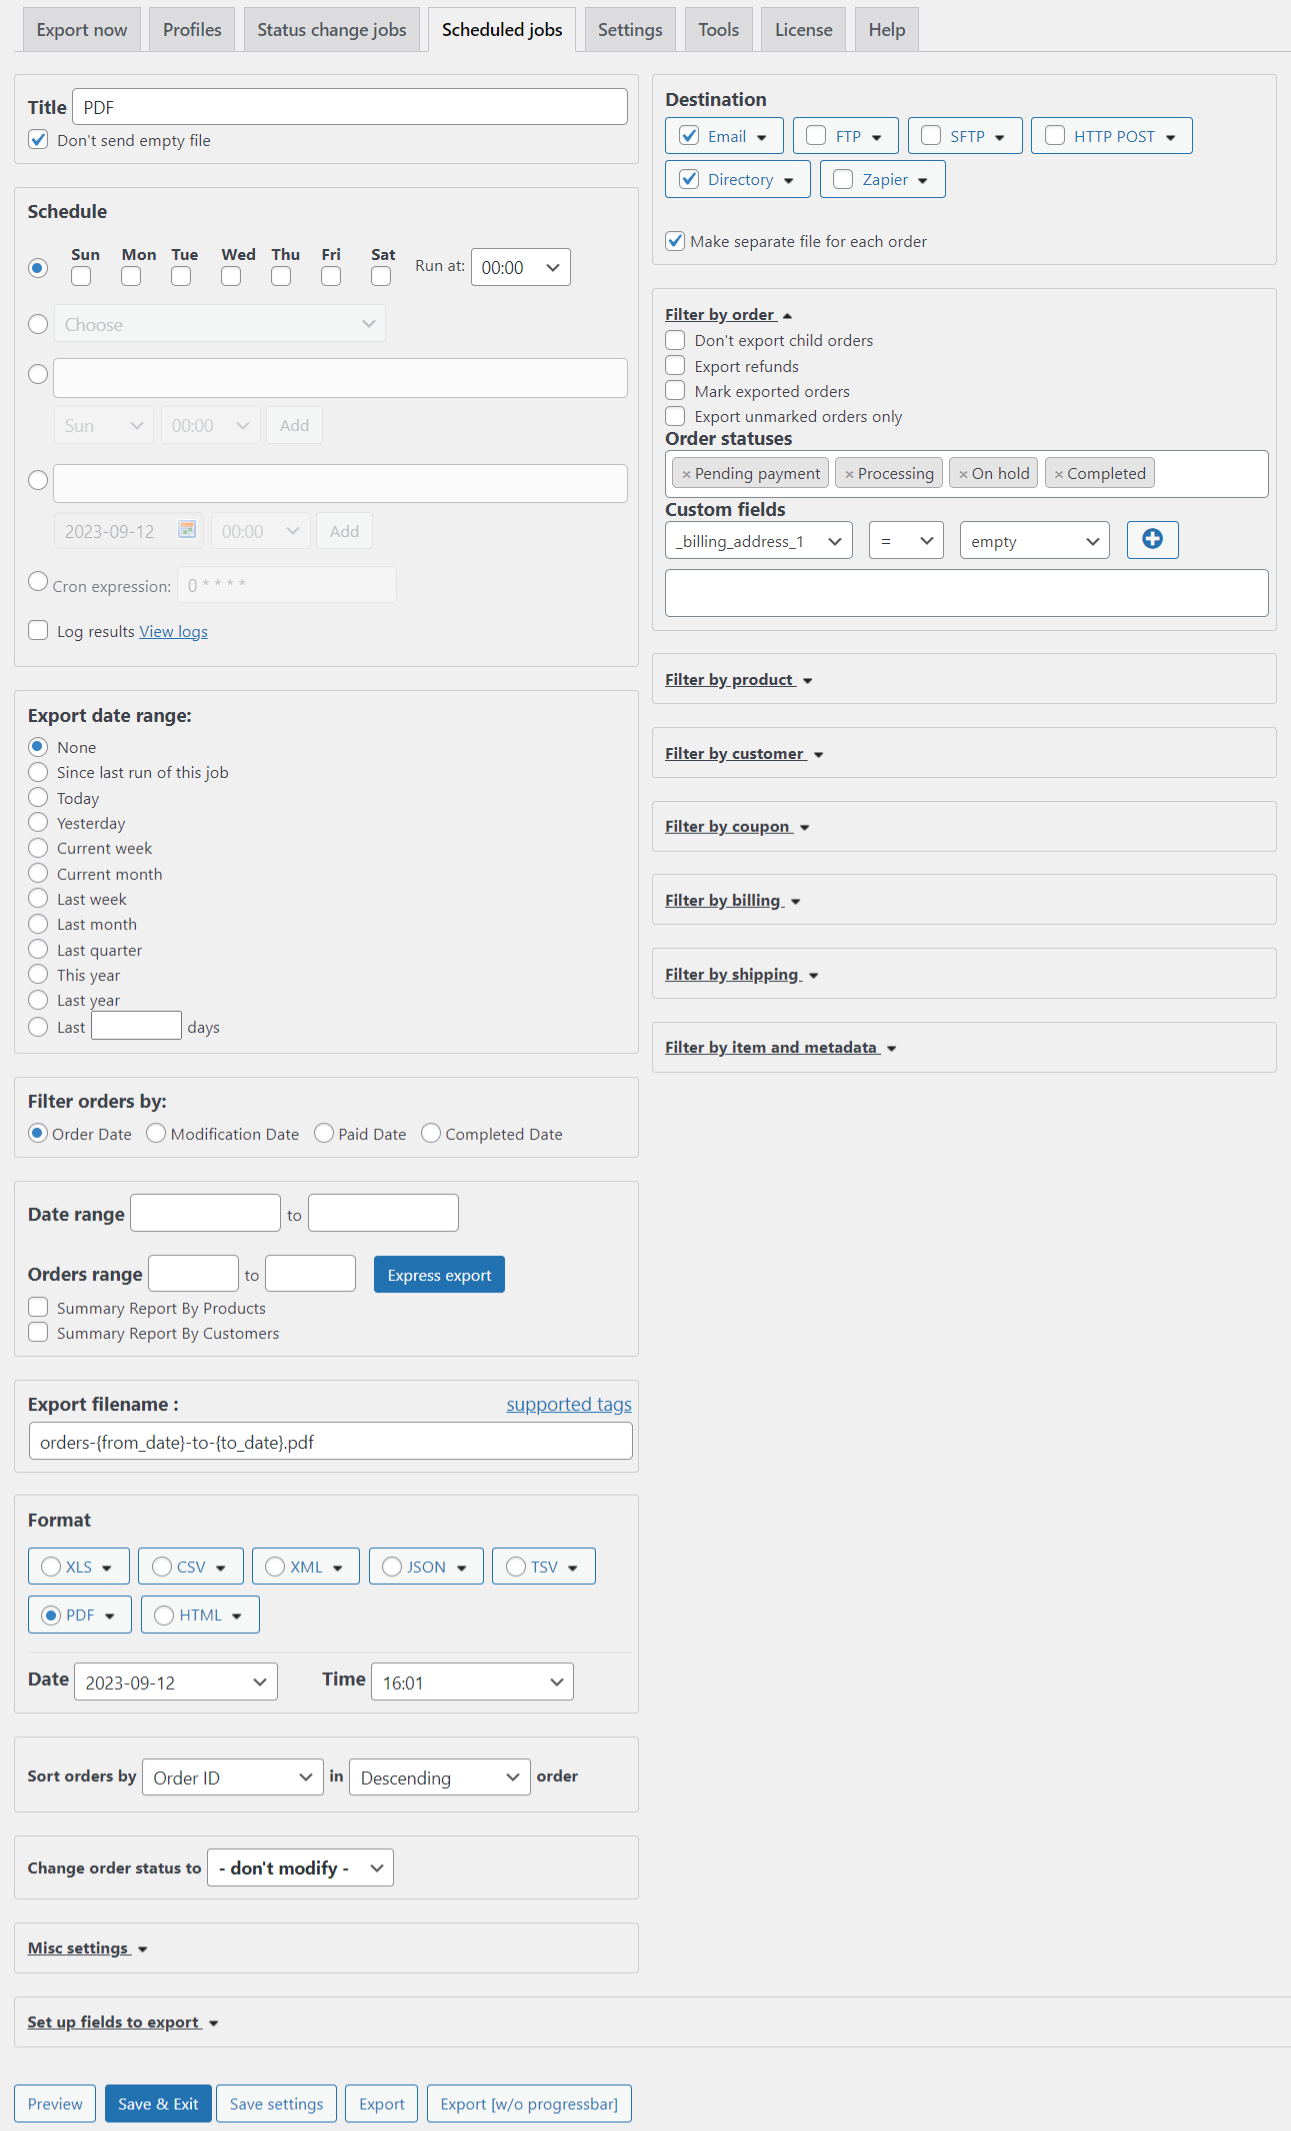
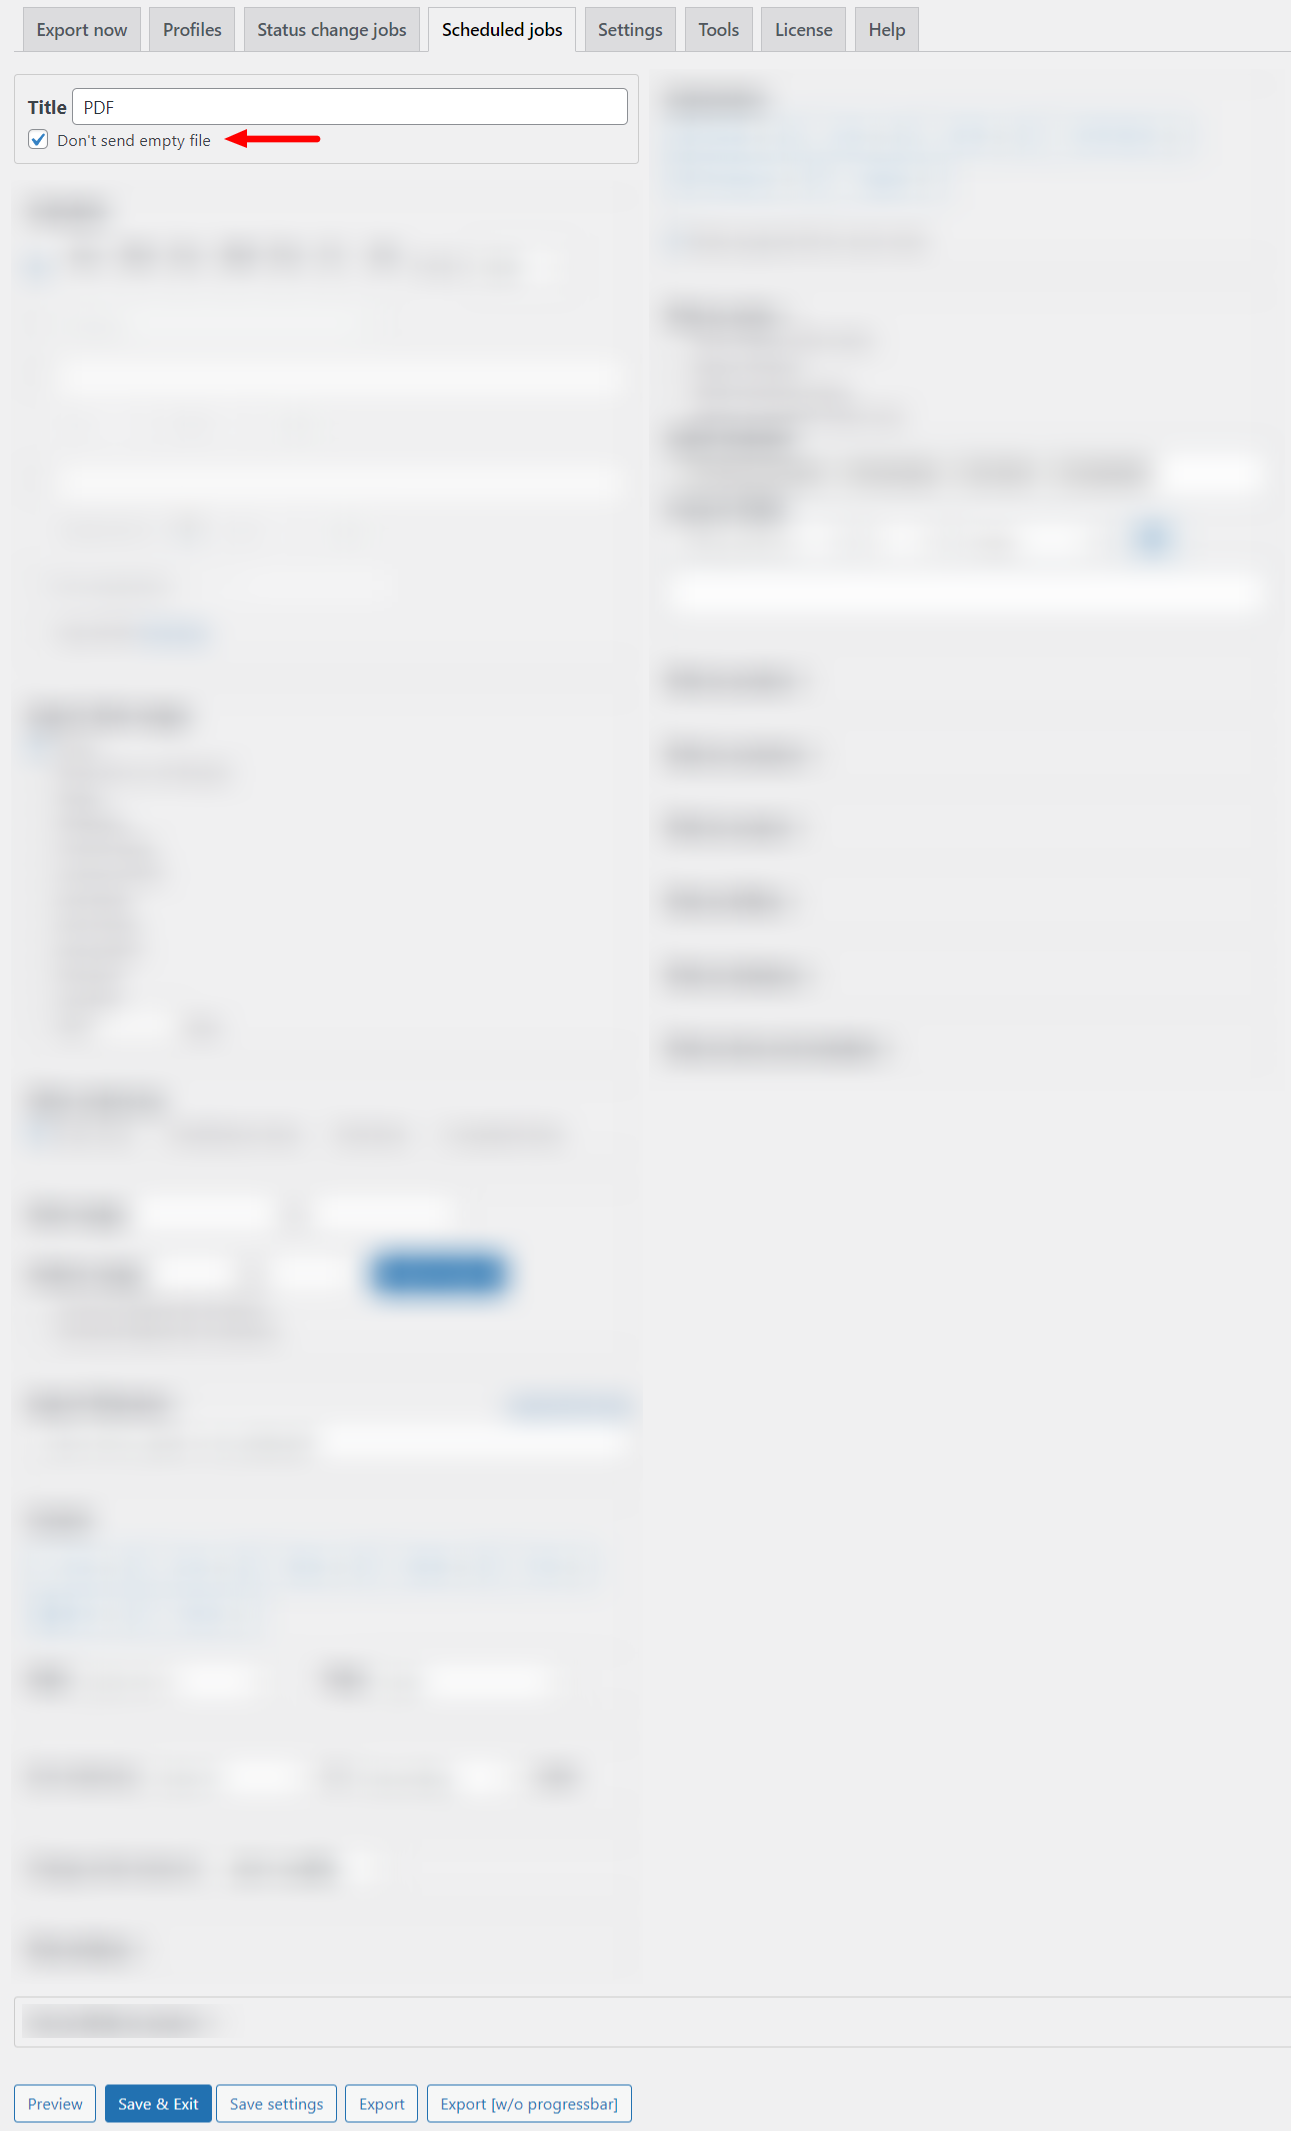
By default, an empty file will not be sent.
And the directory path is your site’s folder.

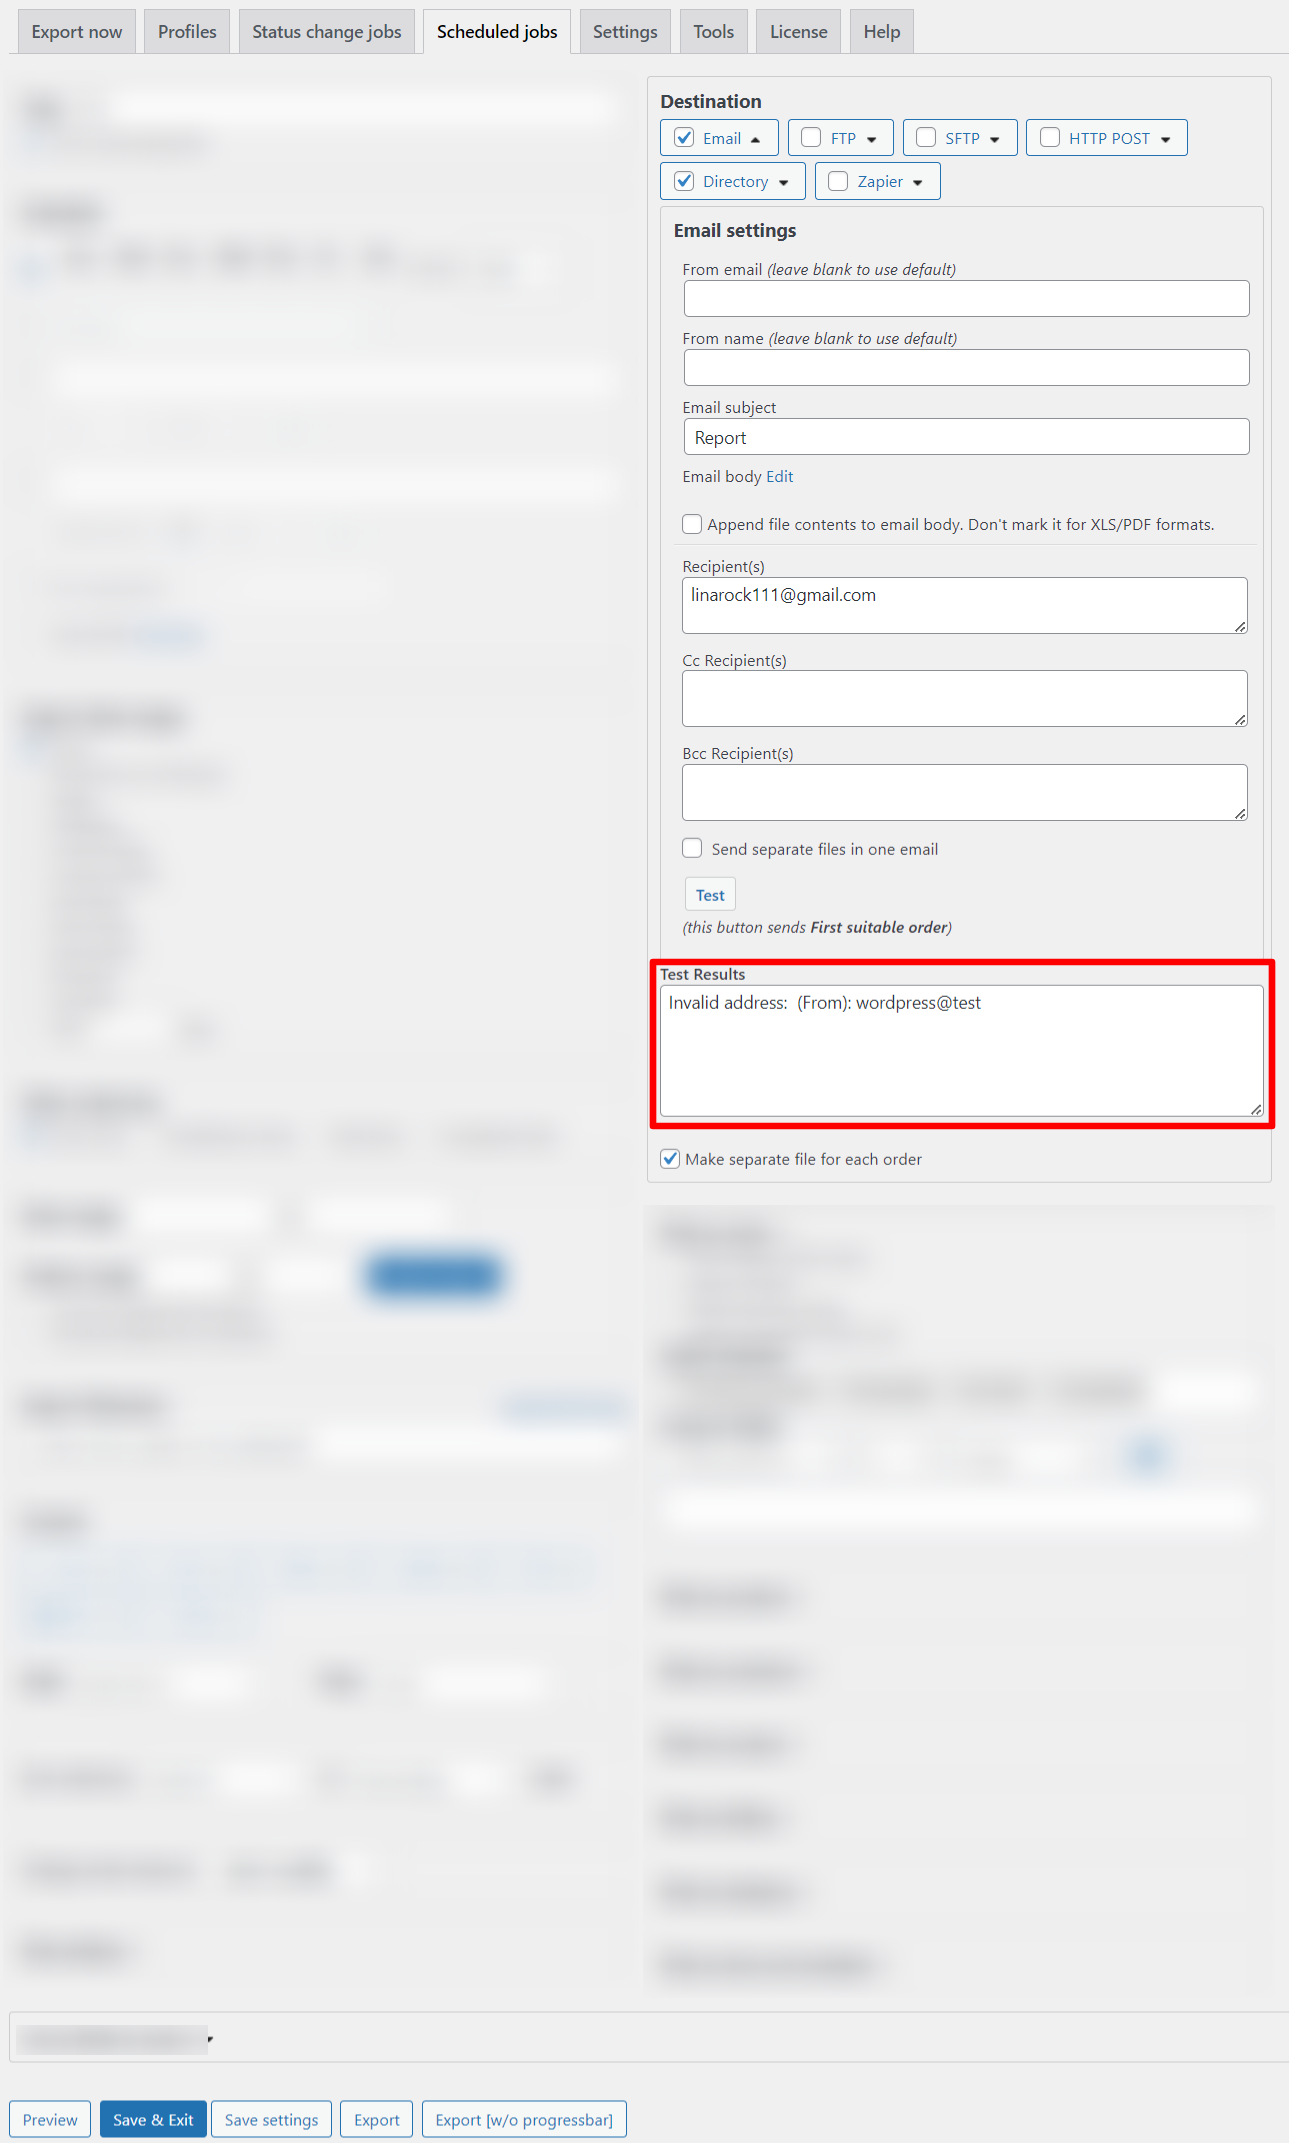
You can choose another export destination (or destinations). For example, Email and Directory. To set up the Email, be sure to include a recipient. Then click on the ”Test” button.
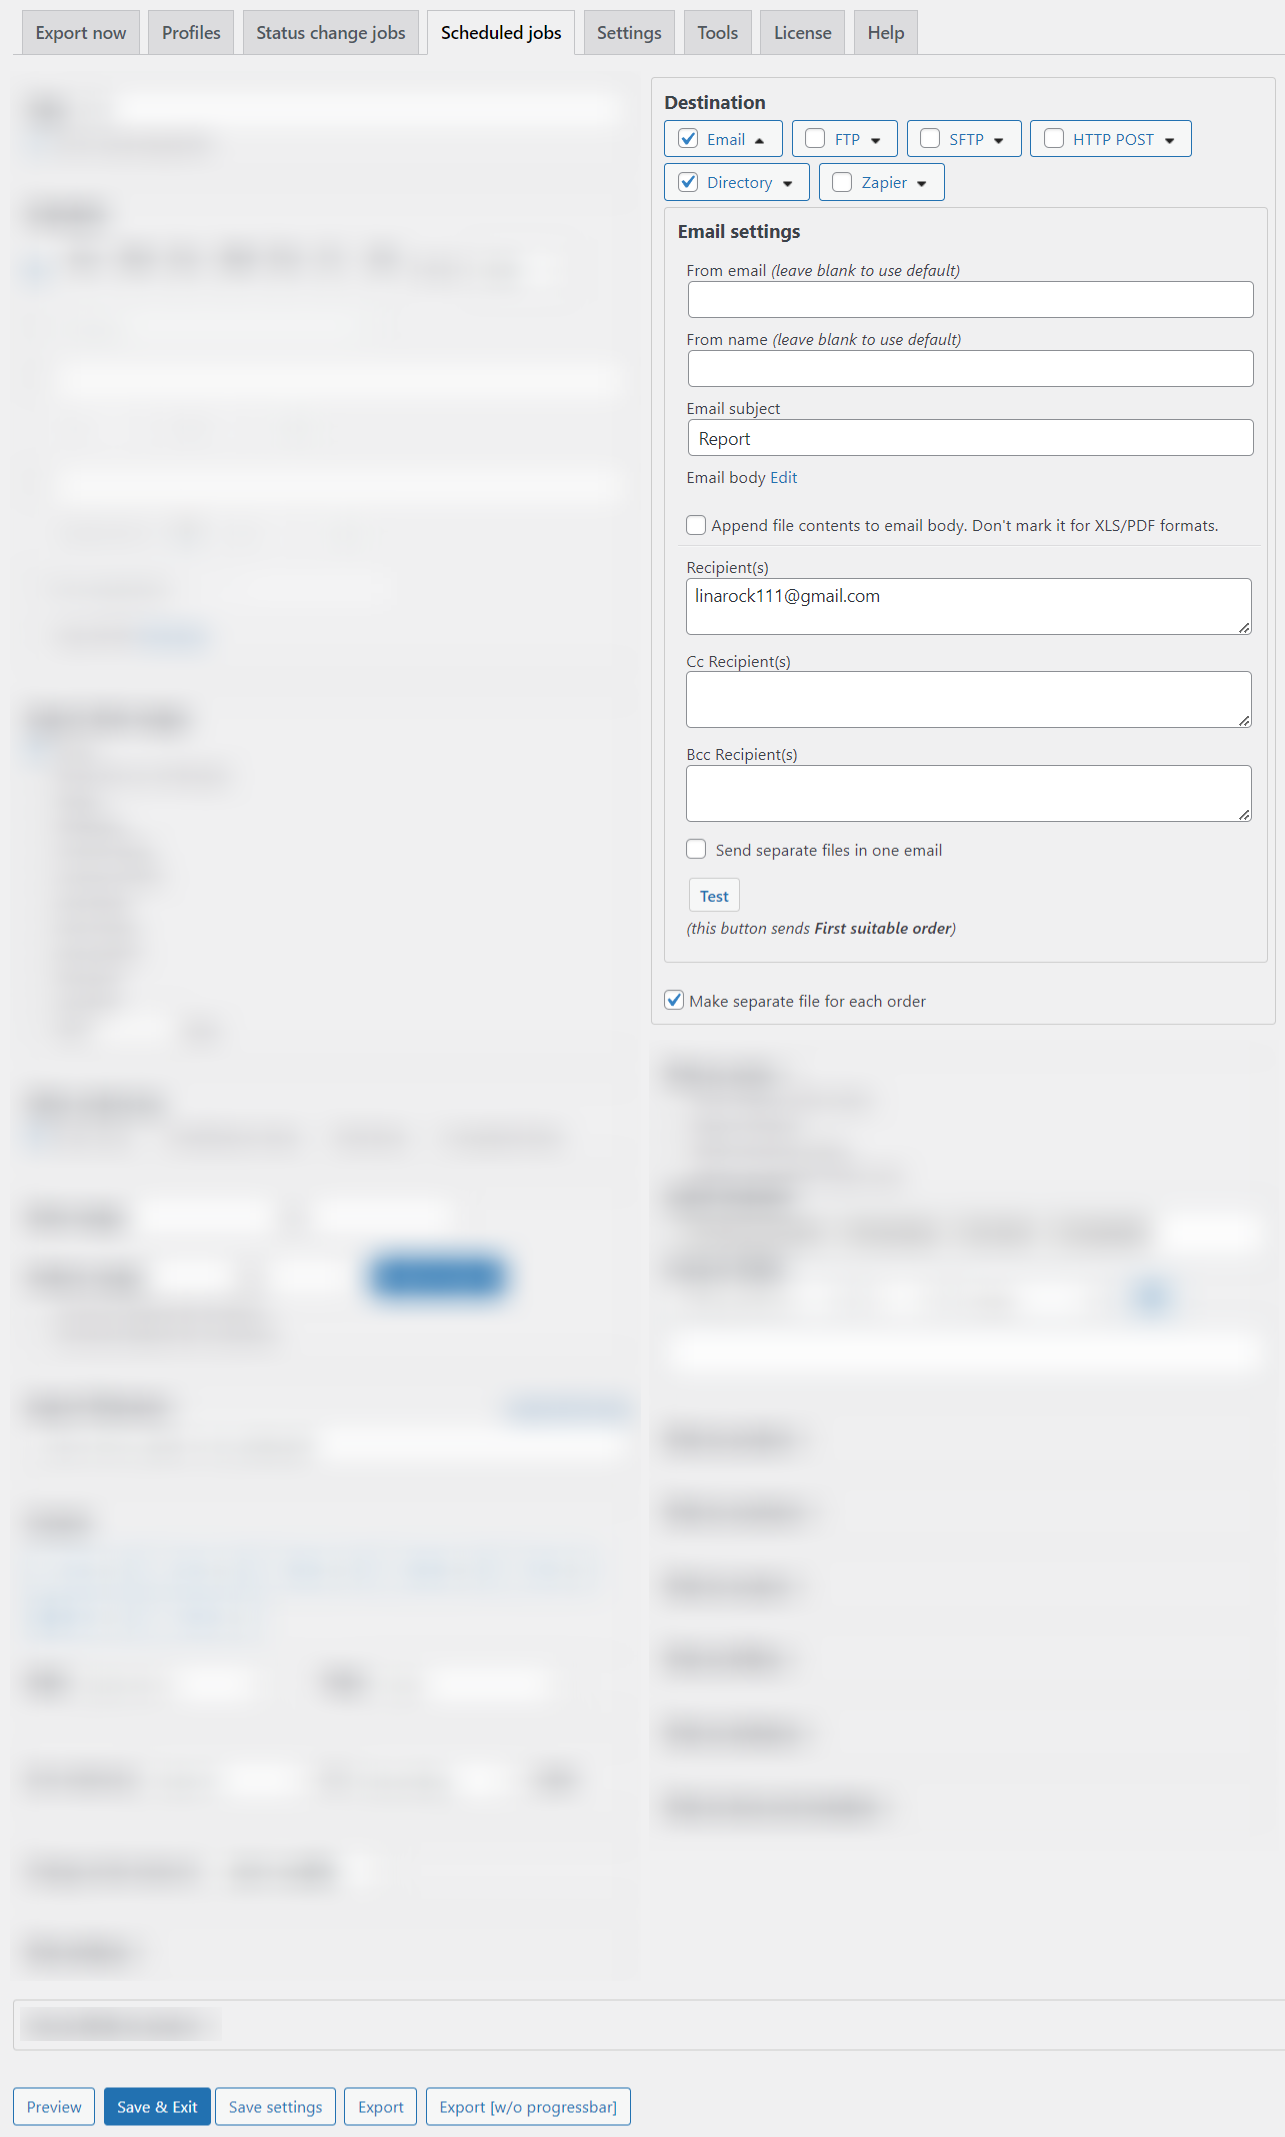
If you have a similar error, then enter email in the “From email” field.
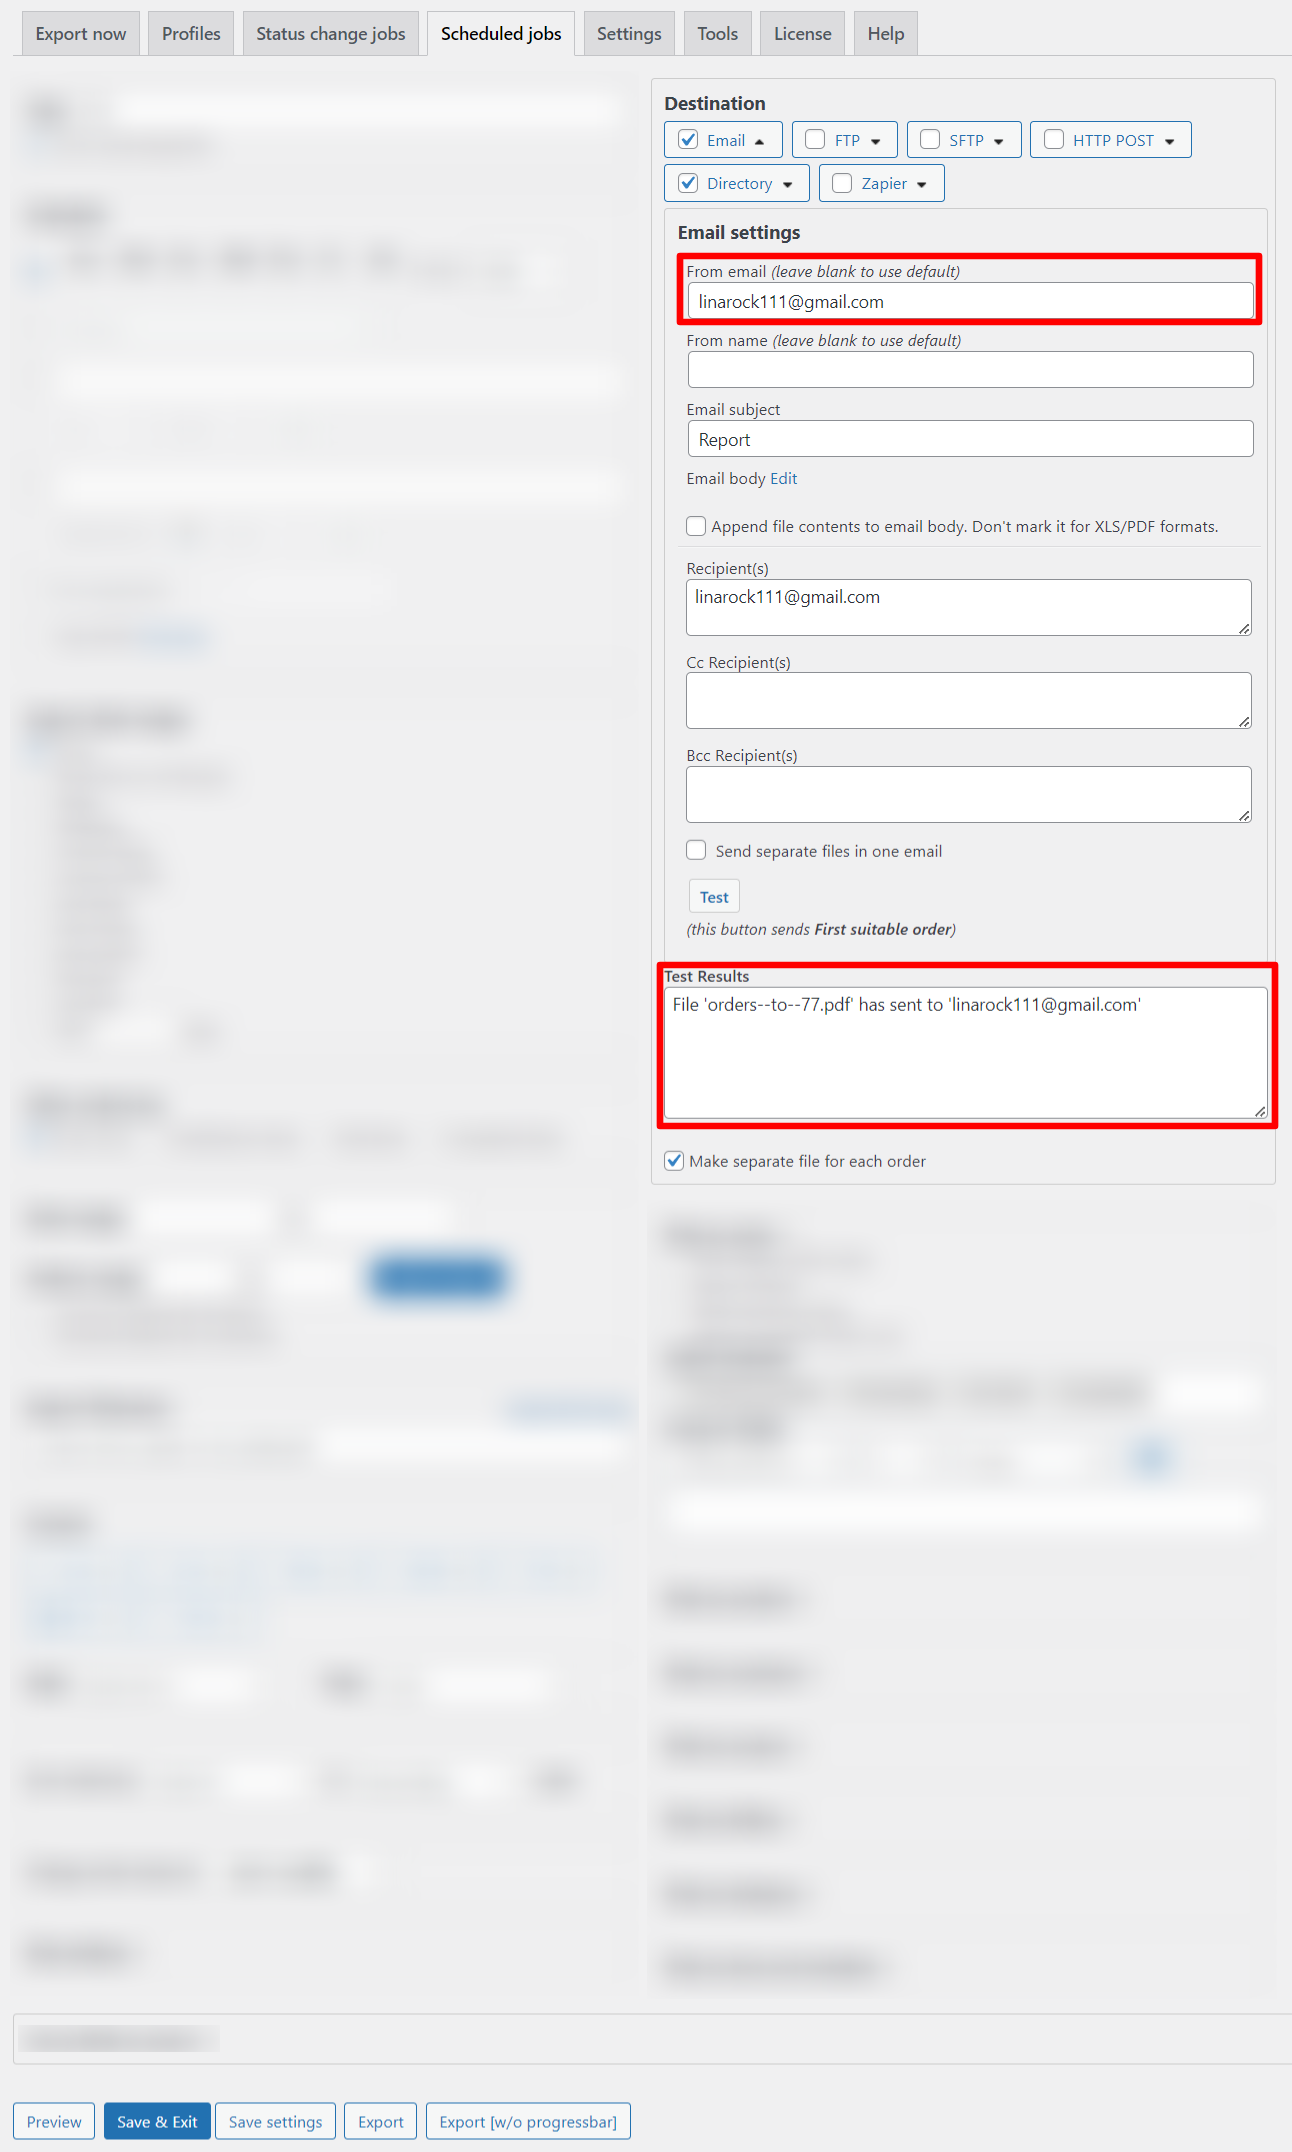
If the submission was successful, you will receive the following message.
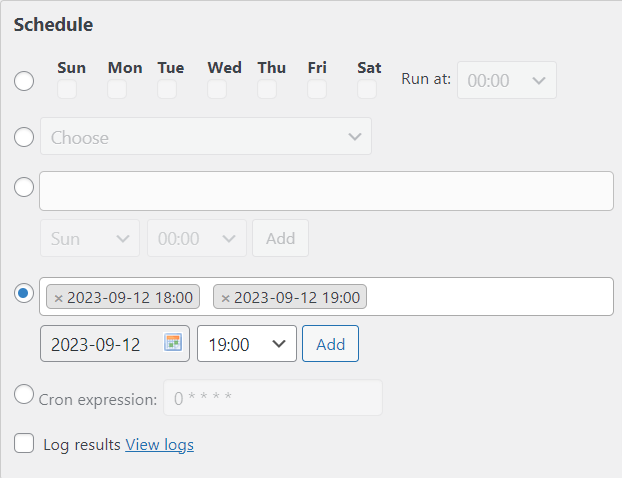
Schedule settings are quite flexible and understandable.
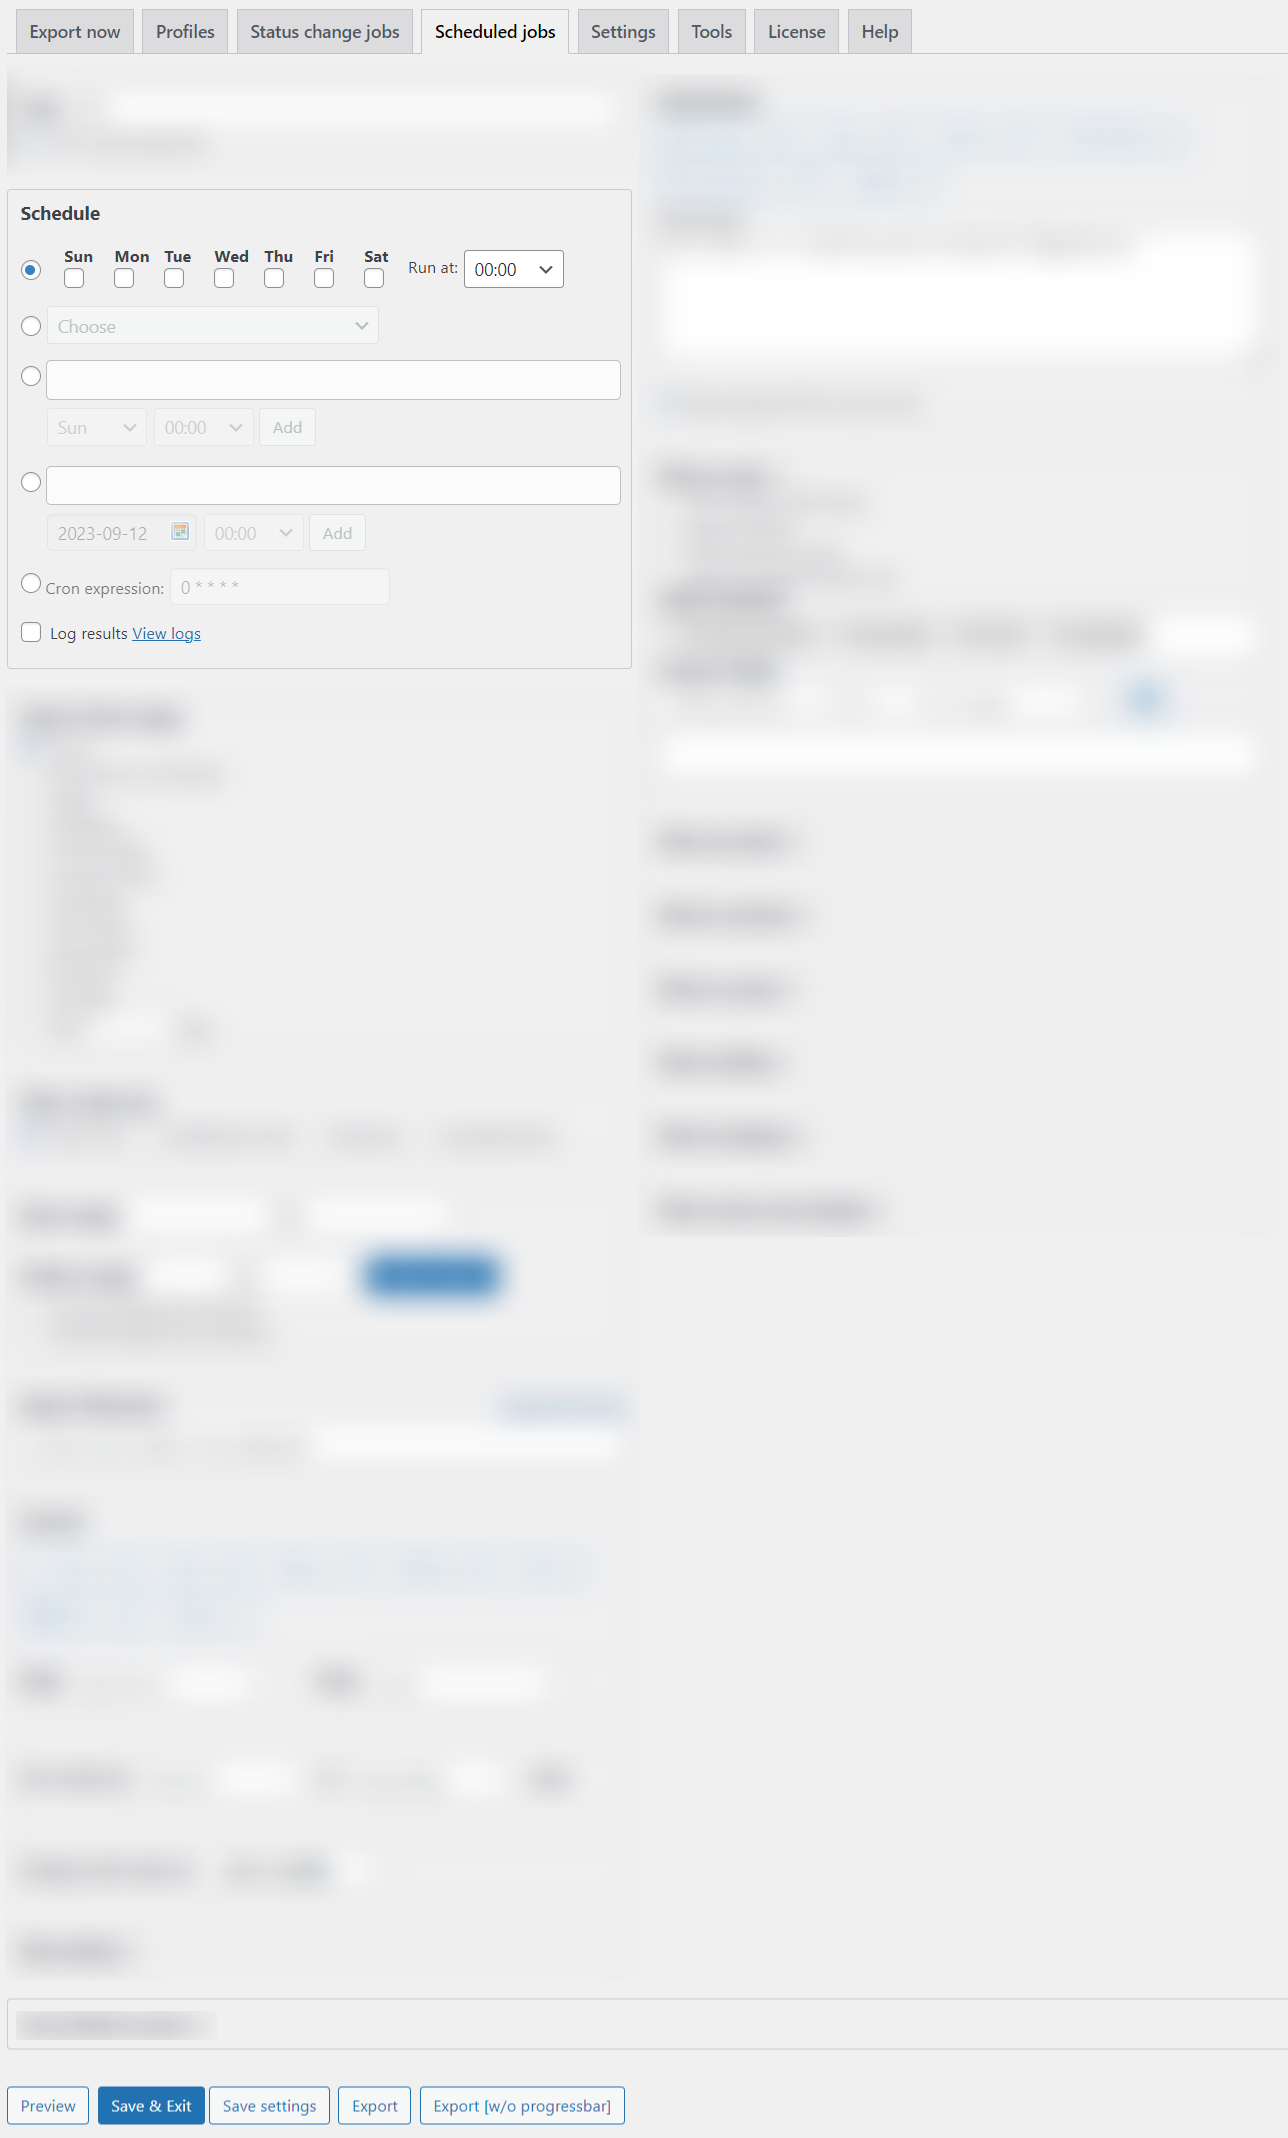
Let’s imagine that you have to send a report on a certain day of a certain month. Choose date and time and click on the “Add” button.
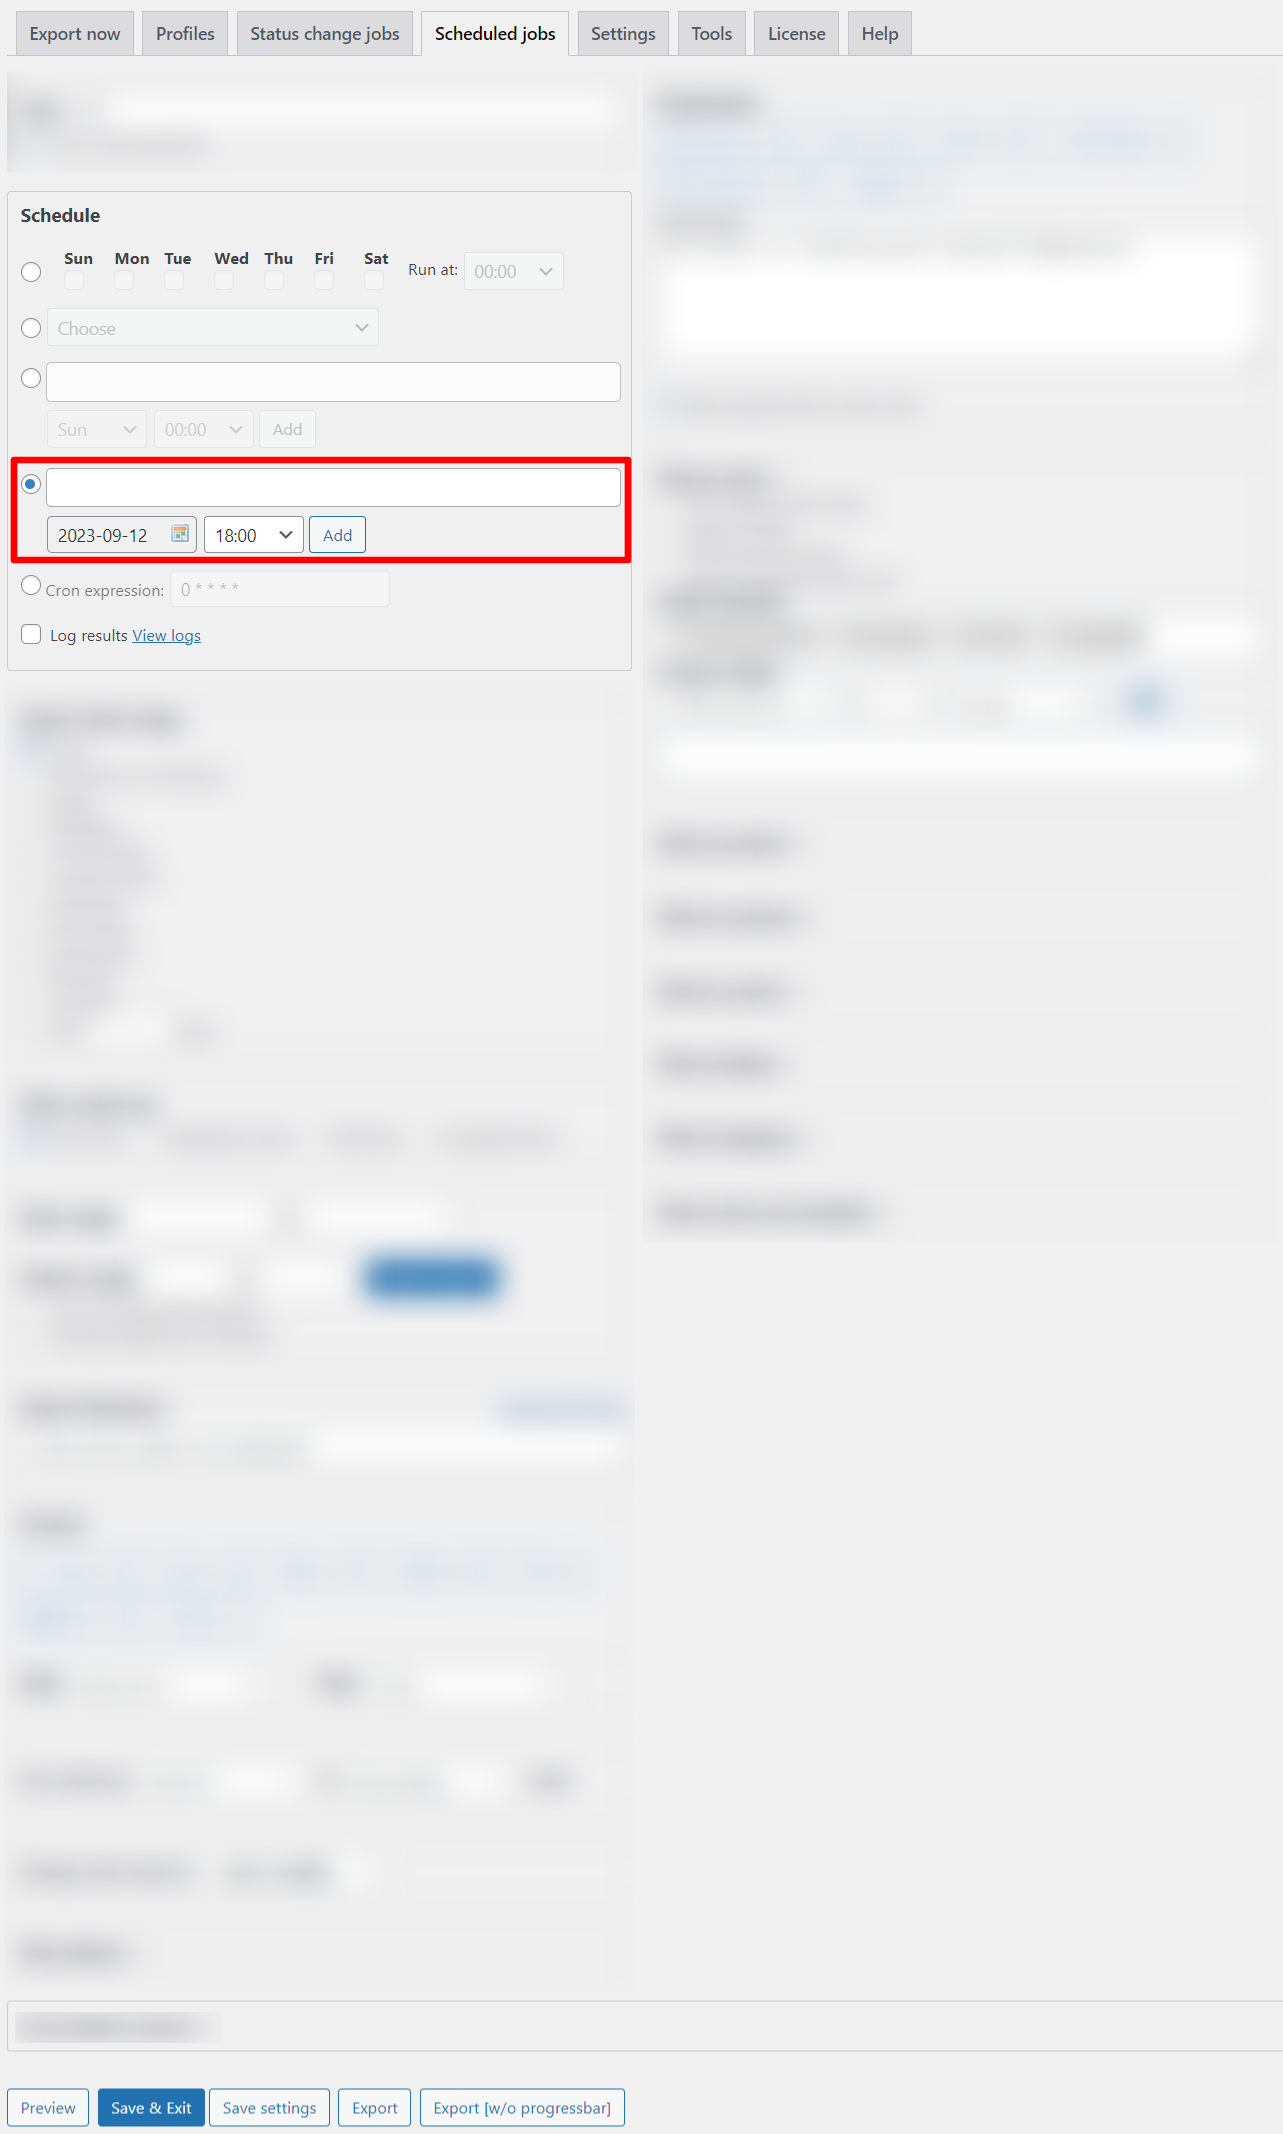
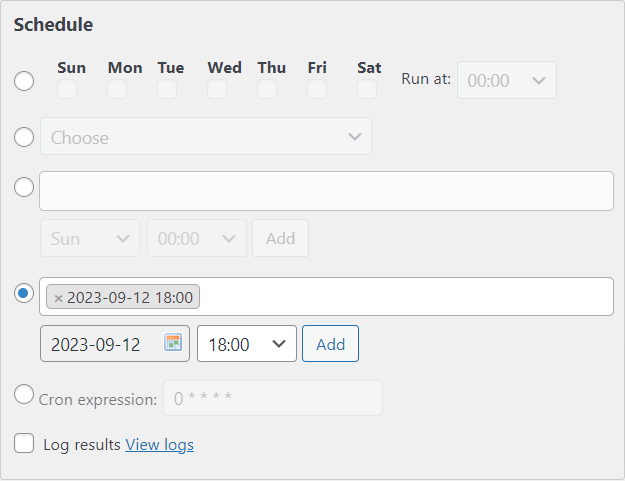
Do the same if you want to add another date.
Set the period for which data will be loaded into the report in the “Export date range” section.

Conclusion on how to set up Advanced Order Export for Woocommerce (Pro)
Now you figured out how to configure Advanced Order Export for Woocommerce (Pro). It also has many other equally useful settings. You can read about all of them in our plugin documentation.