How to set up Phone Orders for WooCommerce: Beginners Guide
Essentially, a phone order is a calling up to your buyers and placing an order via telephone. This can obviously be a huge boon to your revenue as you don’t have to use postage or an expensive shipping service to ship products to customers who may only be making a small order.
The Phone Orders for WooCommerce makes it easier to enter phone orders in the WooCommerce backend. This makes it much more efficient.
The plugin has many useful features:
Quick search through existing customers or add new ones
Easily add new products or search for existing ones on-the-go
Prices can be set according to default rates, or adjusted within the order itself
In this article, we will show how to install and start to use the Phone Orders plugin.
How to install Phone Orders for WooCommerce
Click on the “Plugins” tab and select “Add New”.
Then enter “Phone Orders for WooCommerce” in the search bar. Click on the “Install now” button and then on the “Activate” button.
The plugin will appear in the “Woocommerce” tab.
How to create a new order in Phone Orders for WooCommerce
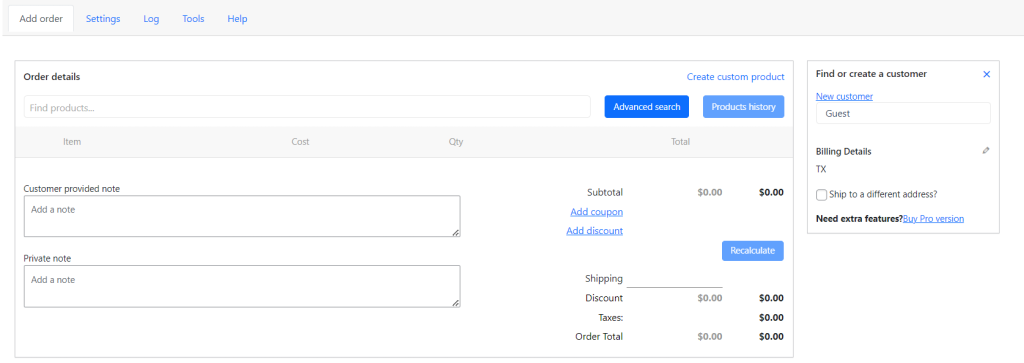
As you can see in the picture, the “Phone Orders” area is divided into two blocks: order details and information about the customer.
Phone Orders main area
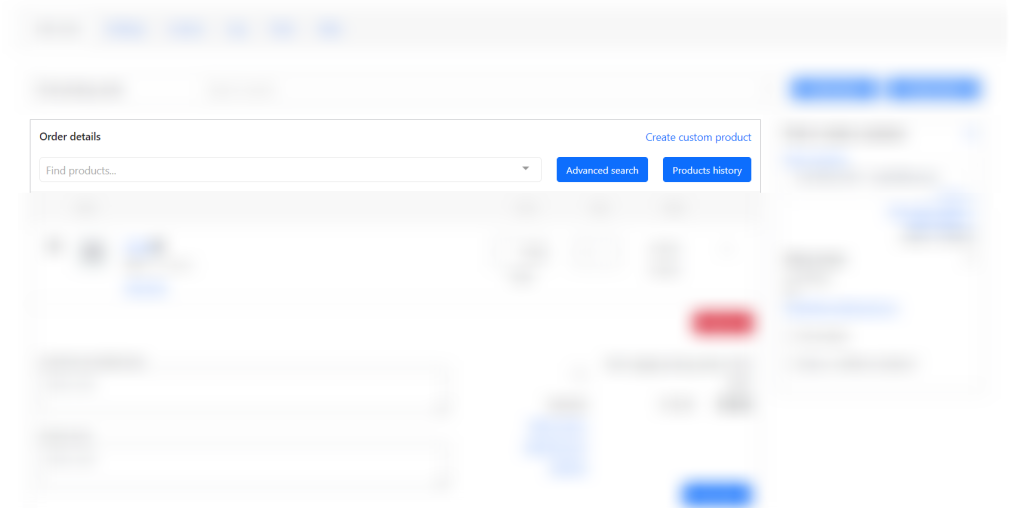
Fill in the details of the order. We select the products that the customer wants to purchase.
Searching of the products in Phone Orders search
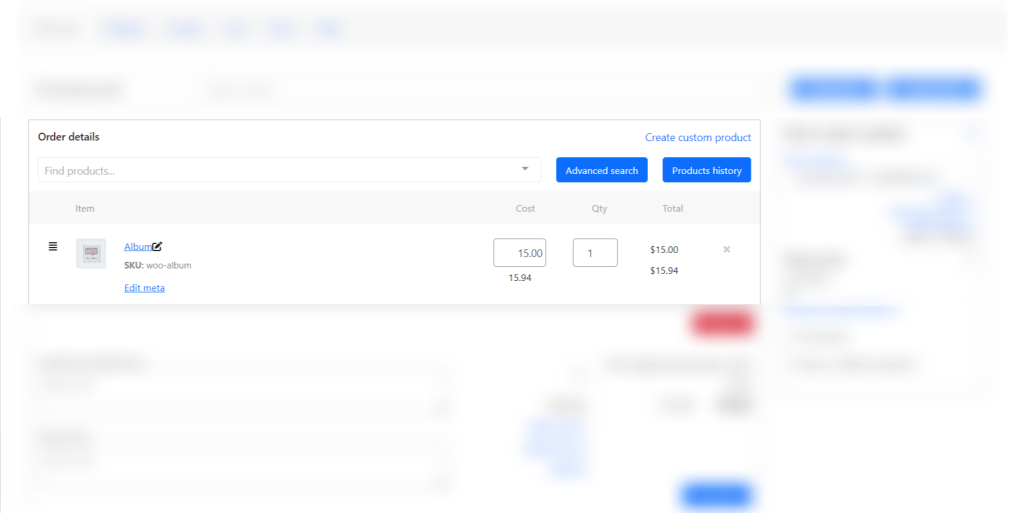
As soon as we click on the desired product, it immediately appeared in the shopping cart.
The Phone Orders’ cart
Let’s change the price and quantity.
Changing the price and quantity in Phone Orders
Click on the “Recalculate” button to display the tax in the shopping cart.
The “Recalculate” button
Now the price with tax is displayed in the cart.
New price with tax in the shopping cart
Notes are located in the lower left corner. It can be both notes of the customer, and others.
Write your order’s note in Phone Orders
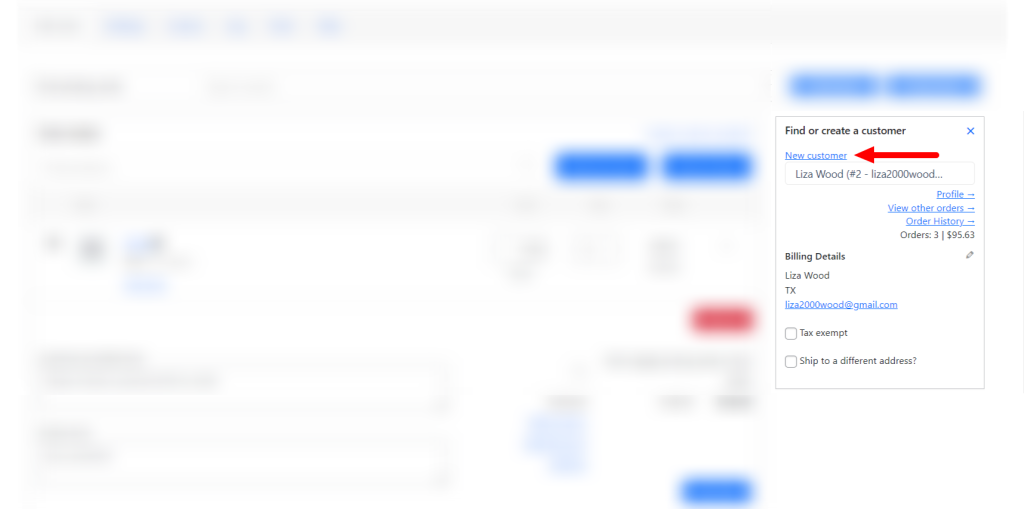
Let’s add a new customer. Click on the “New customer” button link.
The “New customer” link
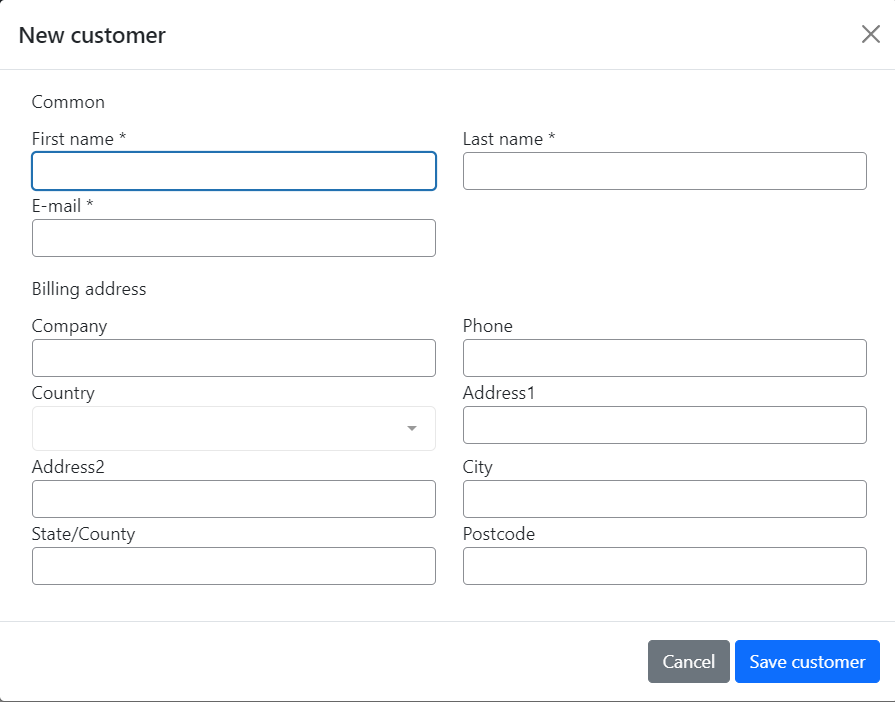
Required fields are marked with a checkmark. Let’s fill it in.
Note: You can set up suitable required fields in the pro version.
The “New customer” editor
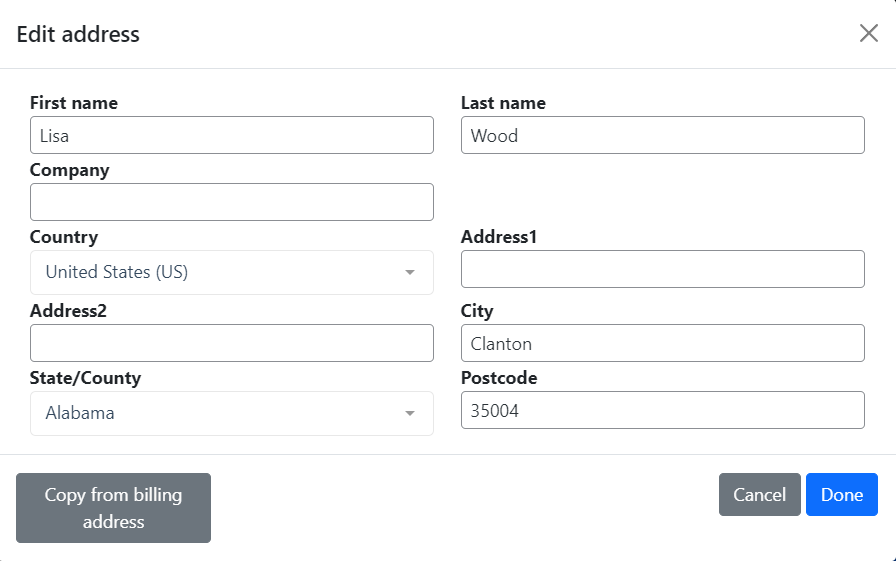
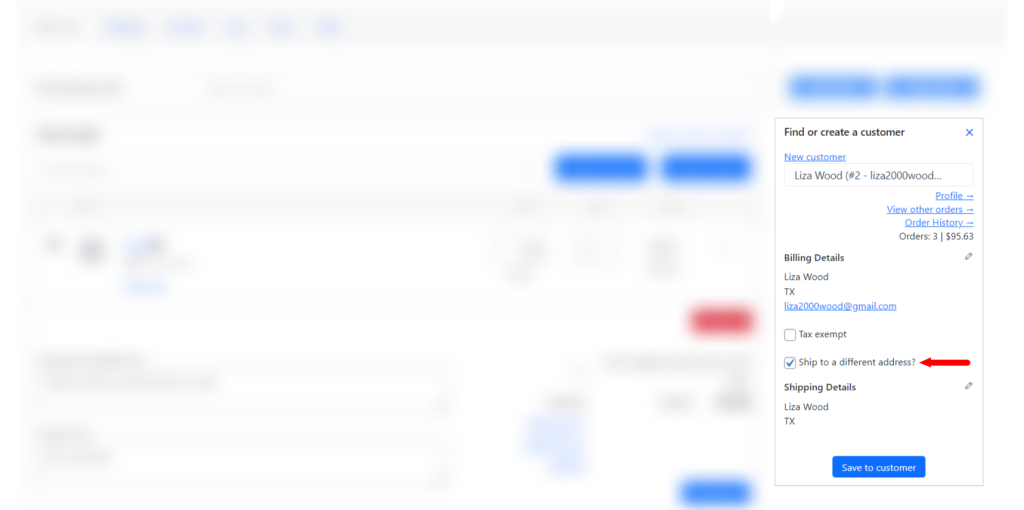
For example, Lisa (our customer) said that she needs to deliver the order to a different address. Check the box “Ship to a different address?” and fill in the data (pencil icon).
Checking the box “Ship to a different address?”Editing address
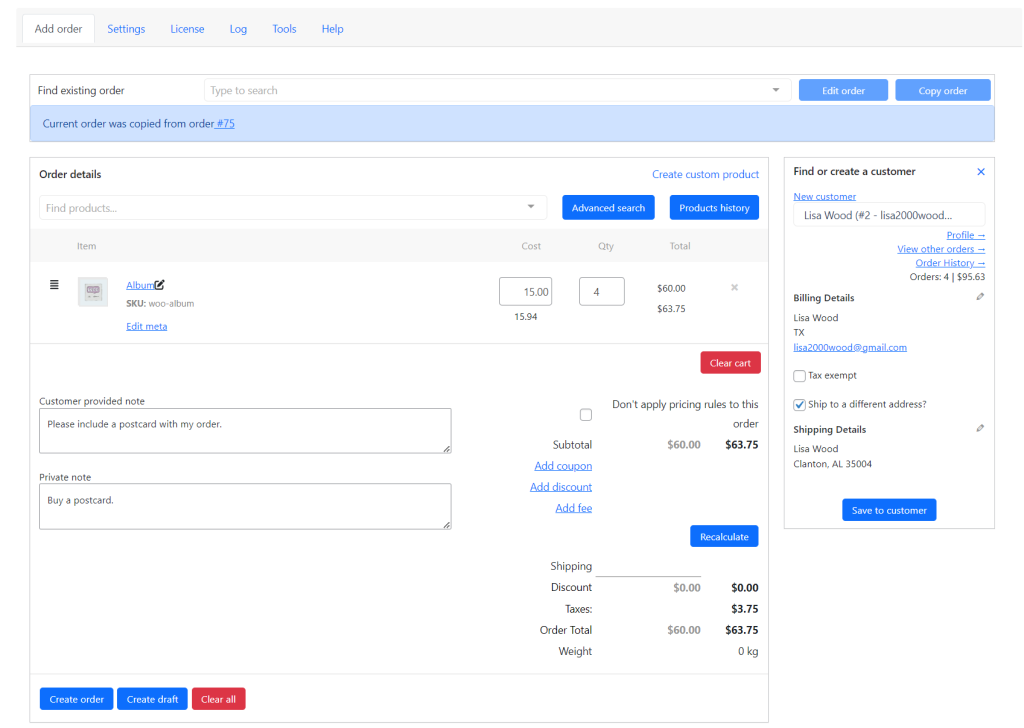
When you have entered all the details of the order, click on the “Create order” button. Now you can view the order, send a check to the customer by email or create a new order.
Creating the order
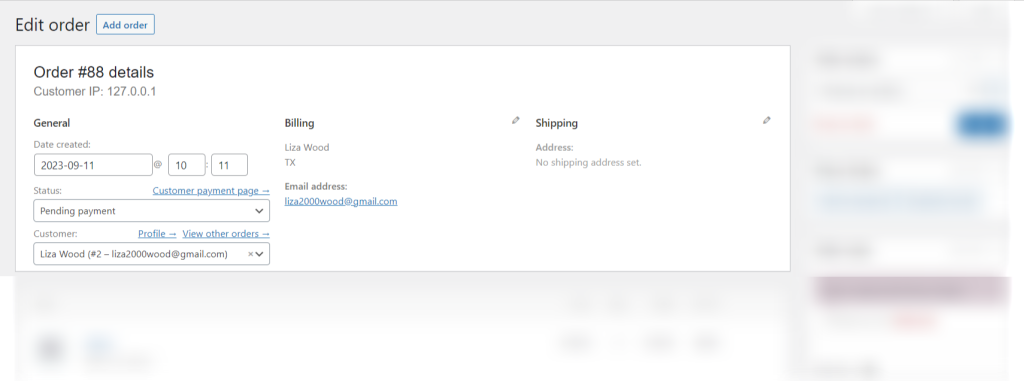
This is what the “View order” page looks like.
The “View order” page
How to create a new order based on existing order in Phone Orders for WooCommerce
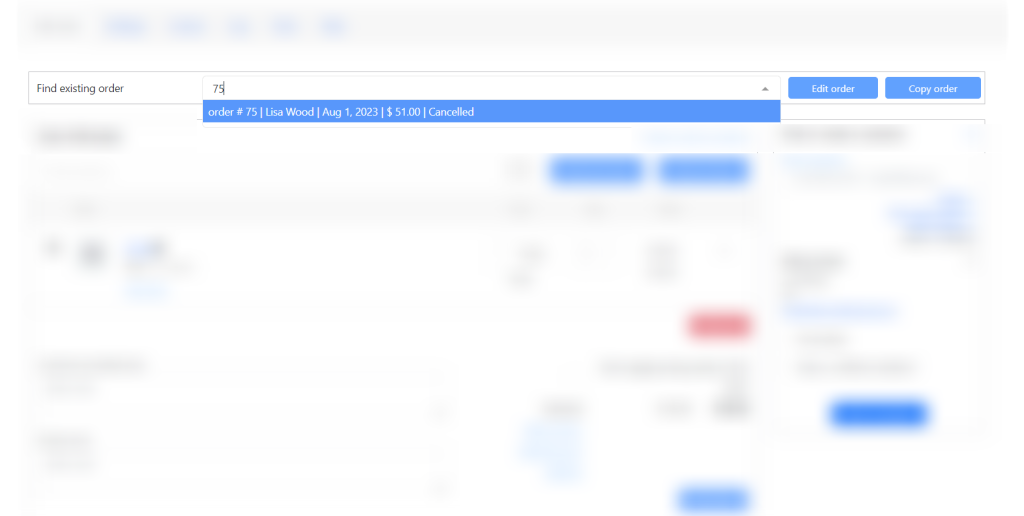
Find, edit and copy an existing order using “Find Existing Order” section in the PRO version of the Phone Orders plugin:
Input customer name, product name or order number;
Using the “Find existing order” panel
Find and choose the order you need;
Choosing needed order
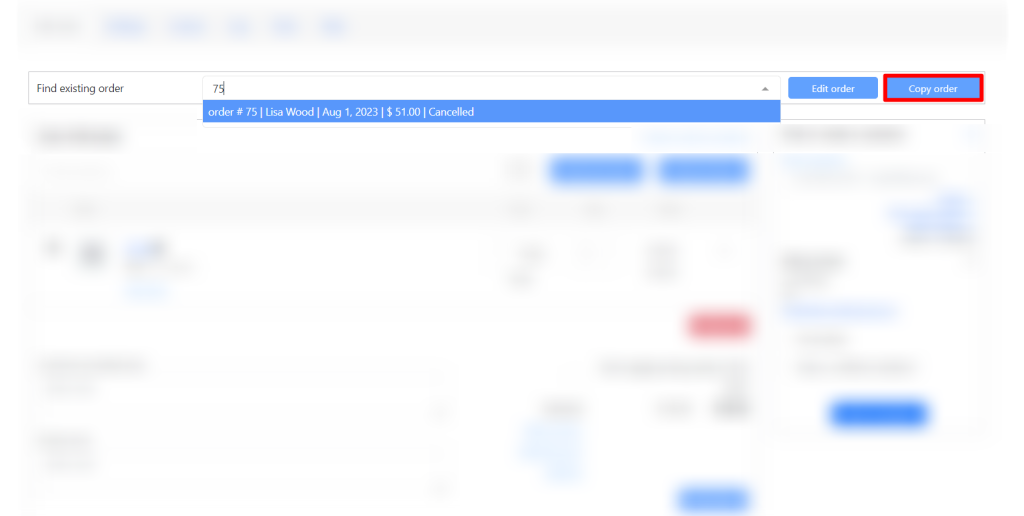
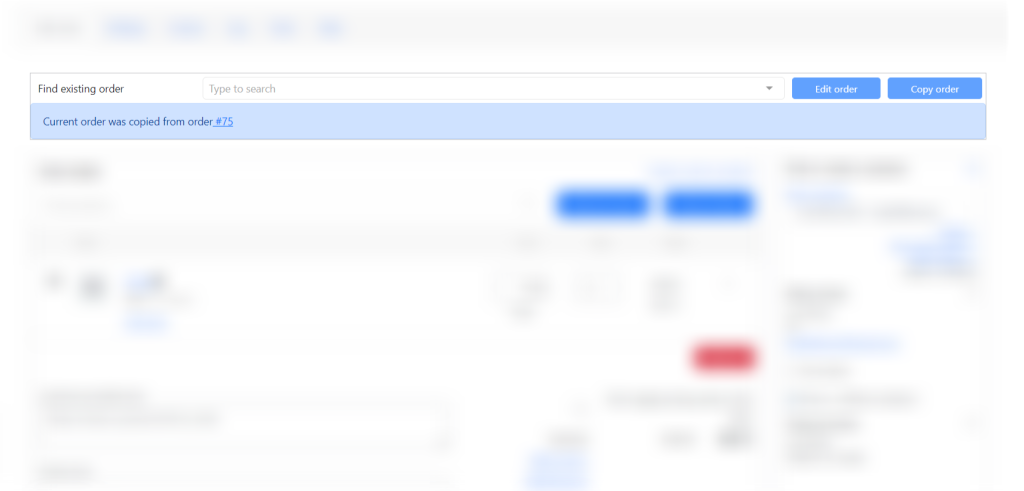
Сopy it to the new.
Clicking to the “Copy order” buttonSuccessful creation of a copy of the orderThe view of copied order
In the PRO version of the plugin, you have access to such functions as:
Pause and resume the order
Customer search by shipping/billing fields
Configure fields and default values while adding new customers
Define products that can be sold (out of stock? without price?)
Support composite/bundled/other complex products
Add any additional fees
Setup custom fields for the order/customer
Extra WooCommerce reports
After creating the order, you can “Pay order as customer”
Read about them in our article How to set up Phone Orders for WooCommerce: Beginners Guide (Pro).
Conclusion on how to set up Phone Orders for WooCommerce
In this blog post I have demonstrated how to set up Phone Orders for WooCommerce. I hope you will be able to set up the plugin with the help of this article. If you are looking for other helpful tutorials, read related articles of this blog.
The use of third-party applications has become increasingly popular among businesses looking to streamline their operations and improve efficiency. From accounting software to customer relationship management tools, these applications offer a wide range of features that can benefit a business in various ways.
One of the key areas where third-party applications can be particularly useful is in order management. With the rise of e-commerce and online shopping, businesses need to have a robust order management system in place to handle the increasing volume of orders. This is where integrating Advanced Order Export for WooCommerce with third-party applications can be a game-changer.
What is Advanced Order Export?
Advanced Order Export for WooCommerce allows businesses to export their order data in a customizable format. This can include order details such as customer information, product details, shipping information, payment information and etc. This data can then be transferred to third-party applications for further processing.
Integrating Advanced Order Export with Third-Party Applications: The Benefits
Streamlined Order Management Process
Integrating Advanced Order Export for WooCommerce with third-party applications can streamline the order management process. Instead of manually entering order data into different systems, businesses can automatically transfer the data to the third-party application. This eliminates the chances of human error and saves time, allowing businesses to focus on other important tasks.
Improved Efficiency
By automating the transfer of order data, businesses can improve their efficiency. This is because orders can be processed and fulfilled faster, reducing the time it takes for a customer to receive their order. This can lead to increased customer satisfaction and repeat business.
Real-Time Data Synchronization
Integrating Advanced Order Export for WooCommerce with third-party applications allows for real-time data synchronization. This means that any changes made to an order, such as updates to shipping information or product quantities, will be reflected in both the order management system and the third-party application. This ensures that all systems have the most up-to-date information, reducing the chances of errors or delays.
Best Practices for Integrating Advanced Order Export with Third-Party Applications
Integrating Advanced Order Export for WooCommerce with third-party applications can be a complex task and requires careful planning and implementation. One of the key factors to consider when integrating these systems is compatibility. It is essential to ensure that the order export system and the third-party applications are compatible and can communicate effectively with each other.
Note: You can find a complete list of compatible plugins by following this link.
Tickera
Tickera is a popular WordPress plugin that is used by event organizers to sell tickets online. It is a comprehensive and user-friendly solution for managing ticket sales and registrations for events of any size. The plugin integrates seamlessly with any WordPress theme, making it easy for event organizers to create a professional-looking and customizable ticketing system.
An example of a simple event template with the ability to buy a ticket online.
Integrating Tickera with Advanced Order Export For WooCommerce is a straightforward process. You can follow these steps to set it up:
Buy Bridge for WooCommerce. You won’t be able to export tickets until they become a WooCommerce product. Our plugin only works with WooCommerce.
Note: The ticket creation process will be different with this add-on. Read about it here.
Paste the following code into a snippet, for example using the Code Snippets plugin.
Customize your report. We wrote about this in articles and. Without going into details, you can leave all the default settings and choose your desired export format.
The result of integration of Tickera and Advanced Order Export for WooCommerce (fields are customized).
Extra Product Options for WooCommerce by Themehigh
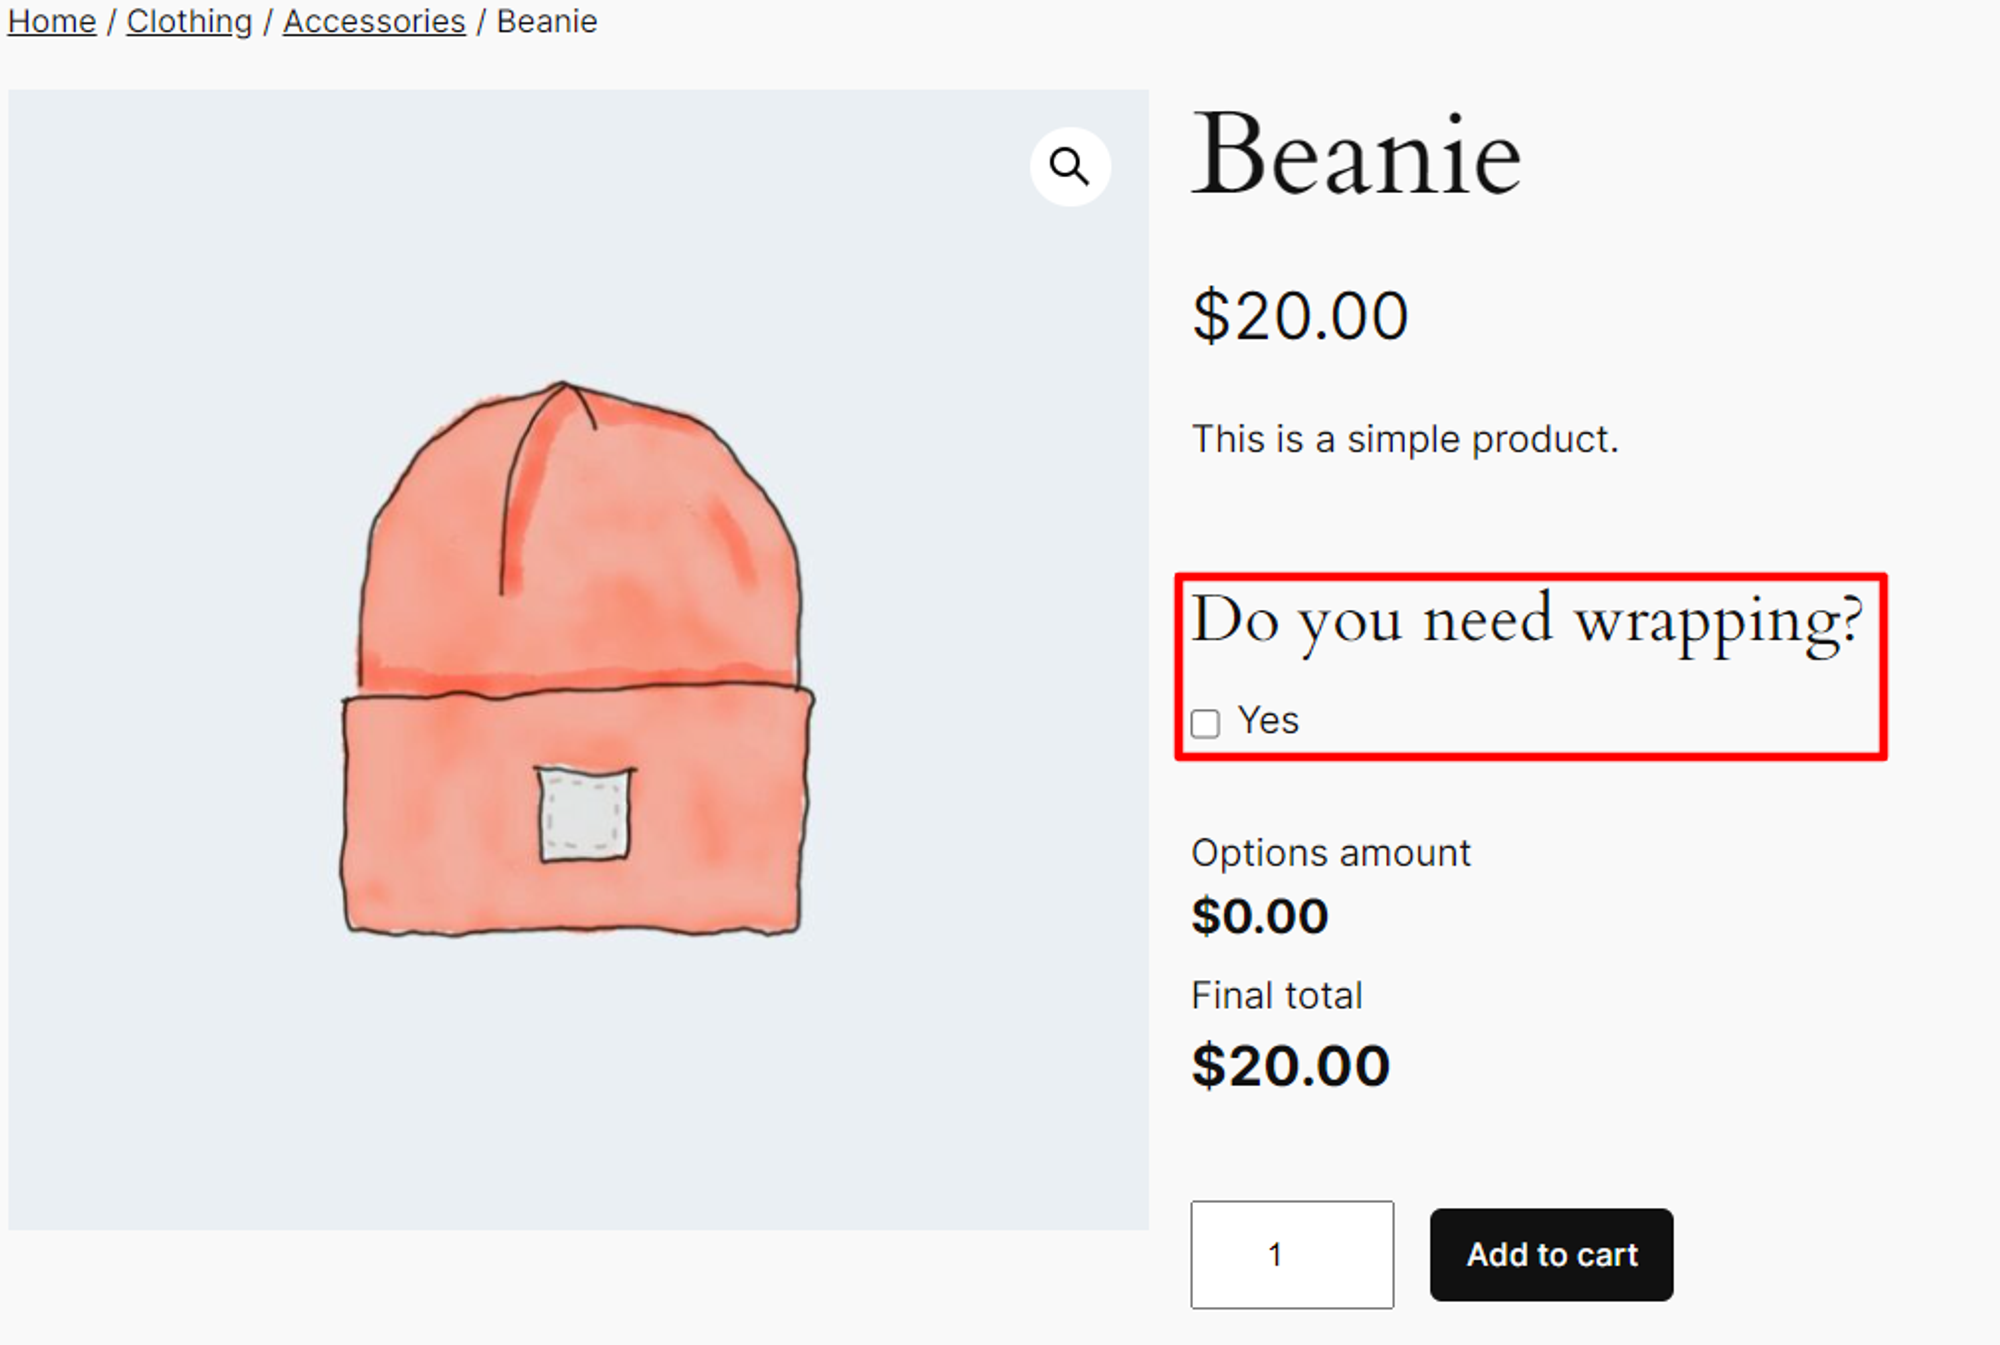
With Extra Product Options for WooCommerce, store owners can create custom fields for their products, such as text fields, drop-down menus, checkboxes, and more. This allows customers to add additional information, such as engraving details or color preferences, to their orders. However, when it comes to exporting these orders, the default WooCommerce export feature does not include the custom product options. This can be a major issue for businesses that rely on these options for their products. By integrating with Advanced Order Export For WooCommerce, store owners can export orders with all the custom product options included.
In an example, the option to select gift wrapping is already available on the product page. Thus, the customer does not need to look for it.
Using Advanced Order Export For WooCommerce integration, we can track how often customers add Gift wrapping to an order. This can be useful in making decisions regarding a product: Should the price be increased or decreased? or remove Gift wrapping altogether?
As with Tickera, you need to paste the following code into the snippet.
// add all options to SINGLE  product row
class WOE_add_TM_cols{
	var $tm_cols = array( 'pos','name','value','price','quantity', 'name_value');
	function __construct() {
		add_filter('woe_get_order_product_fields',array($this,'add_product_fields') );
		add_filter('woe_fetch_order_products', array($this,'fill_tm_cols') ,10, 5);
	}

	function add_product_fields($fields) {
		foreach($this->tm_cols as $tm_col) {
			$fields['tm_field_'.$tm_col] = array('label'=>'TM '.$tm_col,'colname'=>'TM '.$tm_col,'checked'=>1);
		}
		return $fields;
	}

	function fill_tm_cols($products, $order, $labels, $format,$static_vals) {
		$new_products = array();

		foreach( $products as $item_id=>$product) {
			$item_meta = get_metadata( 'order_item', $item_id );

			$pos = 1;
			if( isset($item_meta["_tmcartepo_data"])   AND  is_array($tmfields = maybe_unserialize($item_meta["_tmcartepo_data"][0]))  ) {
				$new_product = $product;
				foreach($tmfields as $tm_field) {
					$tm_field['pos']= $pos++;//set fake field
					$tm_field['name_value'] = $tm_field['name'] . ':' .$tm_field['value'];
					// fill TM columns
					foreach($this->tm_cols as $tm_col) {
						if( !isset($new_product['tm_field_'.$tm_col])) continue;
						if( !empty($new_product['tm_field_'.$tm_col]))
							$new_product['tm_field_'.$tm_col] .= ", " .$tm_field[$tm_col];
						else
							$new_product['tm_field_'.$tm_col] = $tm_field[$tm_col];
					}
				}
				//don't add each option as new product!
				$new_products[] = $new_product;
				$pos++;
			}
			if( isset($item_meta["_tmcartfee_data"])   AND  is_array($tmfields = maybe_unserialize($item_meta["_tmcartfee_data"][0]))  ) {
				$new_product = $product;
				foreach($tmfields[0] as $tm_field) {
					$tm_field['pos']= $pos++;//set fake field
					$tm_field['name_value'] = $tm_field['name'] . ':' .$tm_field['value'];
					// fill TM columns
					foreach($this->tm_cols as $tm_col) {
						if( !isset($new_product['tm_field_'.$tm_col])) continue;
						if( !empty($new_product['tm_field_'.$tm_col]))
							$new_product['tm_field_'.$tm_col] .= ", " .$tm_field[$tm_col];
						else
							$new_product['tm_field_'.$tm_col] = $tm_field[$tm_col];
					}
				}
				//don't add each option as new product!
				$new_products[] = $new_product;
				$pos++;
			}
			if($pos==1) //nothing added - just copy product as is
				$new_products[] = $product;
		}
		return $new_products;
	}
}
new WOE_add_TM_cols();
Then generate a report.
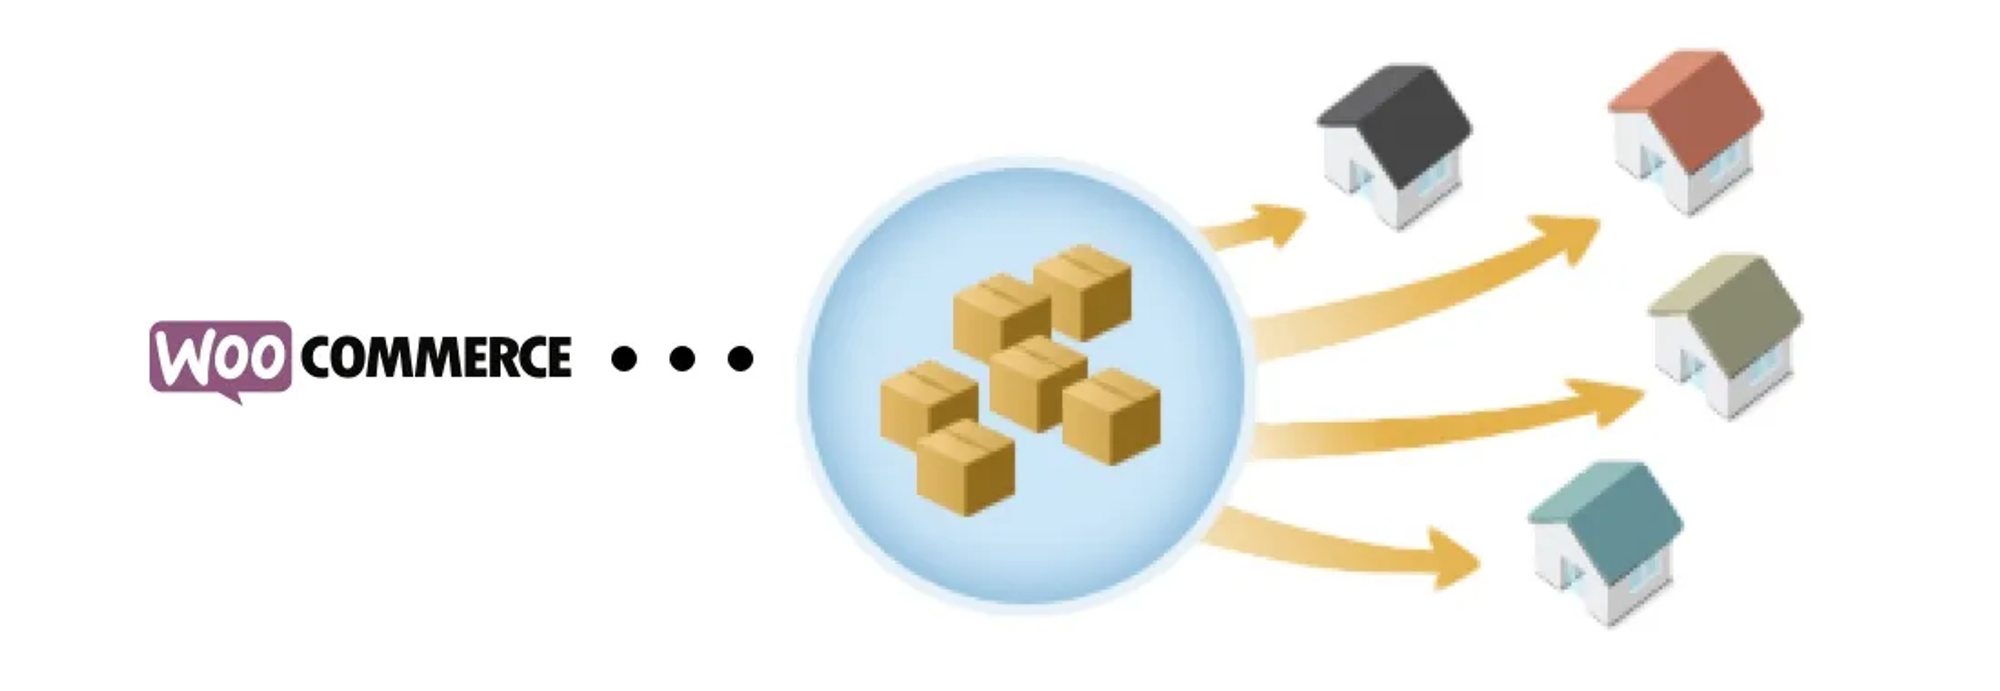
Shipping Multiple Addresses
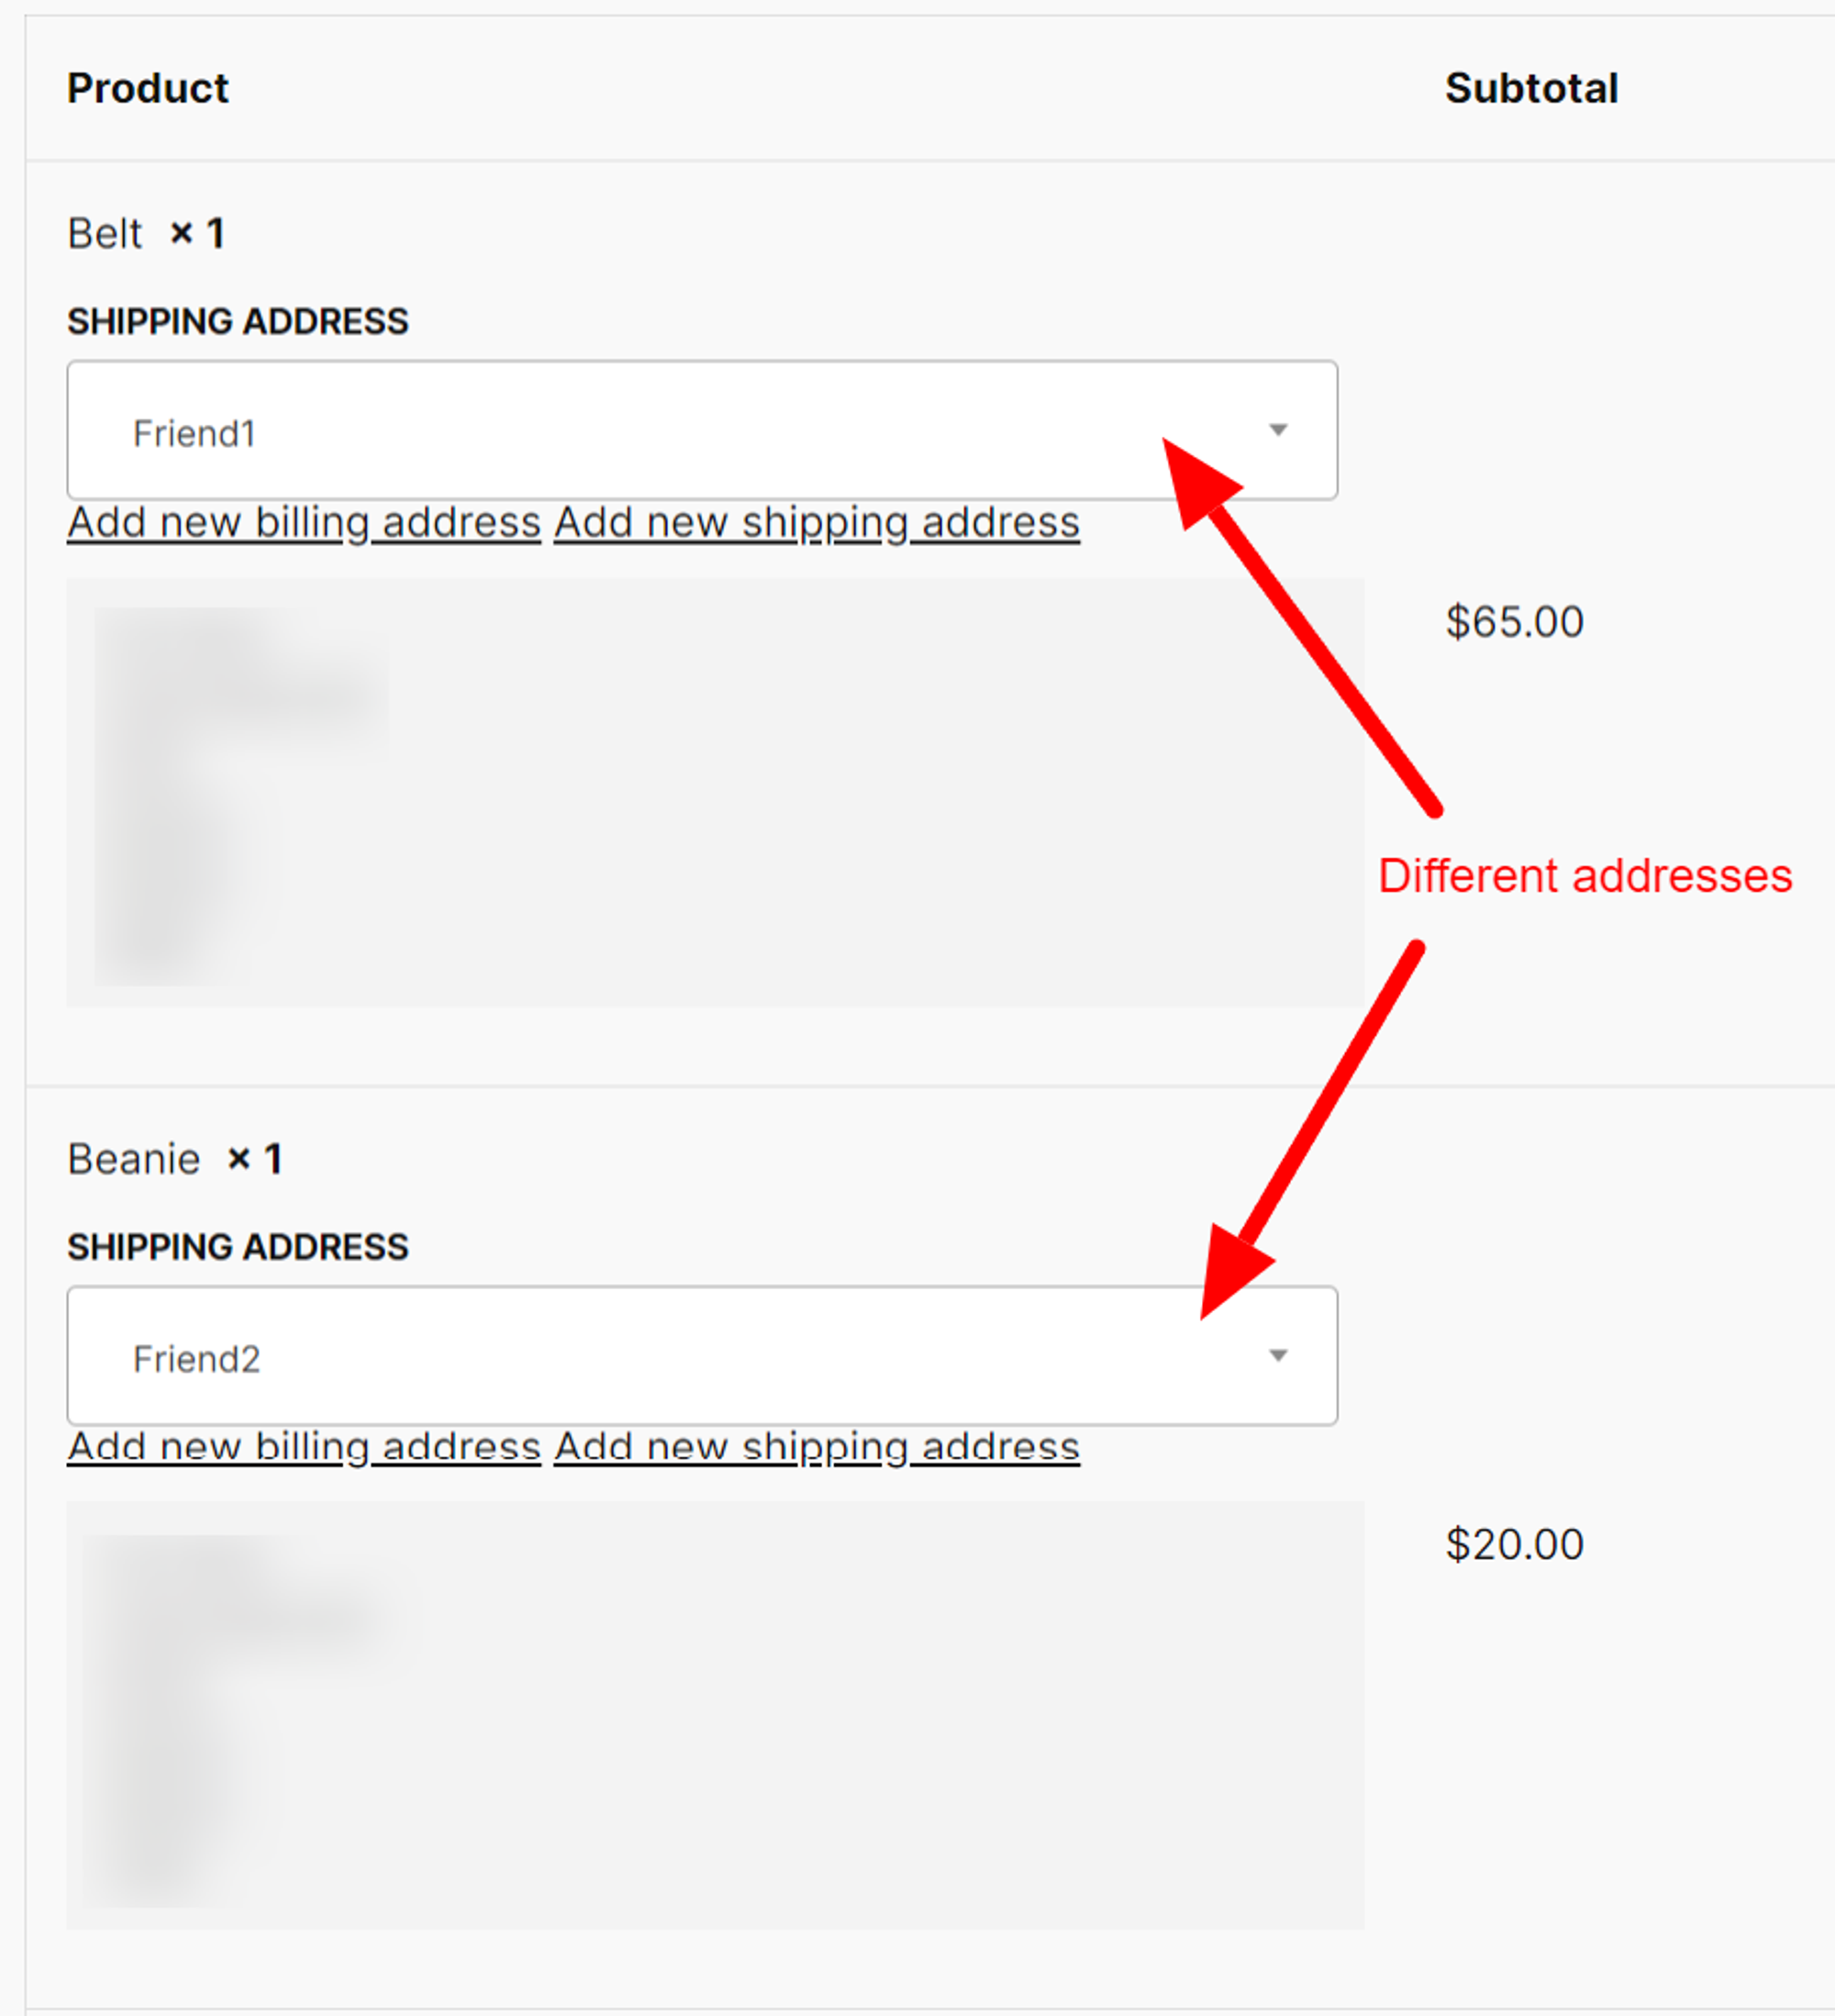
Shipping multiple addresses has become an essential plugin for e-commerce businesses, as it allows customers to ship their purchases to multiple locations with ease. This is especially useful for customers who may want to send gifts to multiple recipients or for businesses that need to fulfill orders to different addresses. Integrating this plugin with Advanced Order Export for WooCommerce takes the shipping process to the next level.
First, let’s clarify how to configure the Shipping multiple addresses plugin. After installation and activation, you will find the new “Multiple Customer Addresses Options” tab. There you need to enable the “Shipping per product” option (located at the very end of the page). After which the buyer will be able to select different shipping or billing addresses for each product at the Checkout page.
As with previous plugins, paste the following code:
//this code adds shipping information for each product
class WOE_add_product_shipping{
	var $qty_shipping, $default_address ;

	function __construct() {
		//add fields to export
		add_filter('woe_get_order_product_fields', array($this,'add_shipping_fields'), 10, 2);
		//remember QTY+Address for each prodct
		add_filter('woe_order_export_started',array($this,'fetch_product_shipping'), 10, 1);
		// rebuild product list based on shipping packages
		add_filter('woe_fetch_order_products',array($this,'rebuild_products_shipping'), 10, 5);
	}

	function add_shipping_fields($fields,$format) {
		$names = array('first_name','last_name','full_name','company','country','address_1','address_2','city','state','postcode','note');
		foreach($names as $f) {
			$fields['shipping_'.$f] = array('label'=>"Product Shipping ".$f,'checked' => 1, 'colname'=>"Product Shipping ".$f);
		}
		return $fields;
	}

	function fetch_product_shipping($order_id){
		$this->qty_shipping = array();
		$shipping_packages = get_post_meta($order_id, '_wcms_packages', true );
		if( !is_array($shipping_packages) )
			$shipping_packages = array();
		foreach($shipping_packages  as $pack) {
			$addr = $pack['destination'];
			foreach($pack["contents"] as $item) {
				$key = $item['cart_key'];
				$addr['full_name'] = trim($addr['first_name'] . " " . $addr['last_name']); // new field
				$addr['note'] = isset($pack['note']) ? $pack['note'] : '';
				if( !isset($this->qty_shipping[$key]) )
					$this->qty_shipping[$key] = array();
				$this->qty_shipping[$key][] = array("qty"=>$item['quantity'],"address"=>$addr);
			}
		}

		//if no pack!
		$order = new WC_Order($order_id);
		$this->default_address = array();
		$names = array('first_name','last_name','company','country','address_1','address_2','city','state','postcode');
		foreach($names as $field)
	                $this->default_address[$field] = $order->{"get_shipping_".$field}();
		$this->default_address['full_name'] = trim($this->default_address['first_name'] . " " . $this->default_address['last_name']); // new field
		$this->default_address['note'] = $order->get_customer_note();
		return $order_id;
	}

	function rebuild_products_shipping($products, $order, $labels, $format, $static) {
		$new_products = array();
		foreach( $products as $item_id=>$row) {
			$item = $order->get_item($item_id);
			$key = $item['_wcms_cart_key'];
			if( !isset($this->qty_shipping[$key])) { // not multishipping package!
				$this->qty_shipping[$key] = array( array("qty"=>$item['qty'], 'address'=>$this->default_address) );
			}
			foreach($this->qty_shipping[$key]  as $new_row) {
				if( isset($row['qty']) )
					$row['qty'] = $new_row['qty'];
				if( isset($row['qty_minus_refund']) )
					$row['qty_minus_refund'] = $new_row['qty'];
				foreach($new_row['address'] as $k=>$v) {
					$k = 'shipping_'.$k;
					if( isset($row[$k]) )
						$row[$k] = $v;
				}
				$new_products[]= $row;
			}
		}
		return $new_products;
	}

}
new WOE_add_product_shipping();
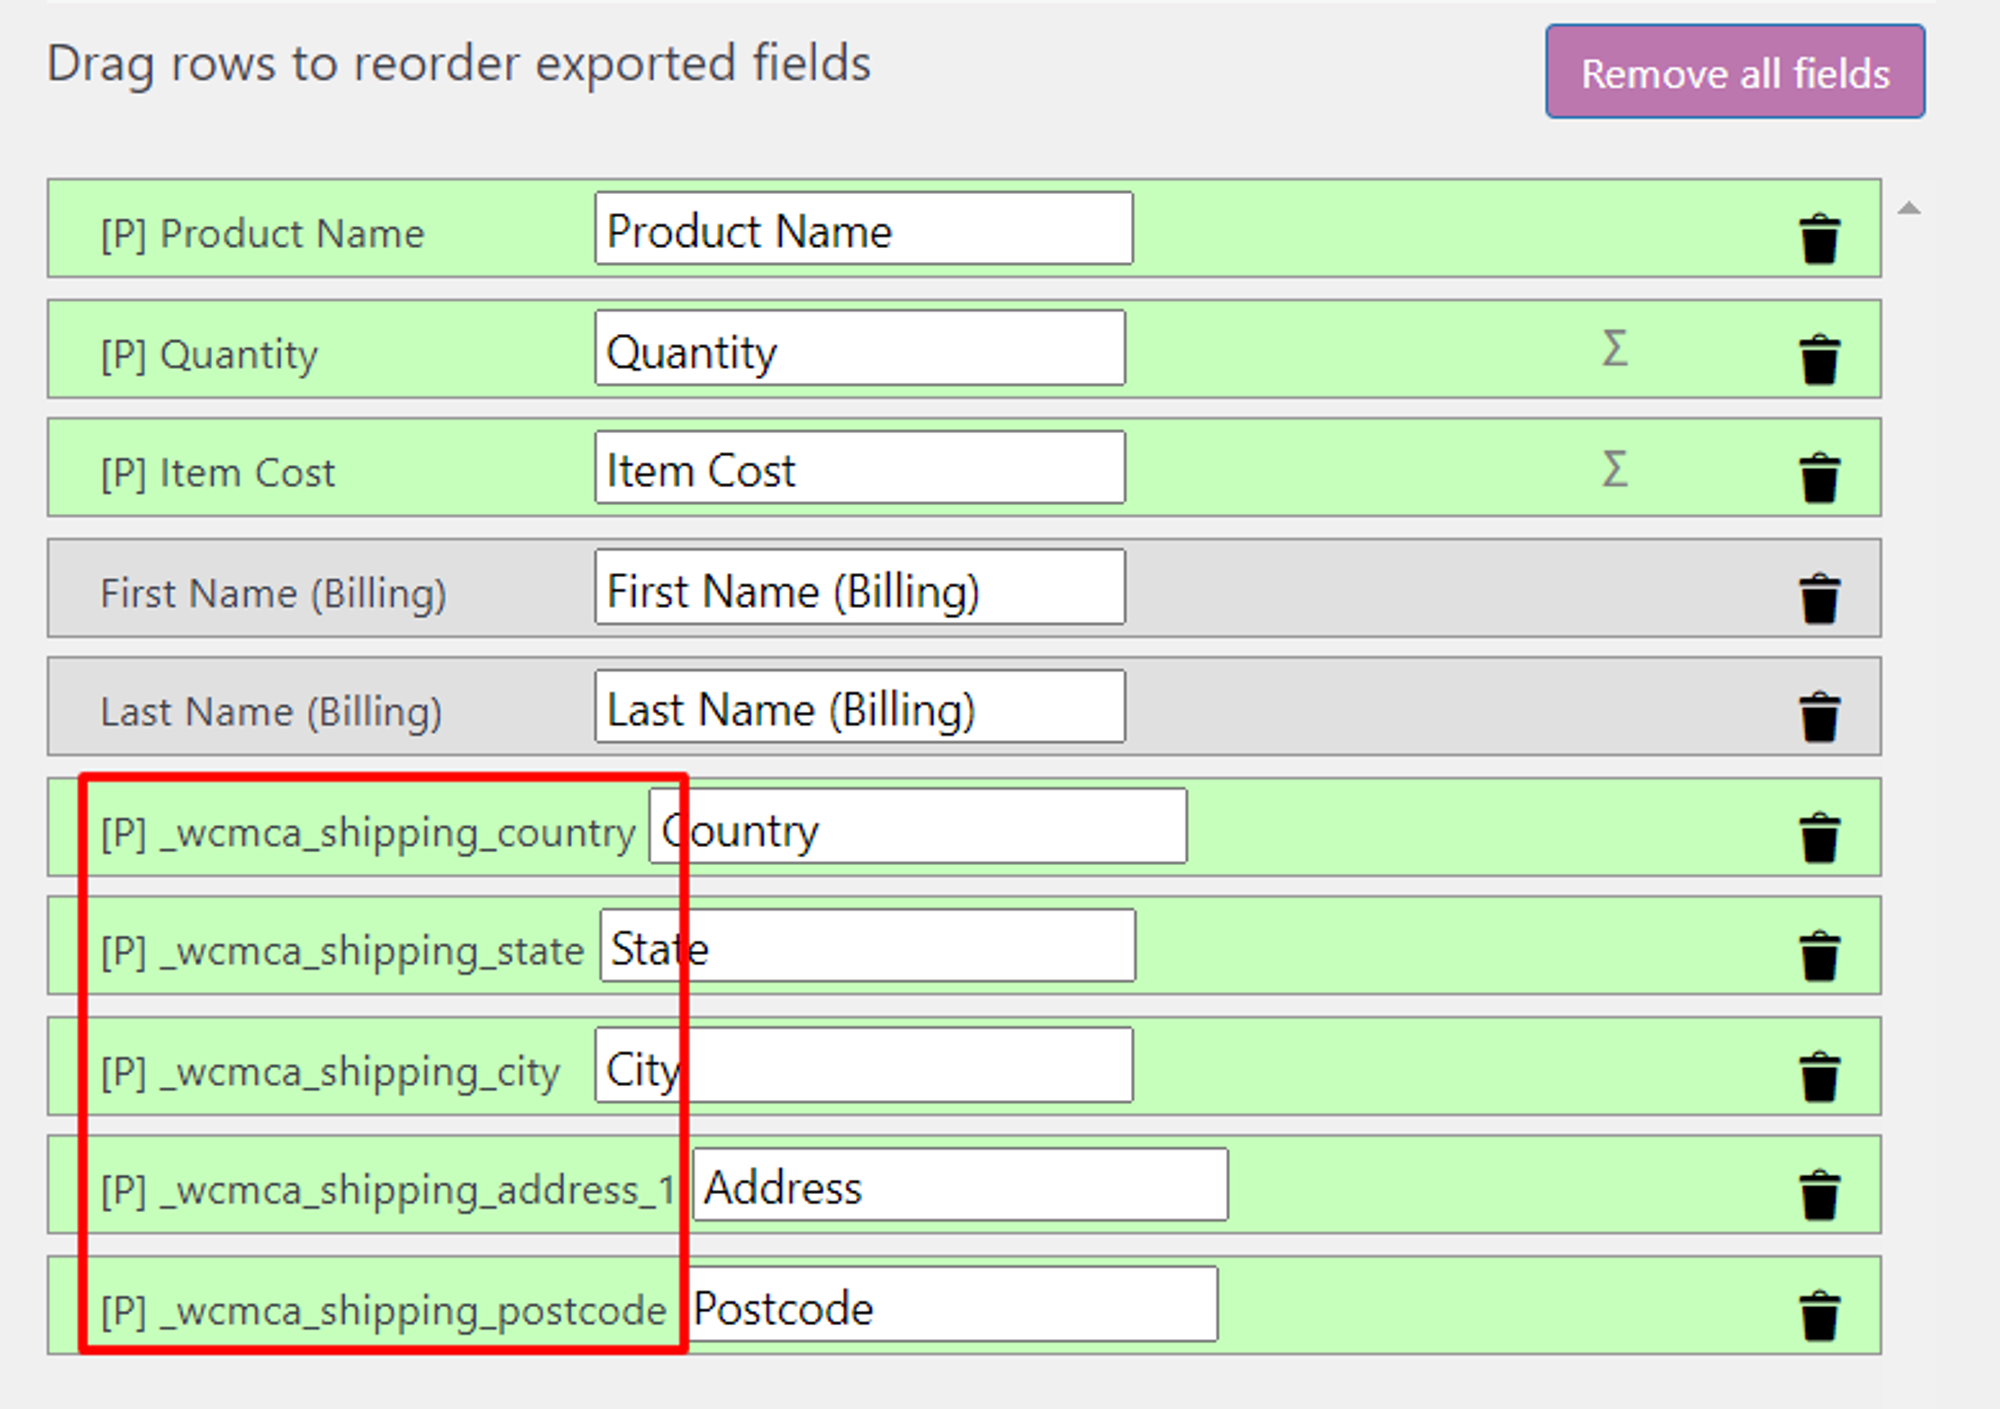
Generating the report will be more difficult this time. You need to create the fields required for the report by clicking on the “Add field” button in the “Product order items” tab in the “Set up fields to export” section. Find and add the following fields as in the screenshot.
Ultimately, integrating of Advanced Order Export for WooCommerce with third-party applications can bring numerous benefits to companies. It saves time, reduces errors, and provides a comprehensive overview of all orders. This not only improves the efficiency of the business but also enhances the overall customer experience, making it a valuable tool for any e-commerce store.
A POS system, or Point of Sale system, is a combination of hardware and software that enables businesses to process transactions quickly and securely. It consists of a computer, a cash register, a printer, a barcode scanner, a credit card reader, and a touchscreen monitor. The POS system allows businesses to keep track of sales, inventory, customer data, and more. It can also provide up-to-date information on customers’ purchasing habits, enabling businesses to tailor their services and products to meet customer demand.
The cash register program must support all trade processes: operations for receiving money, returns, reversals, various types of payments, etc. The possibility of introducing marketing programs is also very important nowadays: discounts, bonuses, promotions, etc. General requirements are also important: protection from unauthorized actions of the cashier, data safety, promptness of system updates.
Phone Orders and POS system: common features
A Point of Sale (POS) system and Phone Orders offer a variety of features that enable businesses to conduct their operations in a more efficient and cost-effective manner. While these two systems have different primary functions, they share several common features that make them essential for managing orders and customer satisfaction:
Both systems have the ability to store customer information, including contact information and order history. This information can be used to quickly identify customers, provide personalized offers, or follow up on orders.
They also allow for easy payment processing, either through integrated payment processing systems or through manually entered payment data. This makes it easy for customers to pay for their orders quickly and securely.
Furthermore, both systems can also be used to generate reports and view sales trends and customer shopping habits.
As you can see, Phone Orders and POS system have a lot in common.
Although the name of the plugin might suggest that its use is limited to Phone Orders, this is not the case. This tool can also be implemented in a physical store.
We will tell you what steps you need to take to implement and configure the plugin as a POS system.
How to use Phone Orders as a POS system?
If you want to set up Phone Orders as POS system, it’s easy to do. First you need to install and configure the plugin. You can read our article about this.
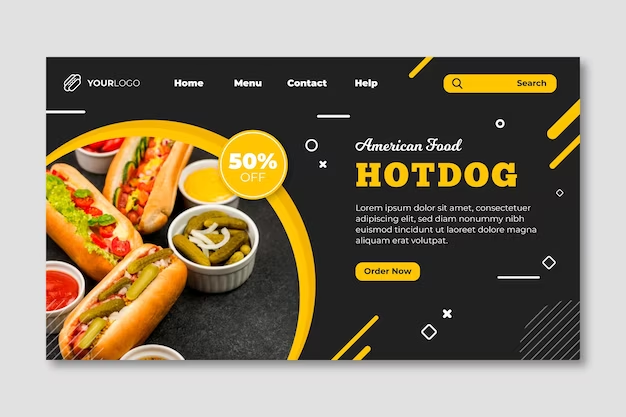
Let’s imagine that we are a company that sells hot dogs for delivery.
We have been listening to our customers and they have repeatedly said that they would love to visit our restaurant if we had one. We have decided that this is the time to take the plunge and open a physical location. Opening a restaurant is a big challenge, but we are confident that our commitment to quality and customer service will make it a success.
We’ve been using Phone Orders on our delivery website for a long time. This is a very convenient plugin that partially automates the order acceptance process (we use the pro version). In addition, the plugin helped us better understand consumer preferences. After tracking order history, we found that the most popular menu item is Hot Dog Classic.
We really enjoyed working in Phone Orders, but we realized it wouldn’t be able to use it in a restaurant. “The plugin is only effective when used online.” – that’s what we thought and we were wrong. After all, it is possible to implement the Phone Orders plugin in an offline location.
There are several ways to to do this. The first option is to use a tablet with a compatible app that can sync with the website. This enables the business to accept orders in an offline setting, such as a restaurant or retail store. The tablet will need to have an internet connection, and the app will need to be able to connect to the website.
Another option is to use a mobile payment processor. This can be done through a variety of apps, such as Apple Pay or Google Pay. This is a great way to accept payments in an offline setting, as customers can simply scan their device and make a payment.
With this feature, our company can increase sales and revenue without the need for an expensive POS system!
Now let’s move on to how to enable it in the plugin.
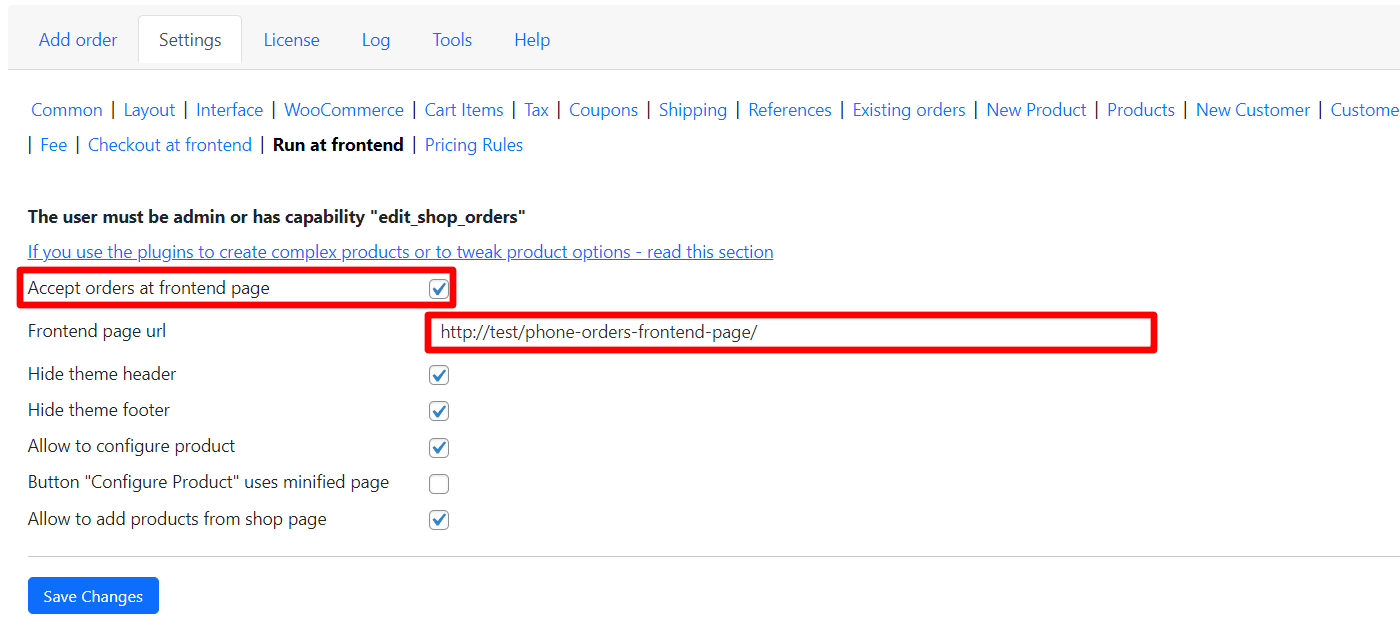
To do this, we need to enable the Run at frontend mod. Go to Settings > Run at frontend and check the Accept orders at frontend page box. Also change Frontend page url to the following format:
Note: This feature is only available in the pro version.
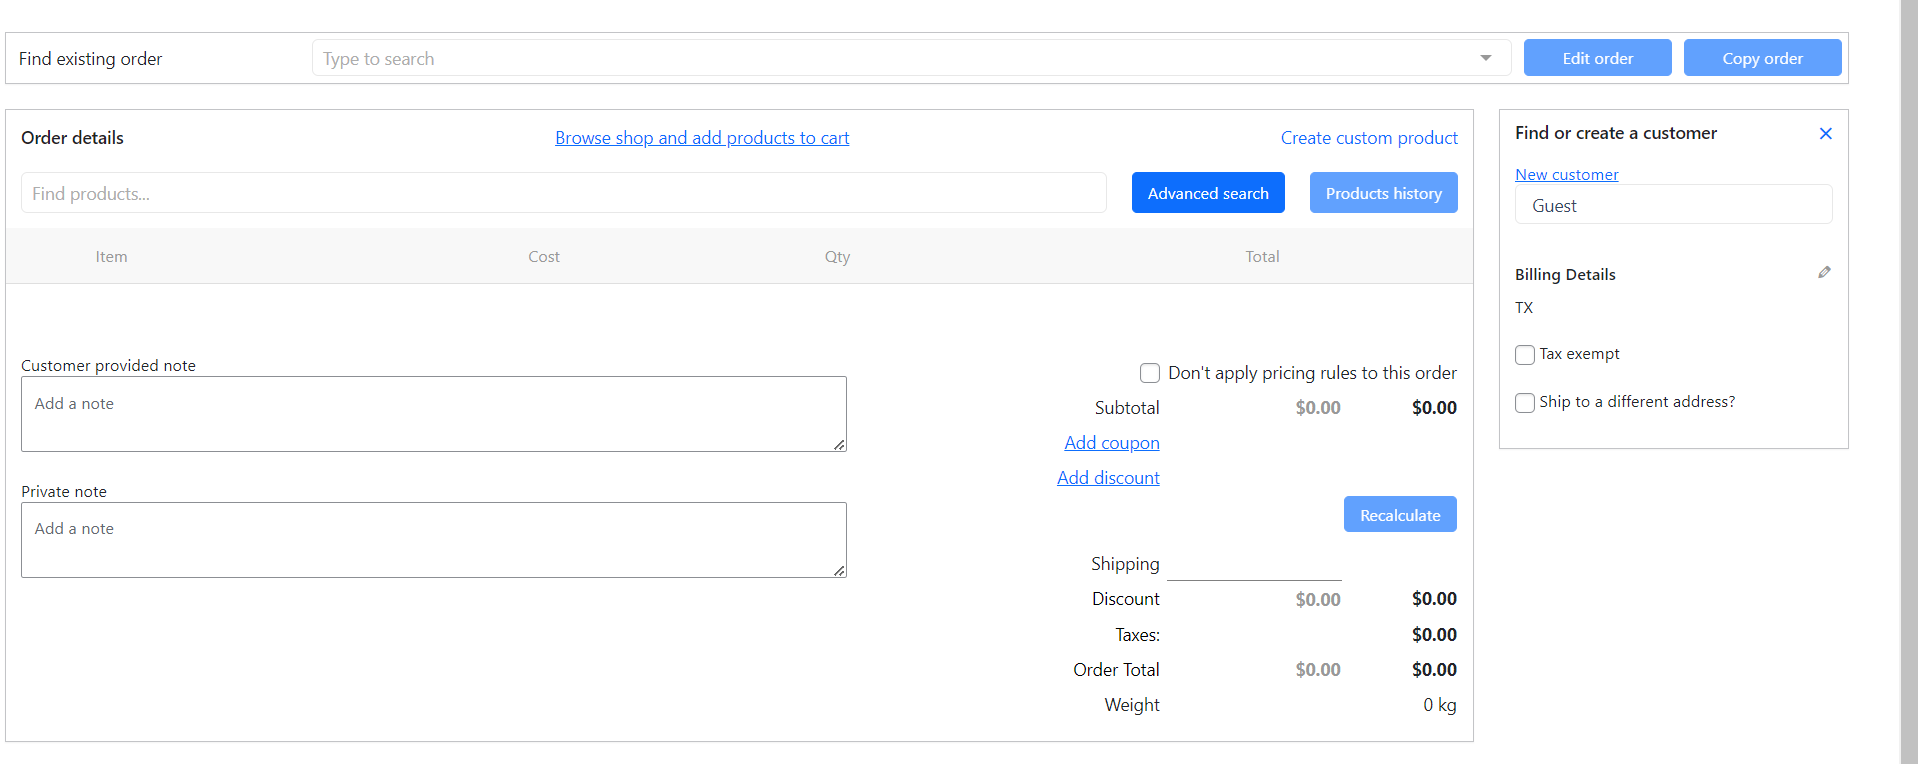
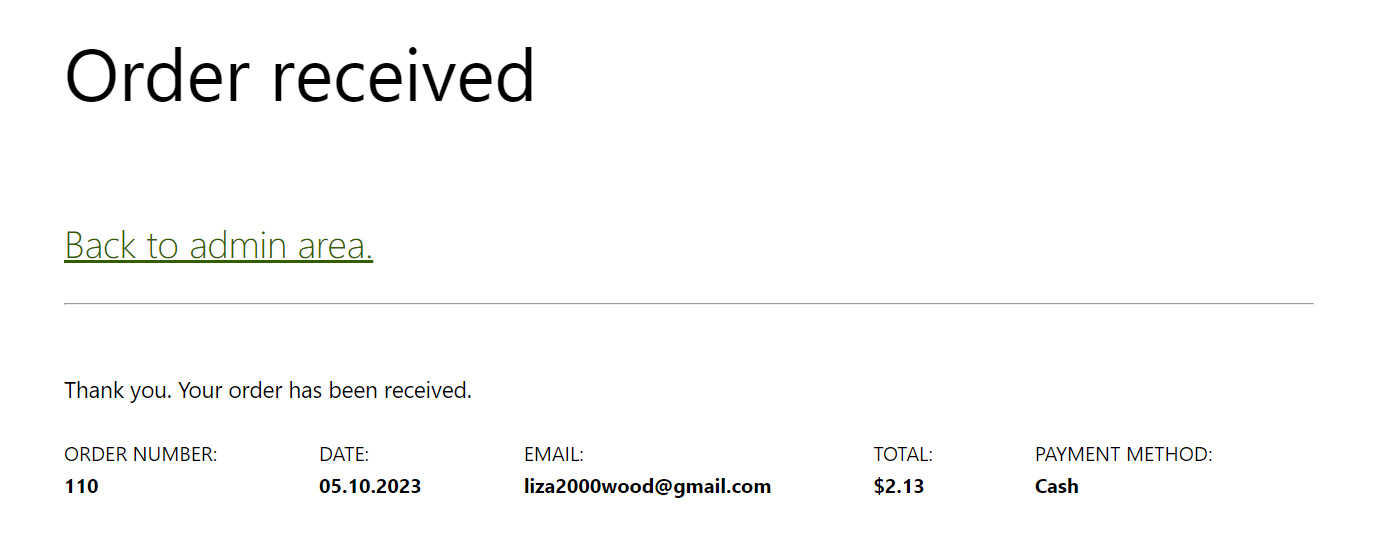
By going to this URL you will see the following window:
The ordering process here is similar to the backend:
Find out the order details.
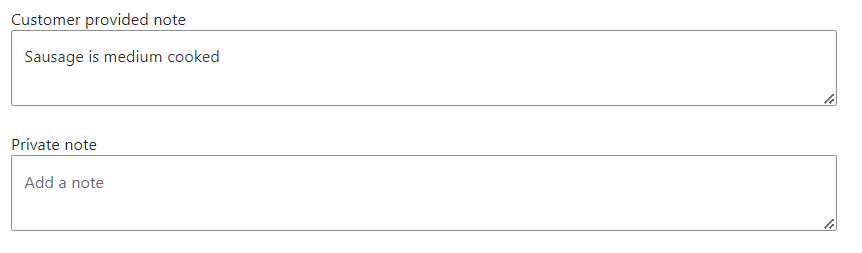
Fill out a note for it (optional).
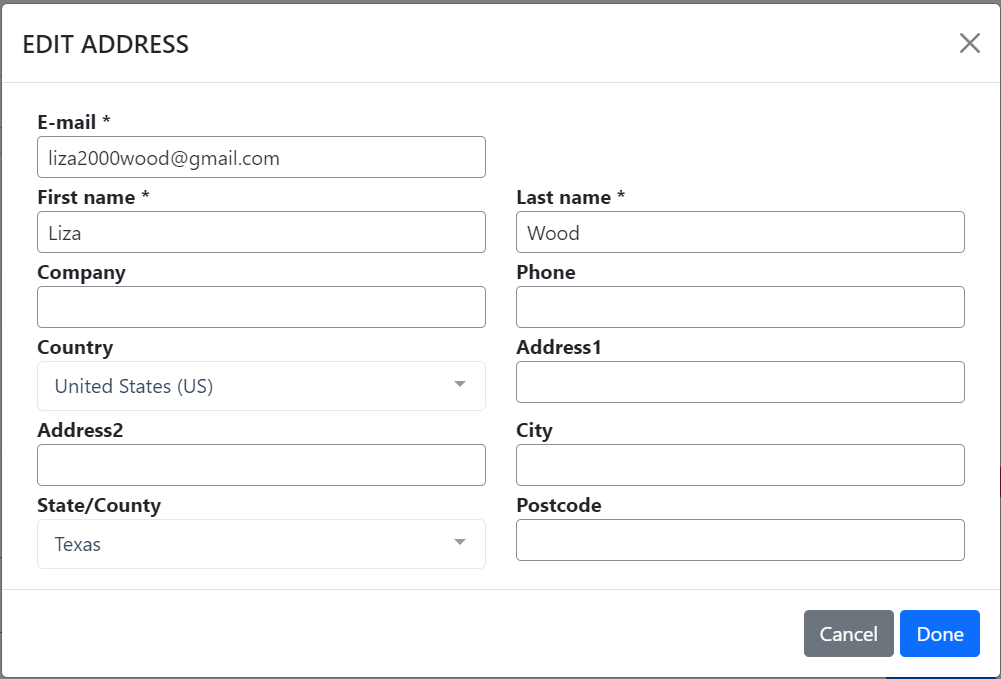
Ask the customer for his/her contact information.
Create an order and ask the customer to pay.
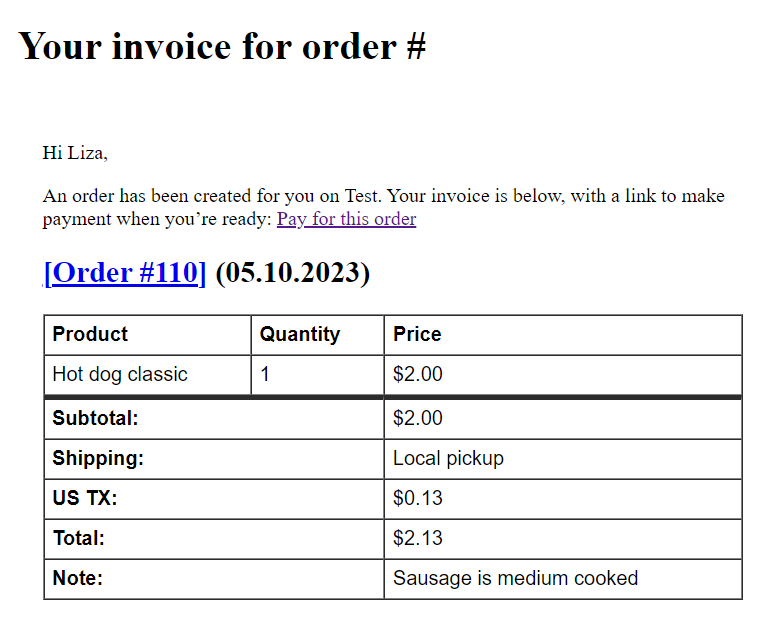
Send him/her an invoice by email (optional).
Conclusion
In conclusion, using Phone Orders as a POS system can be a beneficial solution for company that need an efficient and cost-effective way to process orders. It allows businesses to keep their customer orders organized and accessible at all times, which can be especially helpful for those that need to quickly process orders or provide customers with detailed information about products or services. Furthermore, phone orders are an ideal solution for businesses that are looking to save money on POS systems, as they are typically much cheaper than traditional POS systems. Additionally, Phone Orders are also very easy to use and require minimal training, allowing businesses to quickly get up and running with their POS system. All in all, Phone Orders can be a great option for businesses looking to streamline their ordering process and keep costs down.