Implementing different pricing models can significantly impact a business’s success by aligning its revenue strategies with market dynamics, customer behavior, and competitive landscapes. Various models cater to different business needs—whether it’s attracting price-sensitive customers or maximizing revenue from premium products.
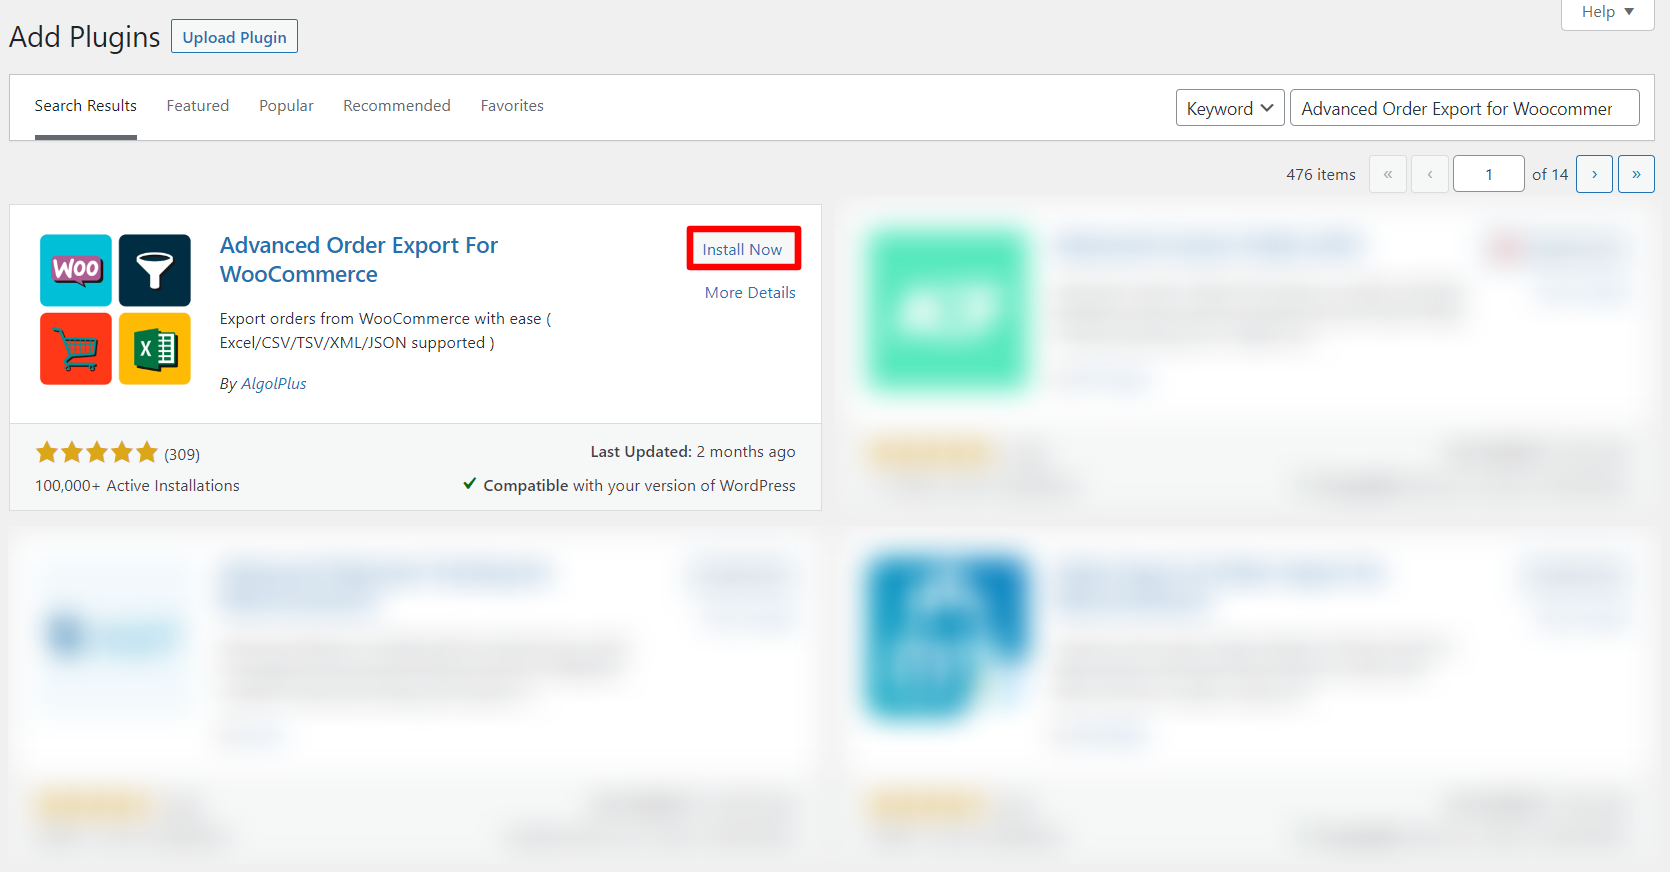
Integrating various discount models in a WooCommerce store can yield significant profits for both the business and its customers, ensuring a mutually beneficial shopping experience through strategic pricing. Let’s review the most favourite dynamic pricing scenarios for the WooCommerce store and how to implement them using our Advanced Dynamic Pricing and Discount Rules for WooCommerce plugin.
Sitewide discount
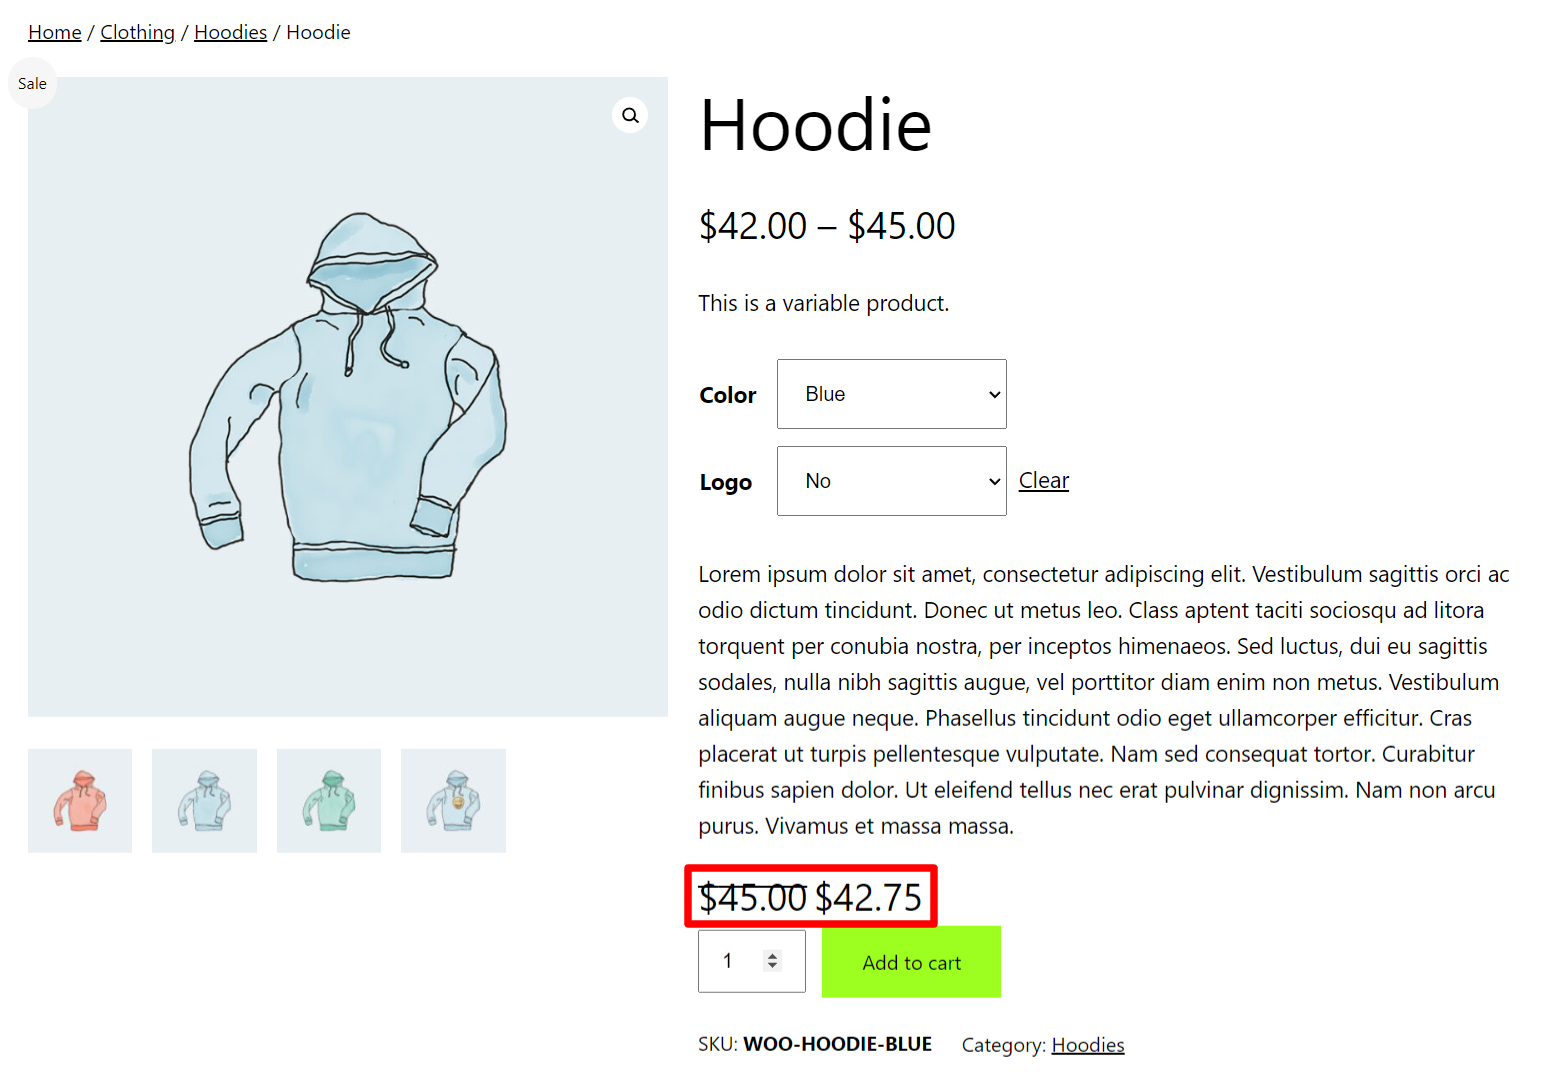
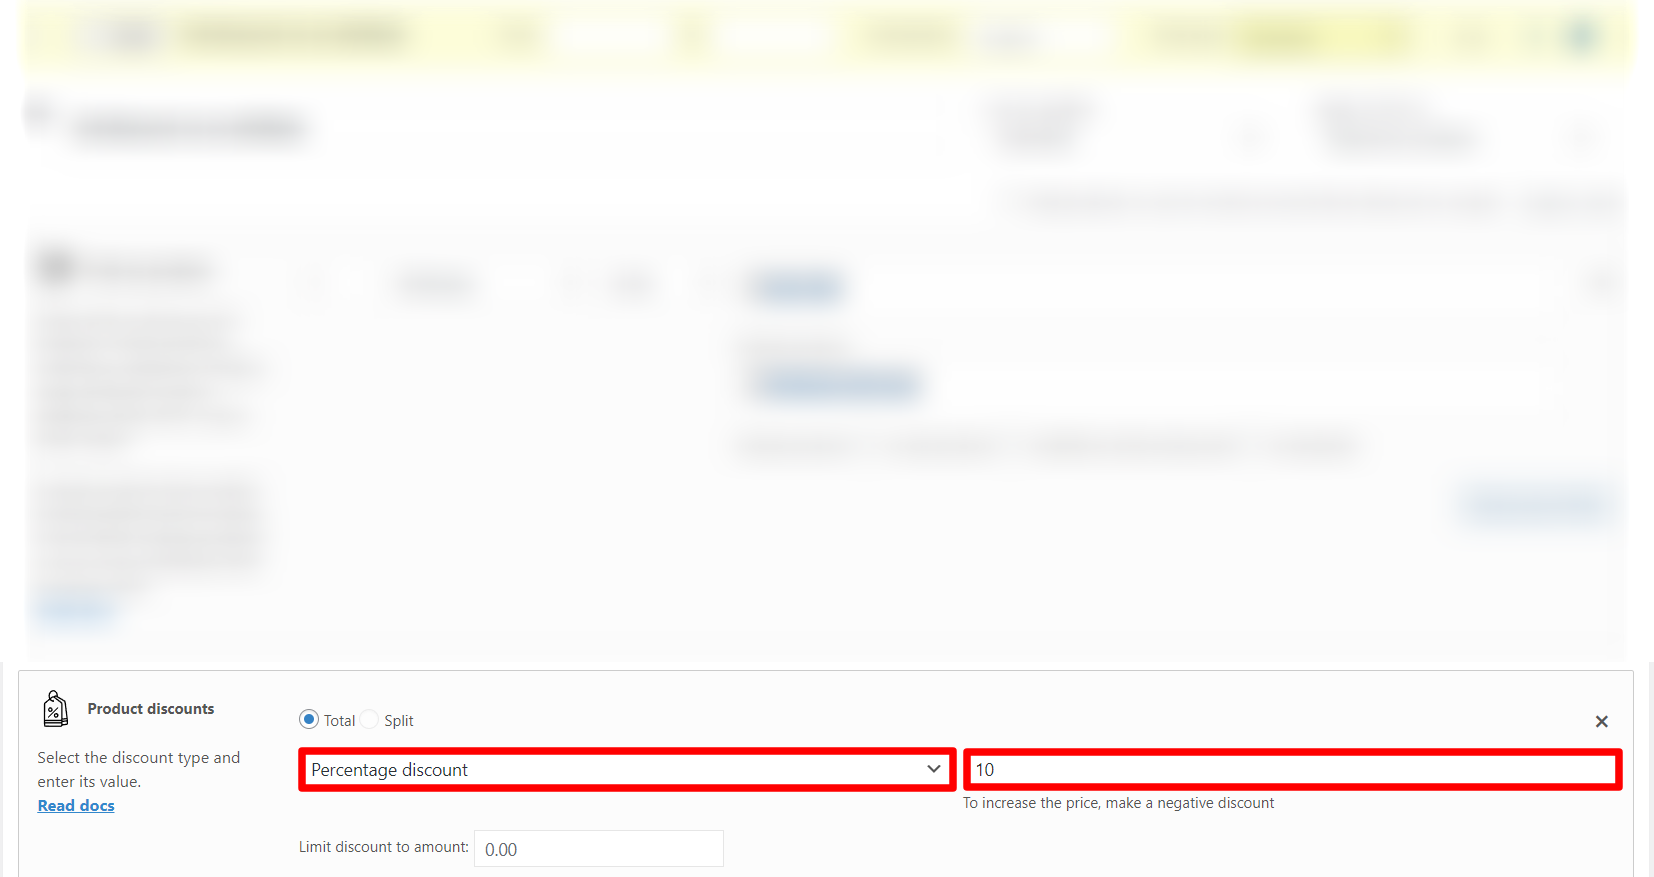
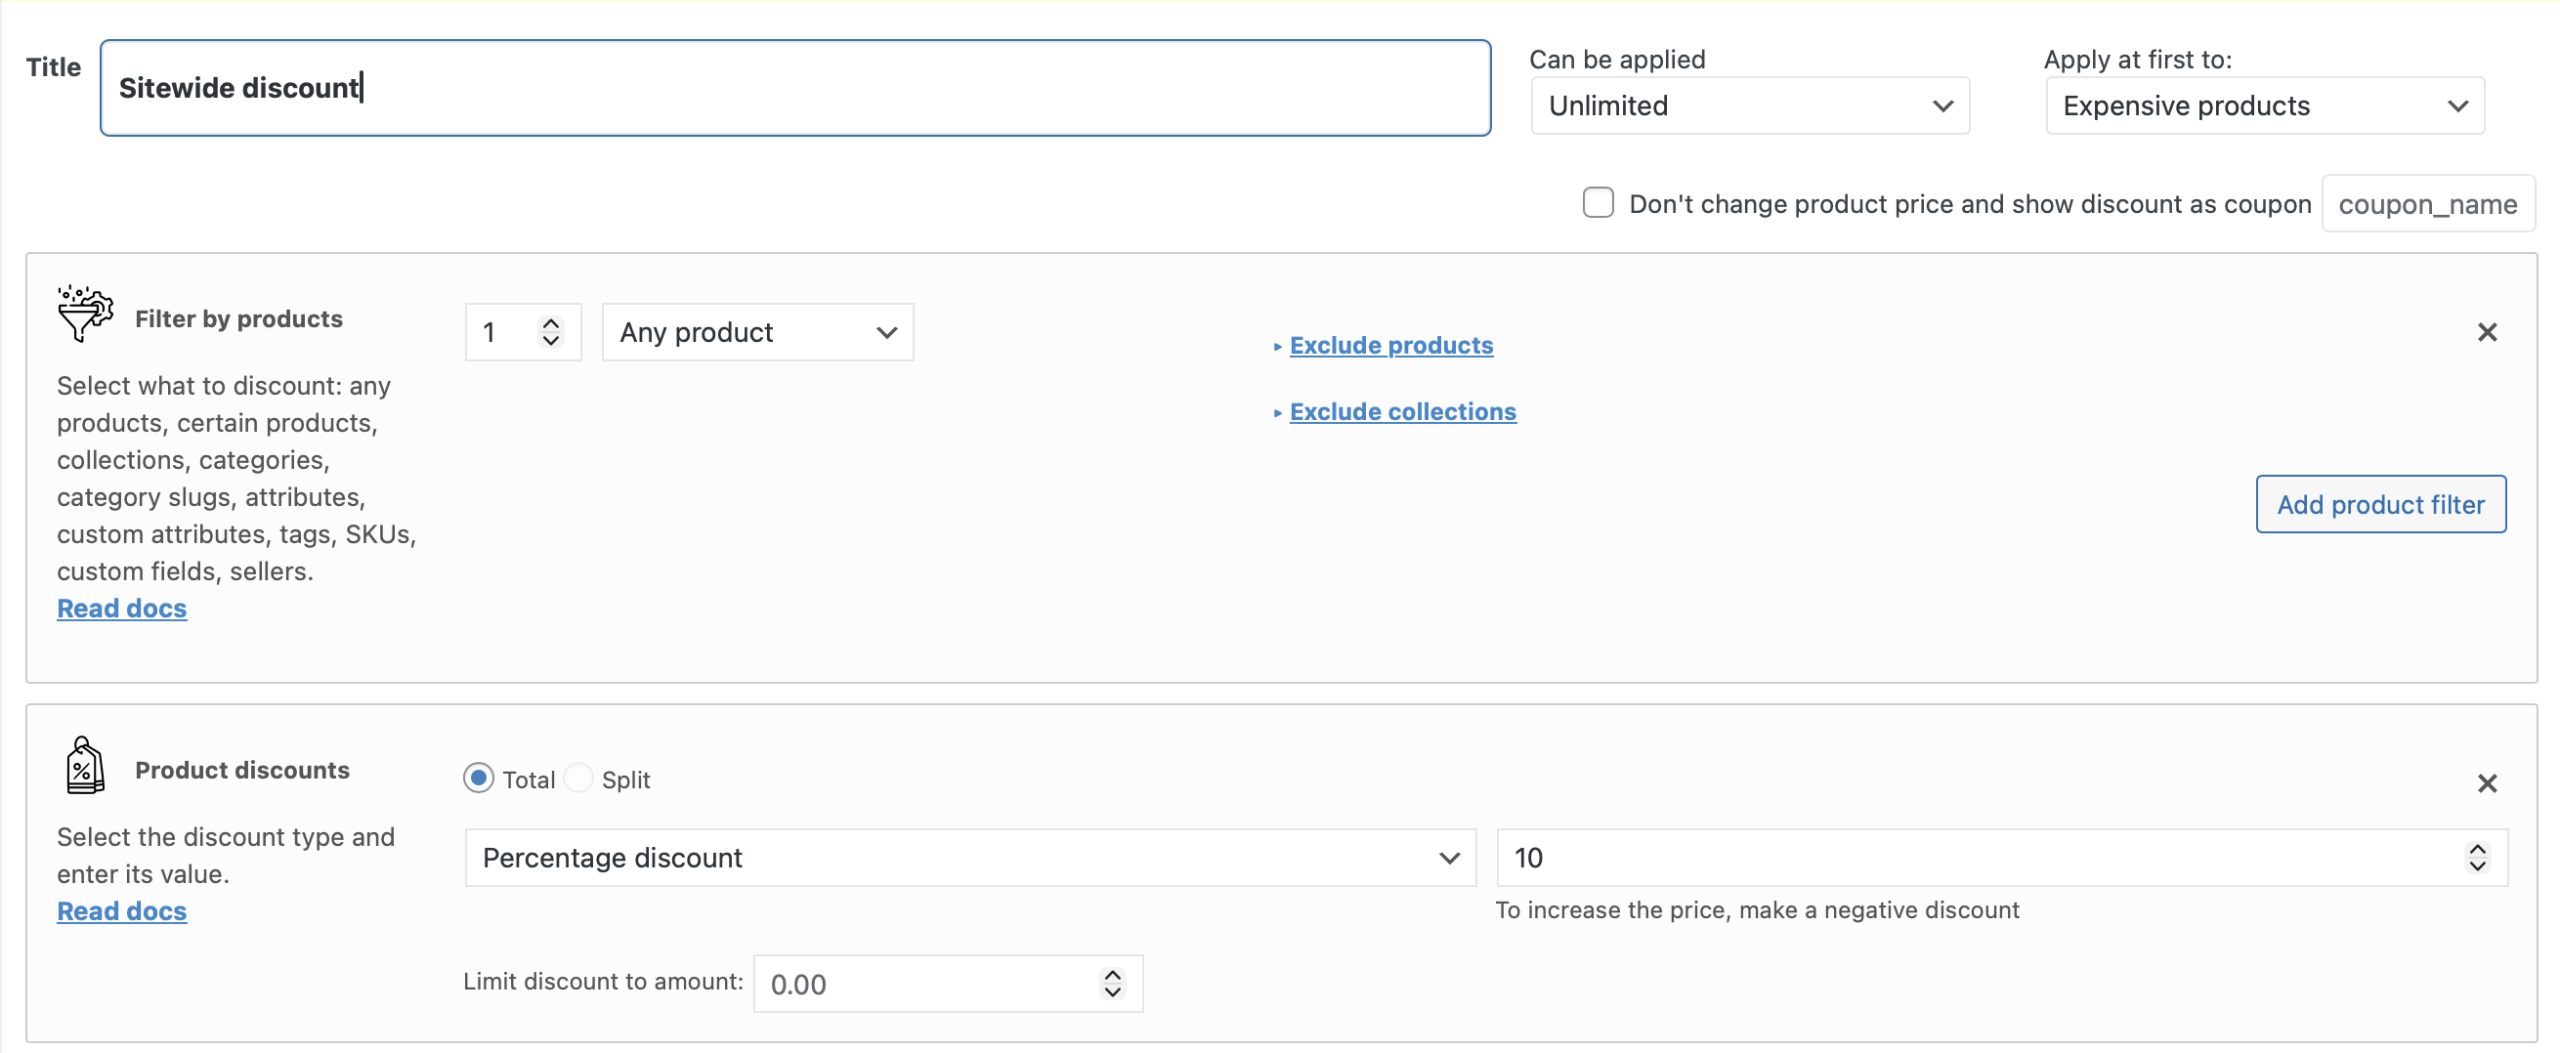
One of the best strategy for the business is a sitewide discount. For the business, offering a sitewide discount can rapidly increase sales volume, clear inventory, and enhance brand visibility. Customers benefit by enjoying discounted prices across the entire store, encouraging them to explore and purchase more products.
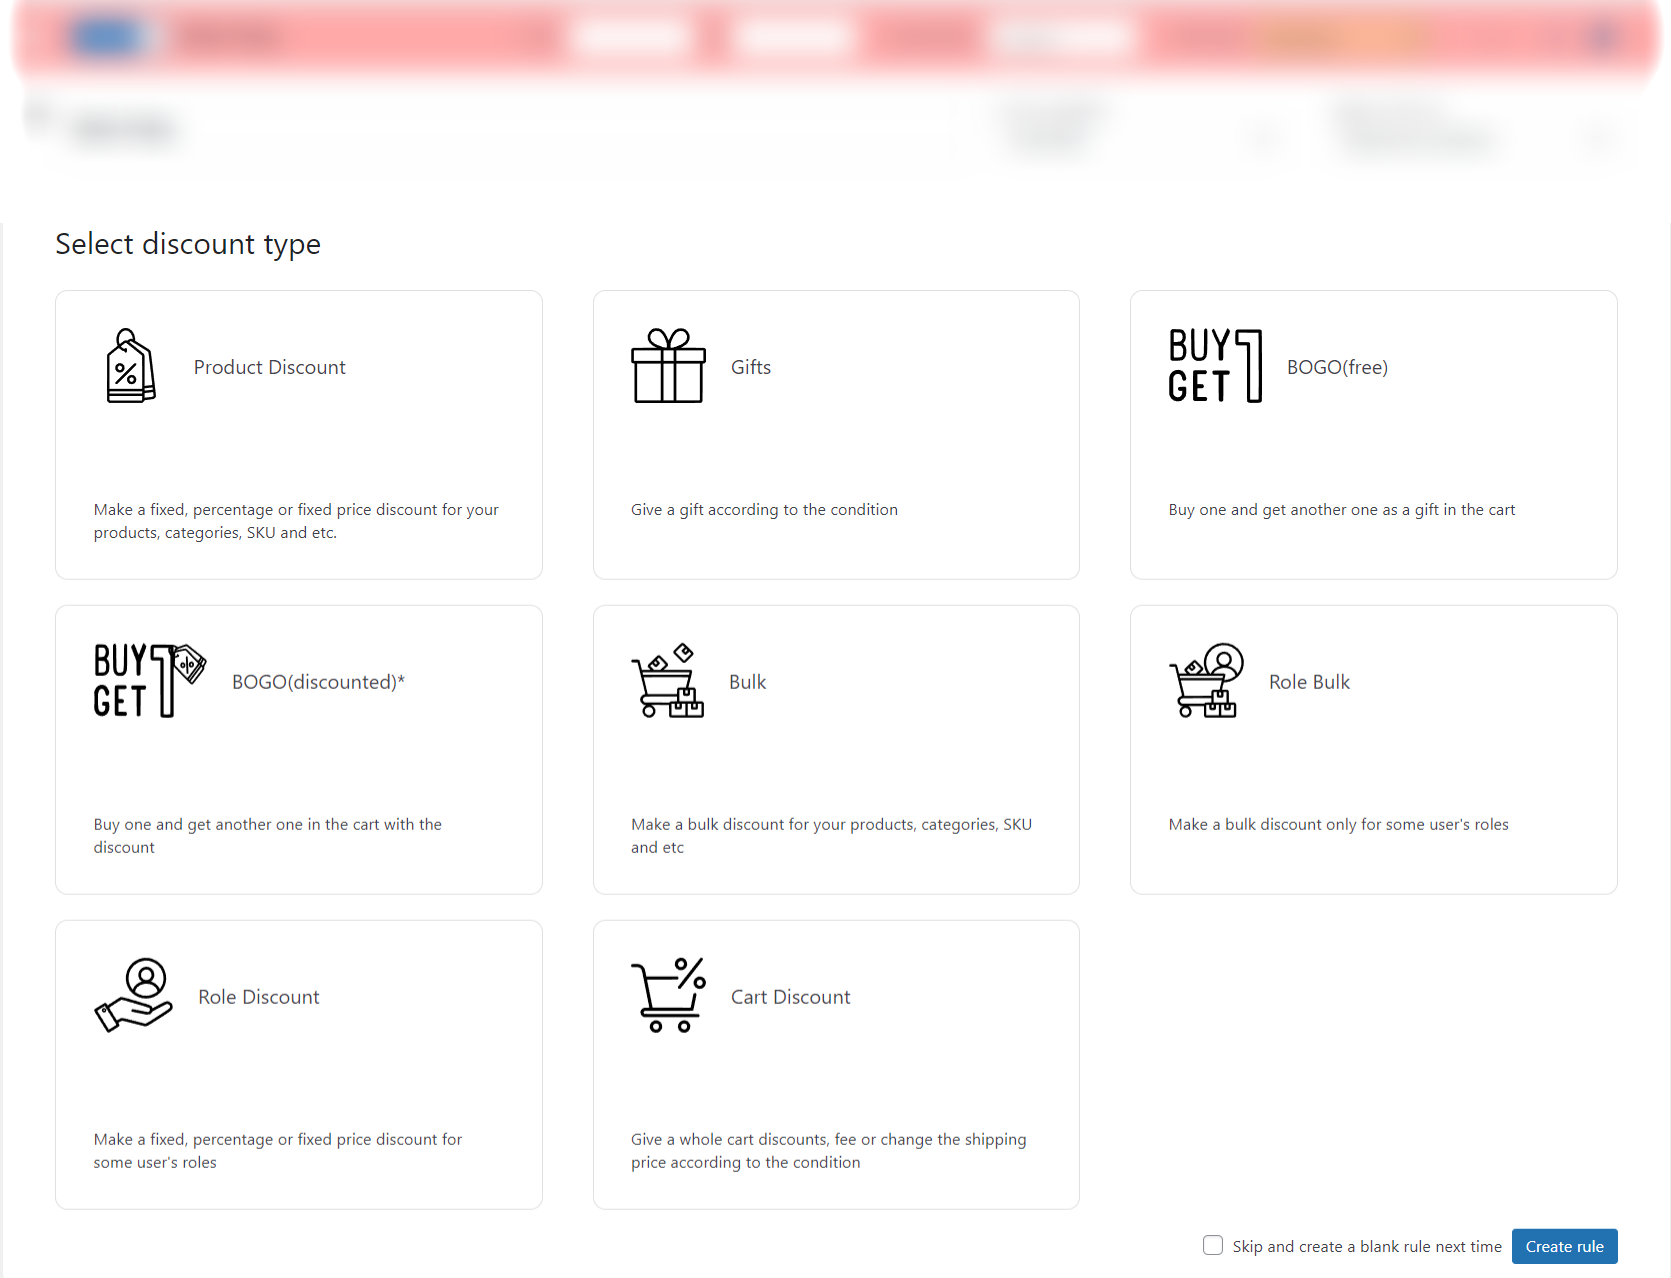
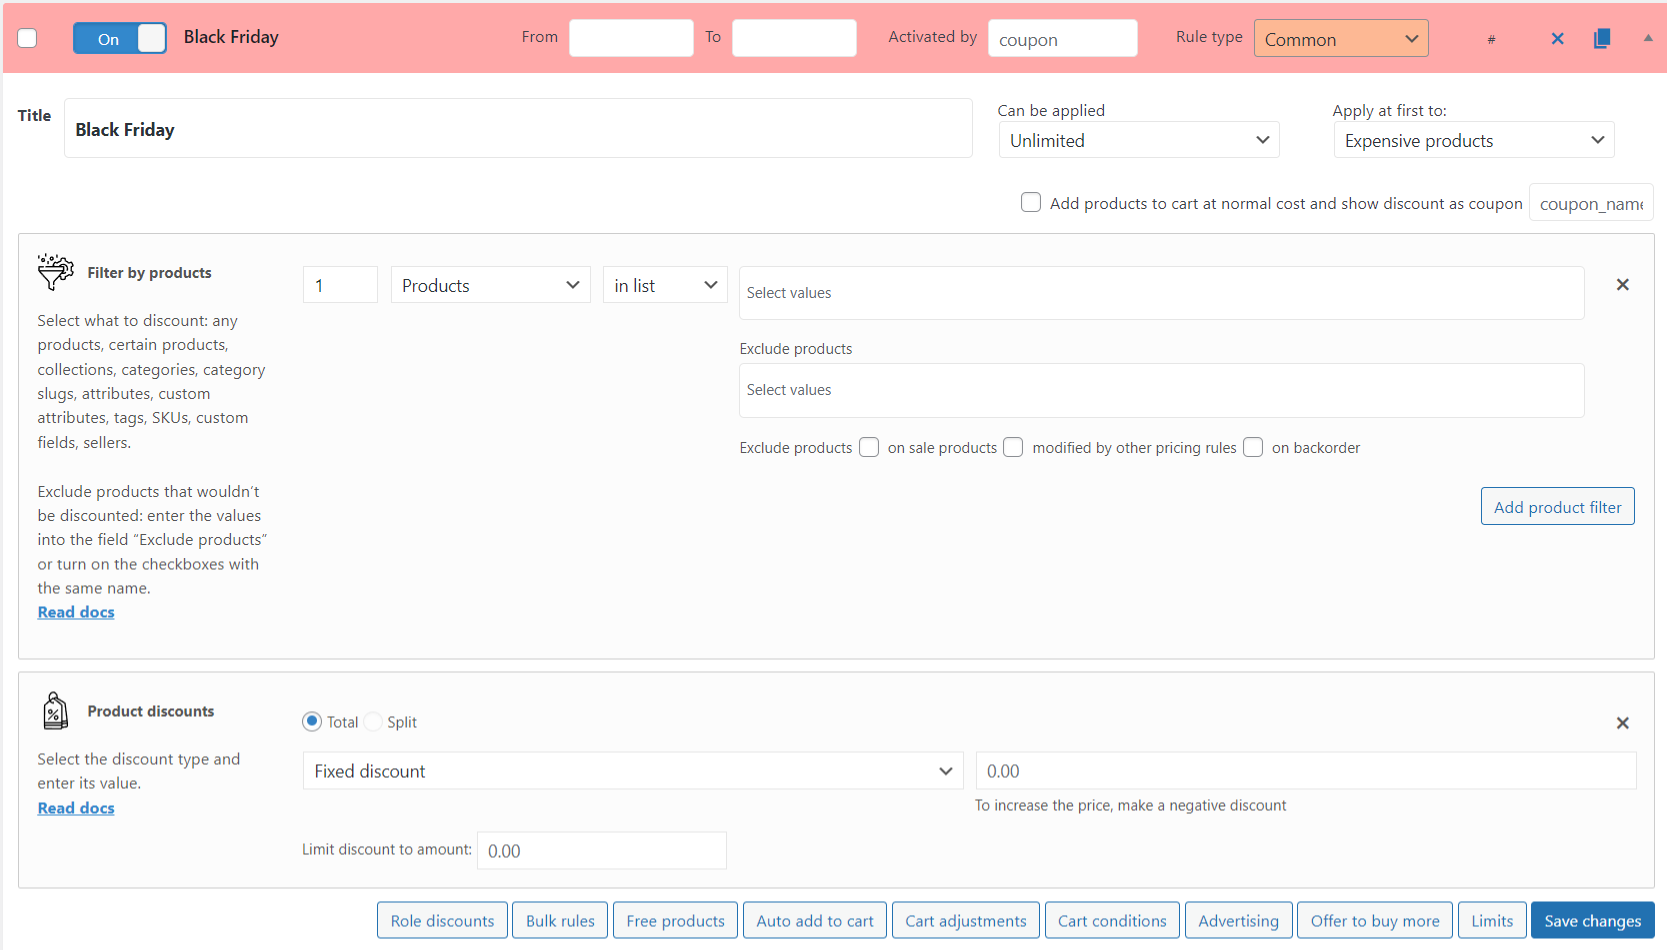
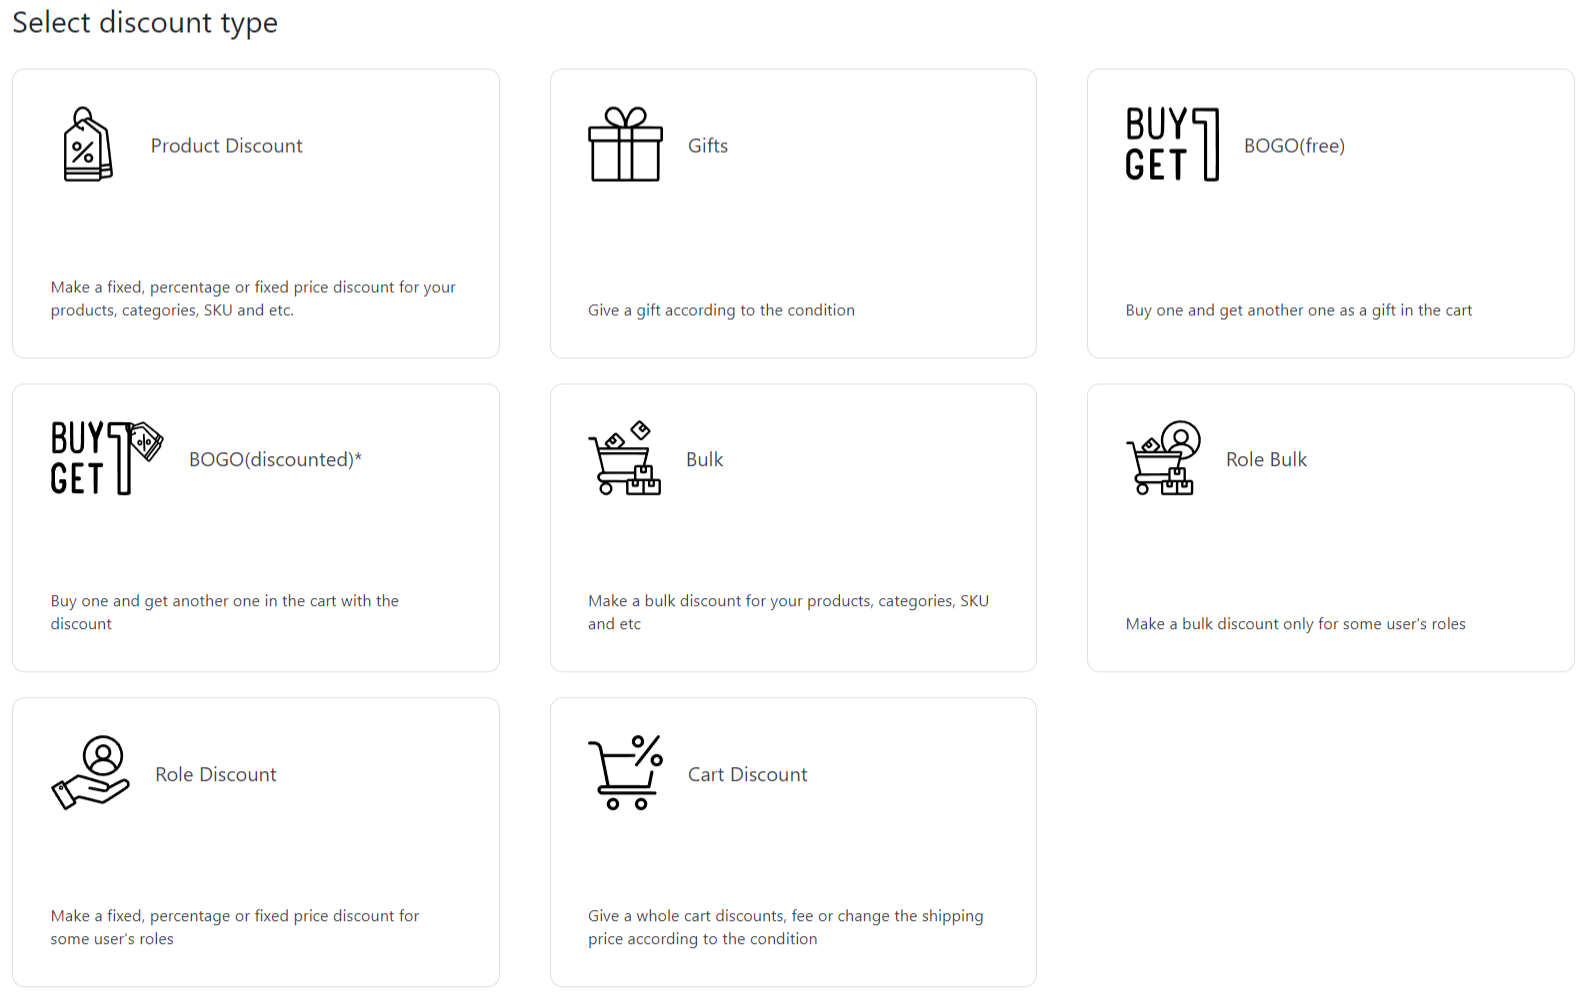
It’s very easy to implement that kind of discount using Advanced Dynamic Pricing and Discount Rules for WooCommerce: just click the button “Add rule” and choose the “Product Discount” rule’s template. Then change the Product Filter’s value to the “Any Product”, choose the discount’s type and amount and click “Save changes” button. That’s all you need to do to make a sitewide discount with Advanced Dynamic Pricing and Discount Rules for WooCommerce!
Cart Discount
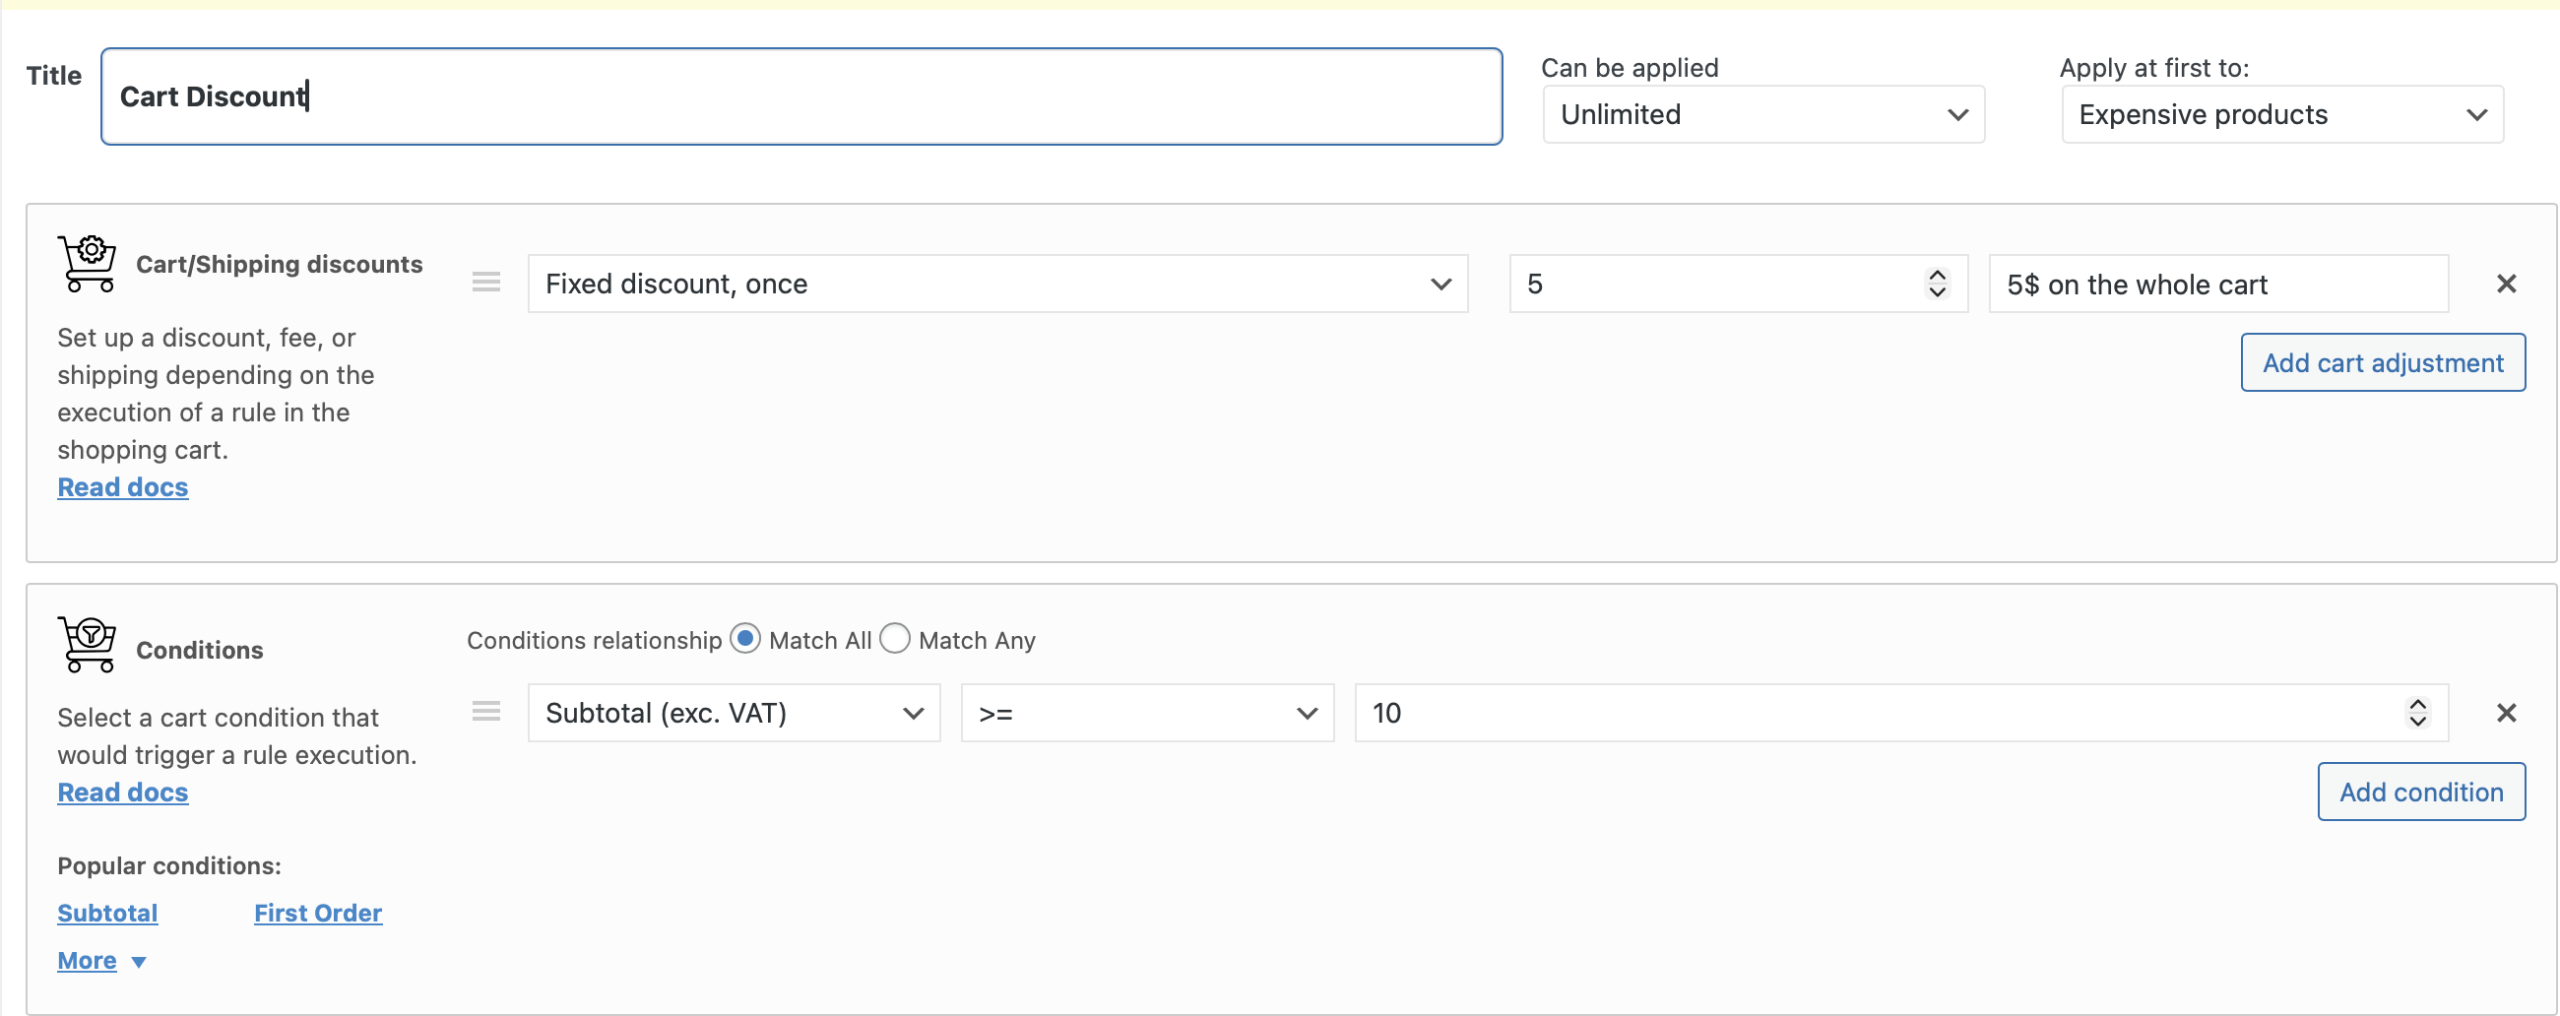
The Cart Discount discount strategy is also widely spread in the WooCommerce stores. With the cart discounts businesses can boost average order values and reduce cart abandonment rates. Customers appreciate the savings applied at checkout, making them more likely to complete their purchases in the WooCommerce store.
Advanced Dynamic Pricing and Discount Rules for WooCommerce can help you to create a cart discounts too: click the “Add rule” button and choose the “Cart Discount” template. There are a various cart discounts type that can be provided for your customers: from fixed discount coupon to the free shipping and tax exemption (only pro version).
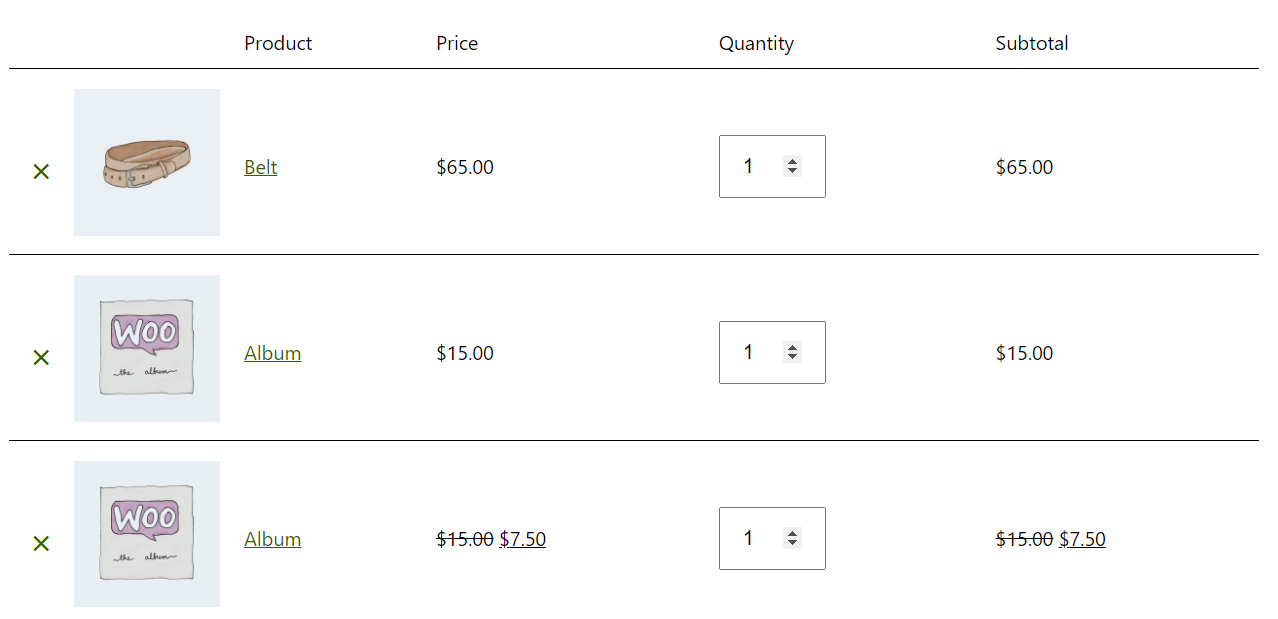
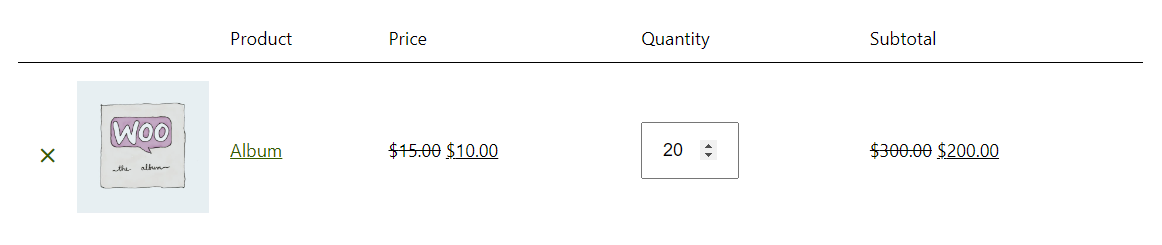
Product Discount
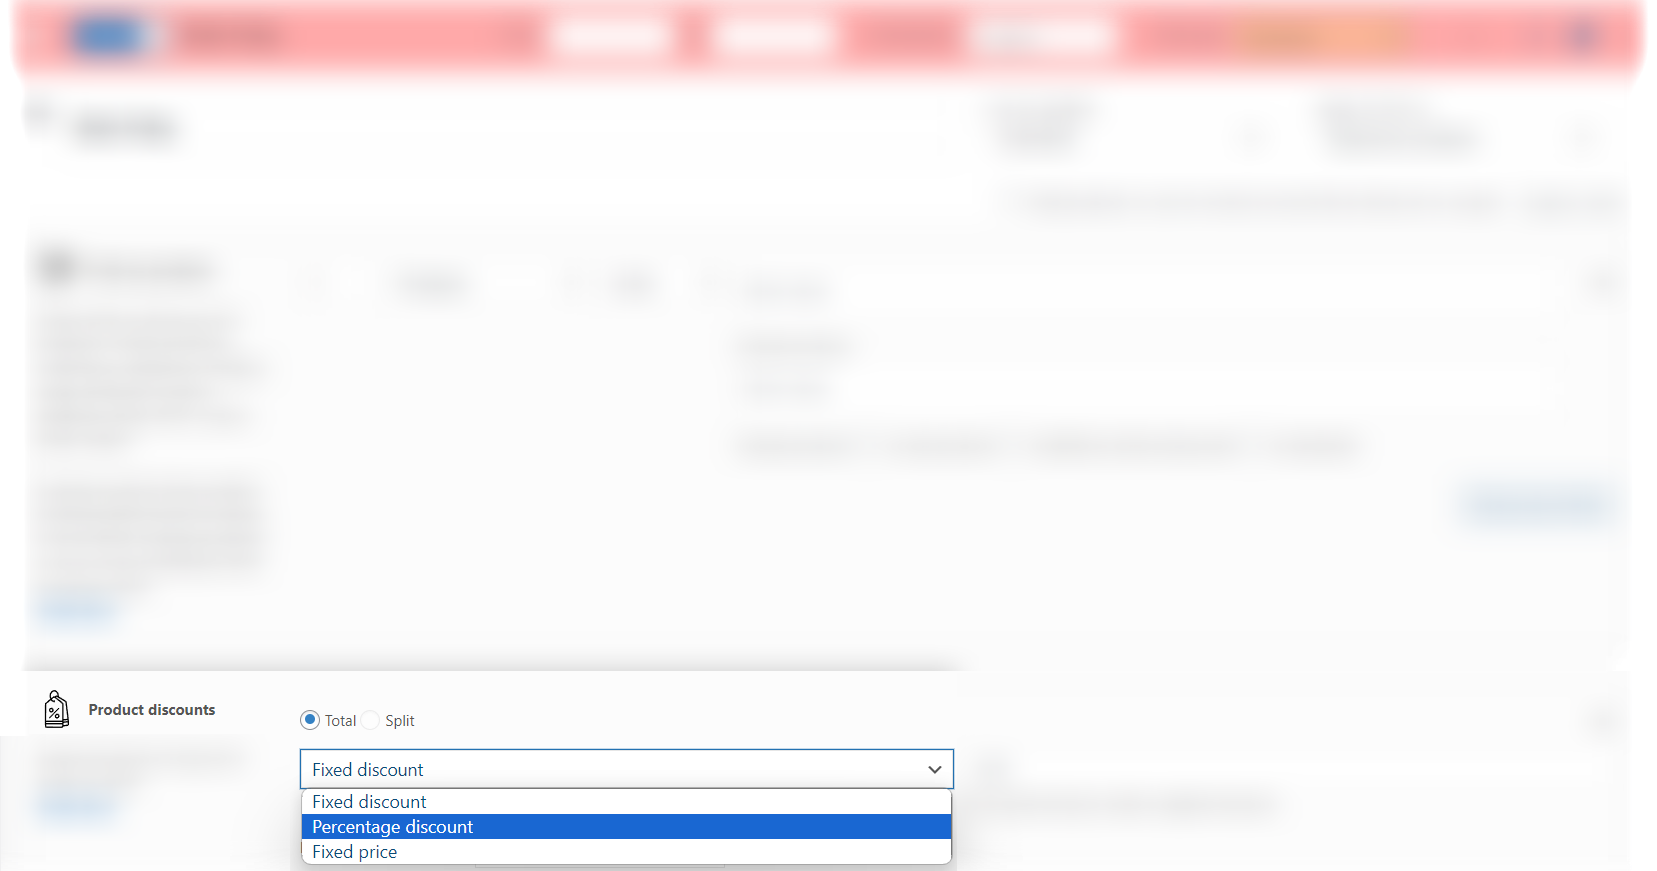
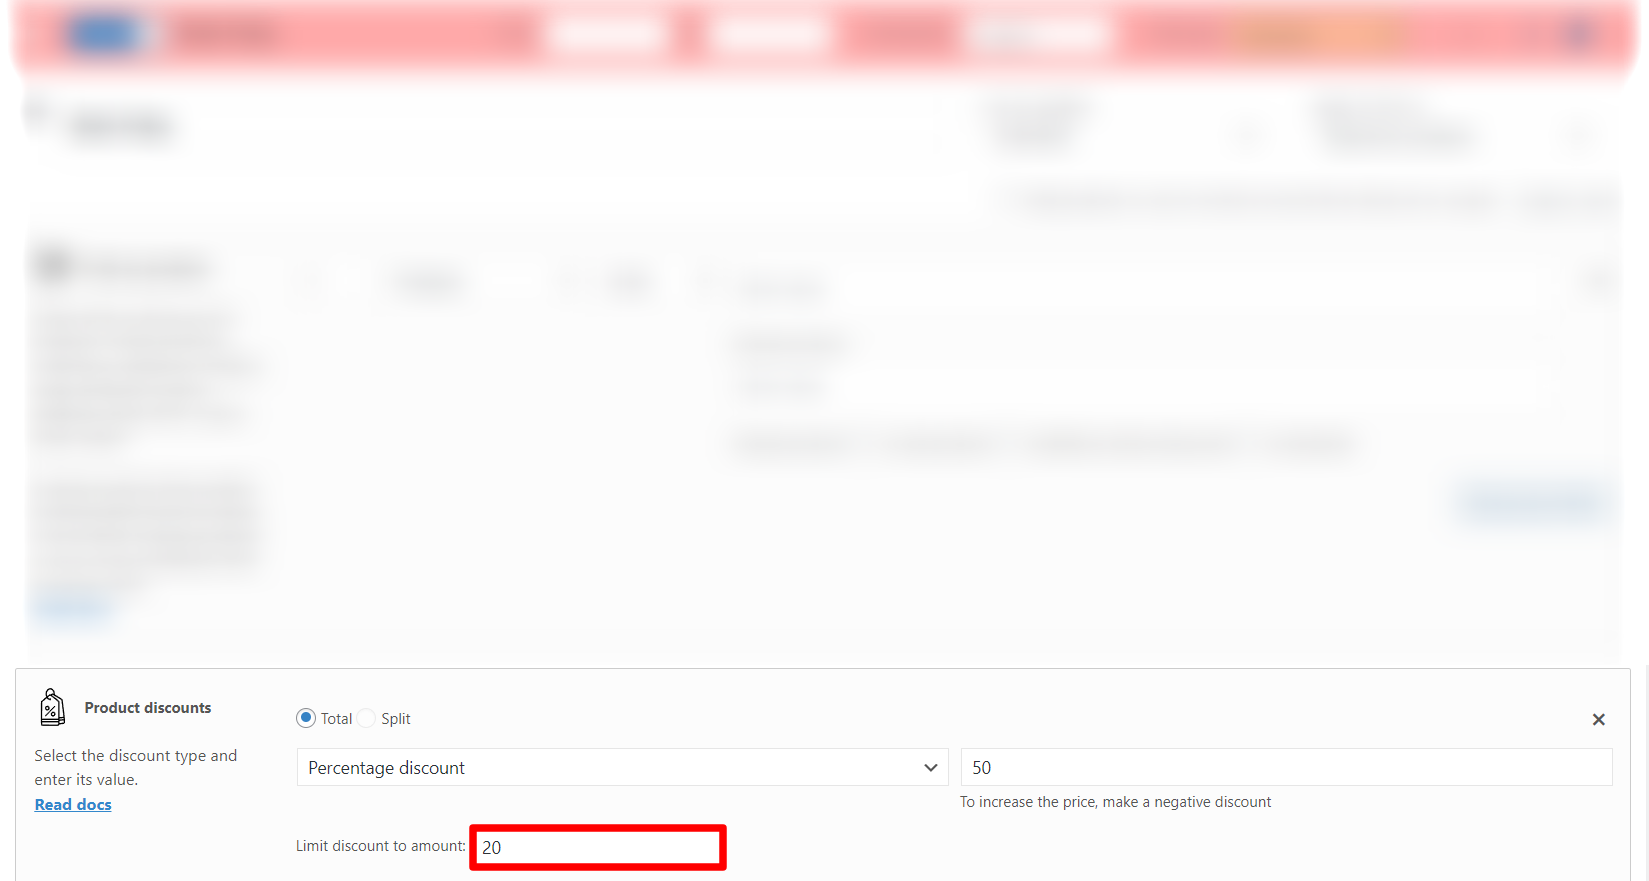
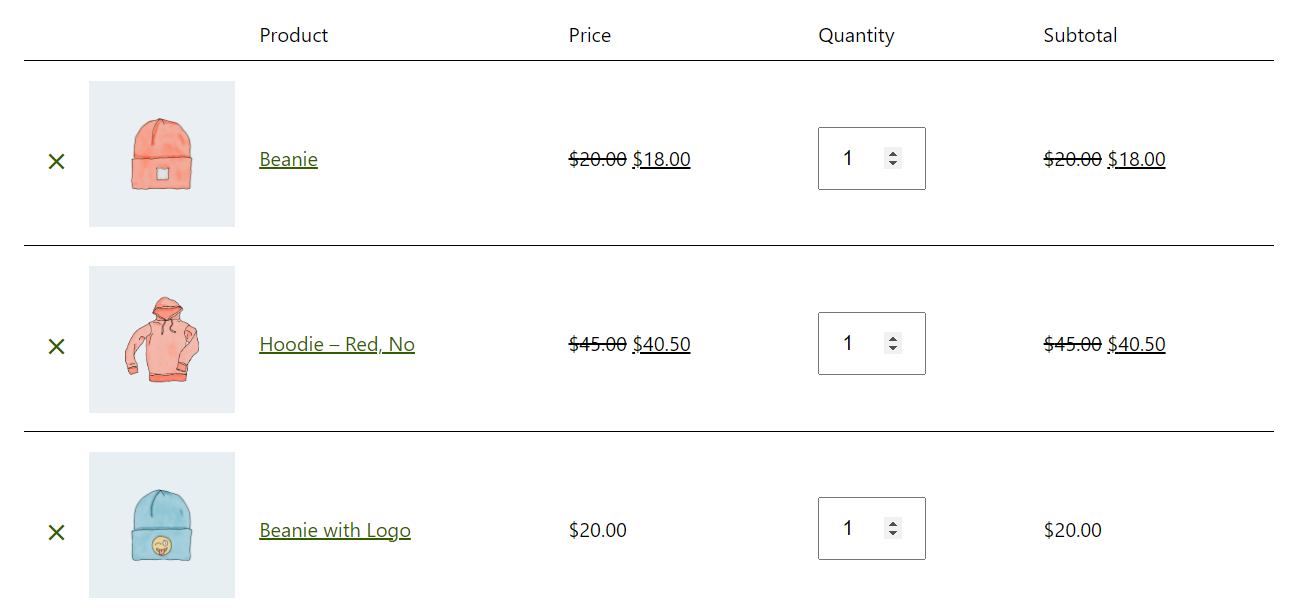
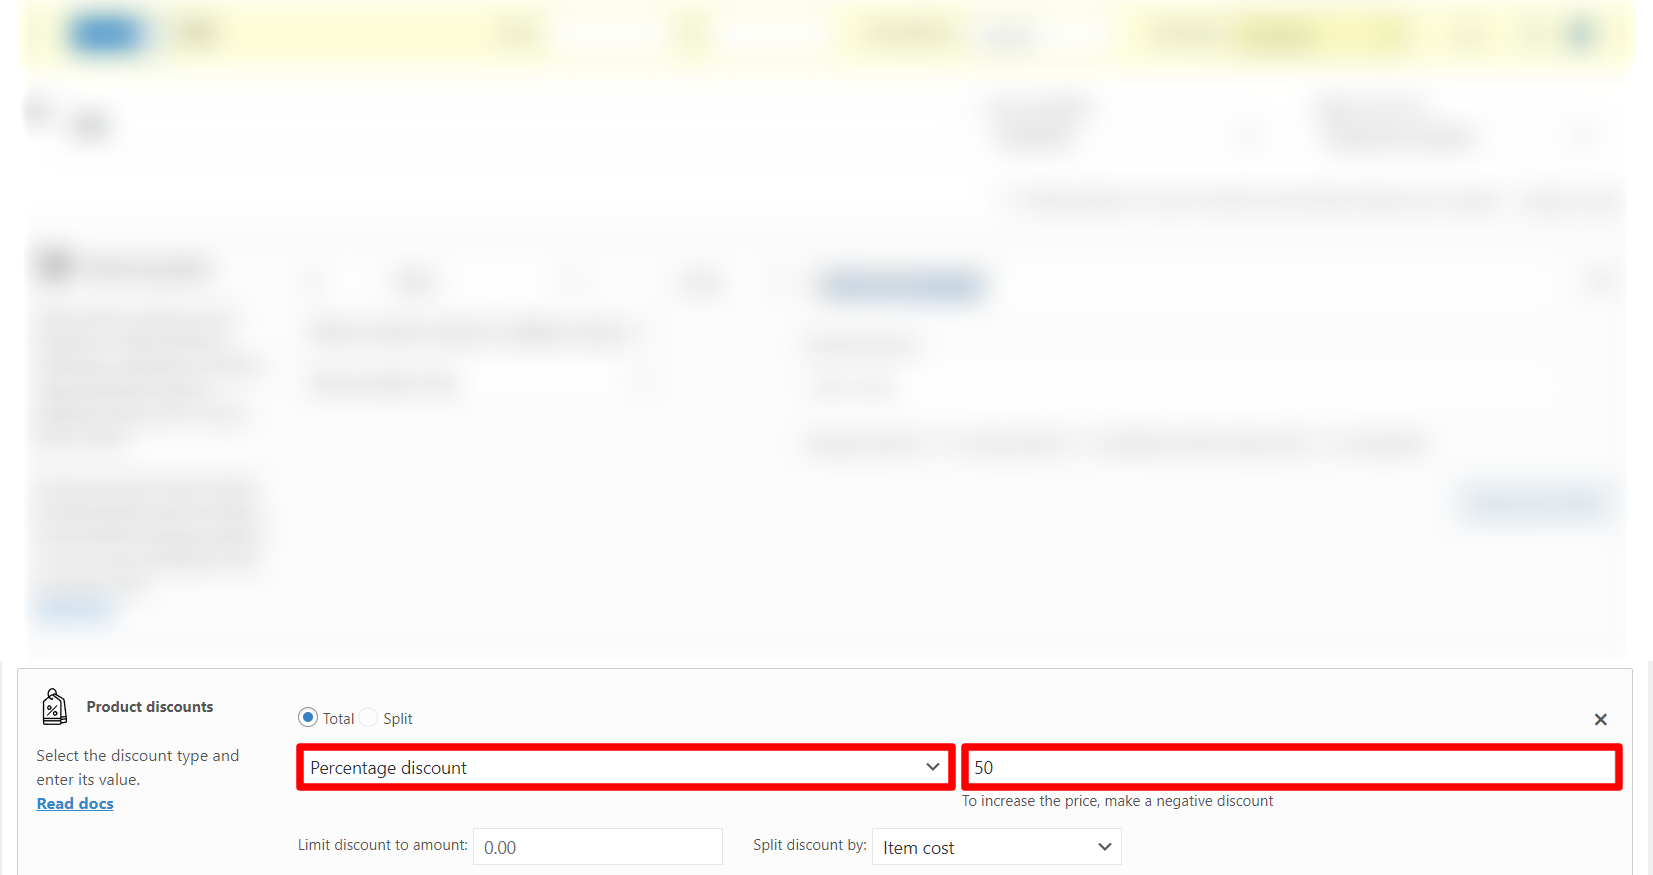
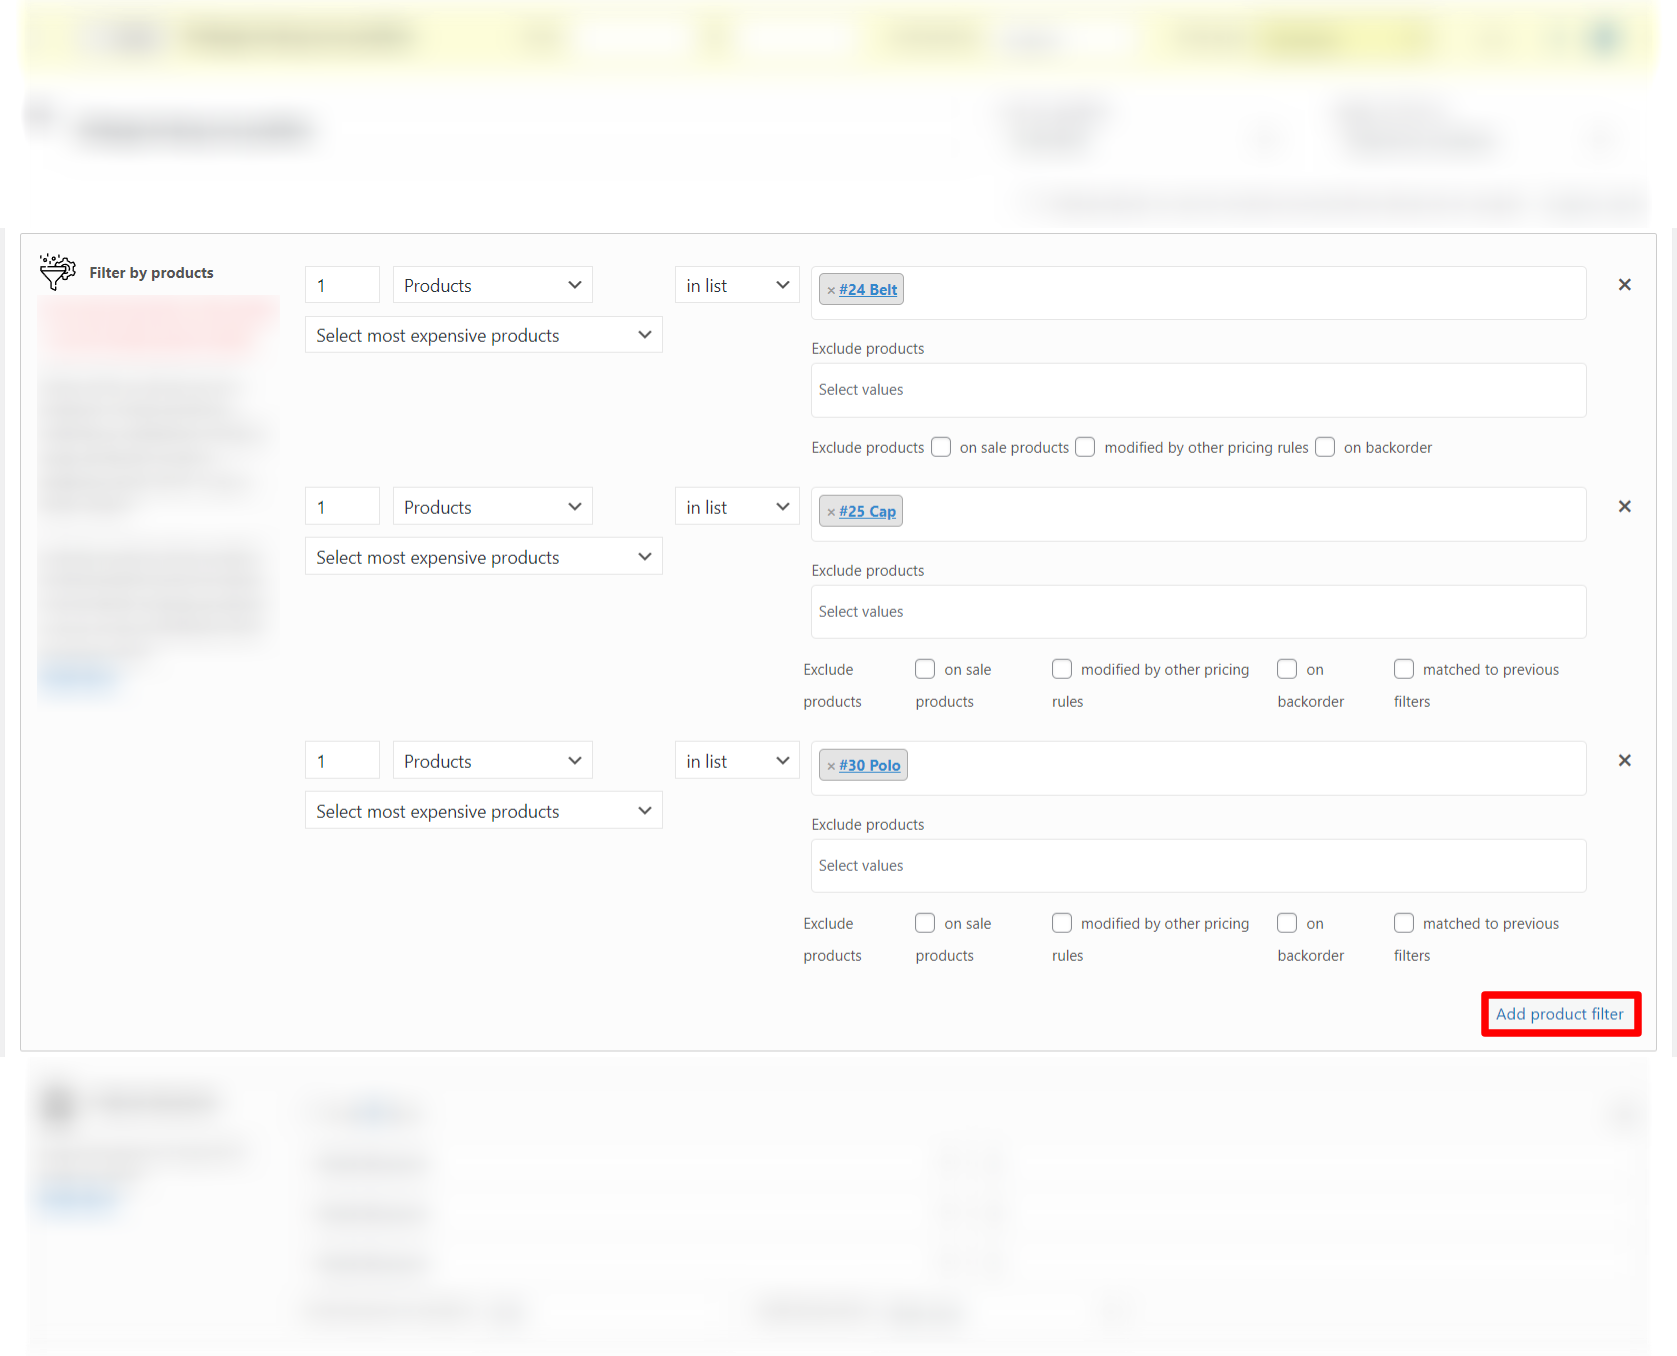
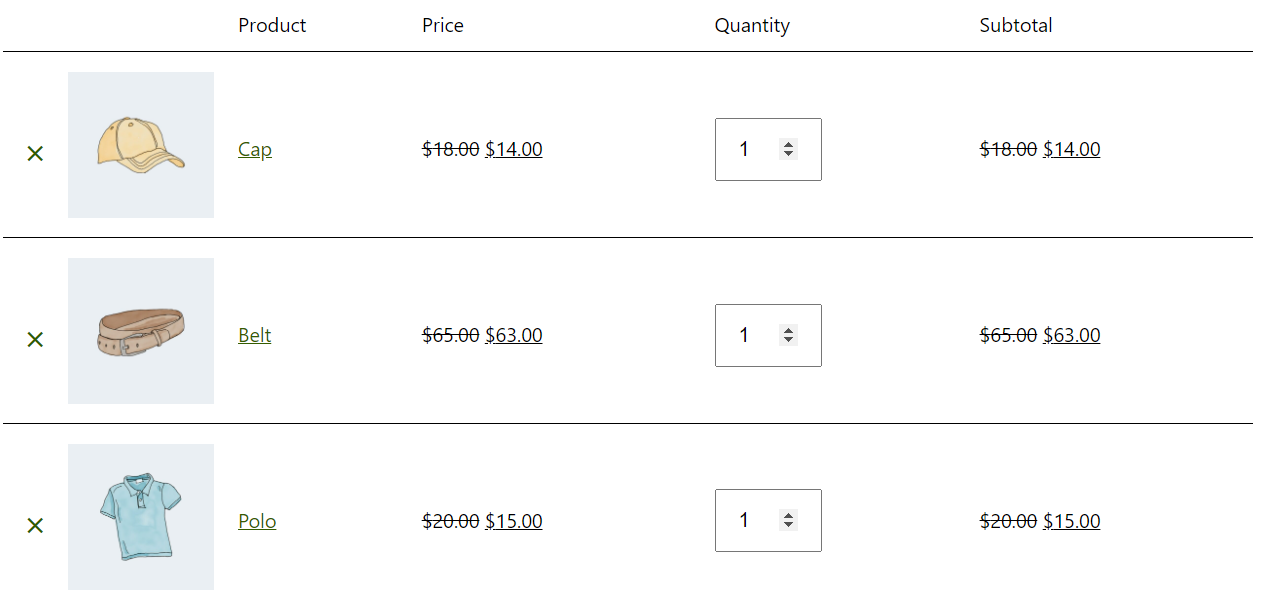
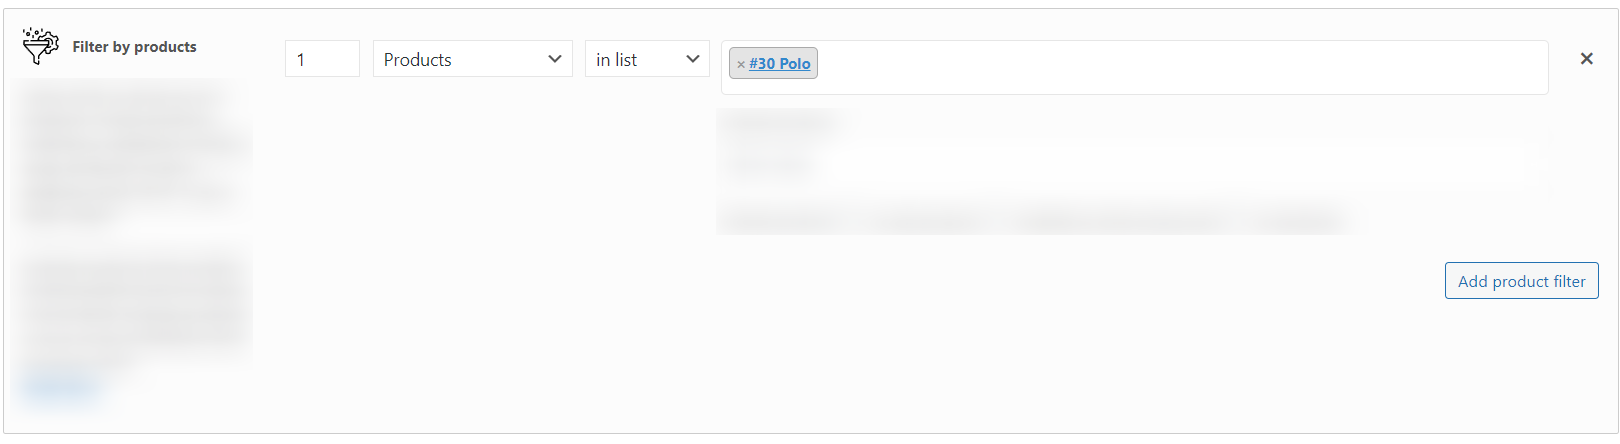
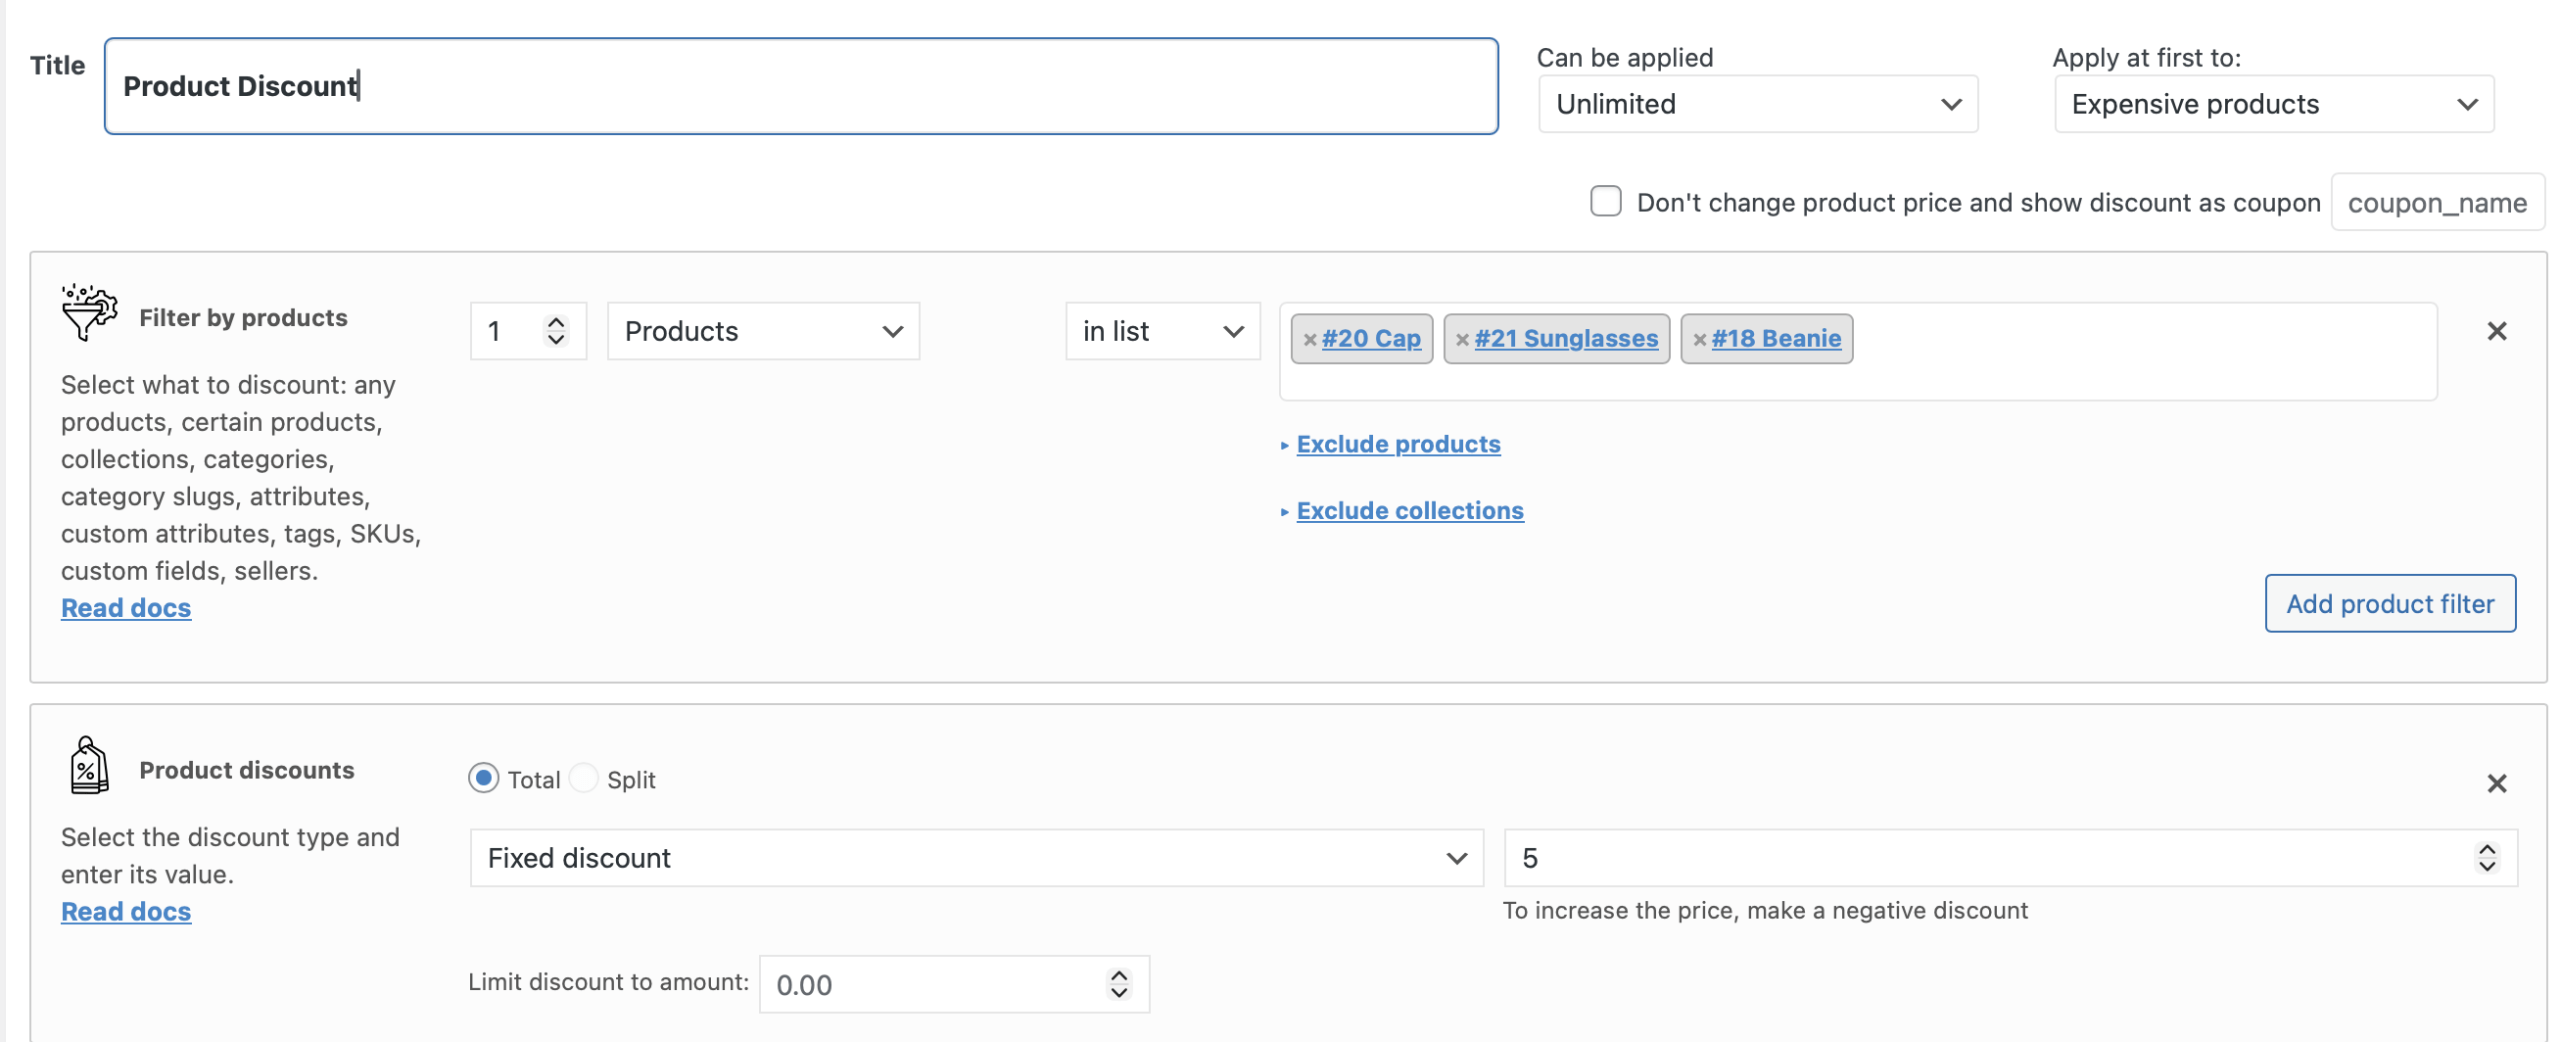
By applying discounts to specific products on the WooCommerce store, you can efficiently manage stock and amplify sales of targeted items. The exact products list to discount can be managed by the stock quantity or, for example, by the season. Customers gain access to lower pricing on the products they have been wanting to buy for a long time, increasing their satisfaction and likelihood of returning.
Simple Product Discount rule can be created by the Advanced Dynamic Pricing as the same way as in the first case, a Storewide Discount. But the only difference is in choosing the products that should be discounted in the Product Filter section. Also, there’s a tool that allows to import the CSV file with the products list and the discounts that should be applied on it, read about this tool more on our documentation site.
Category Discount
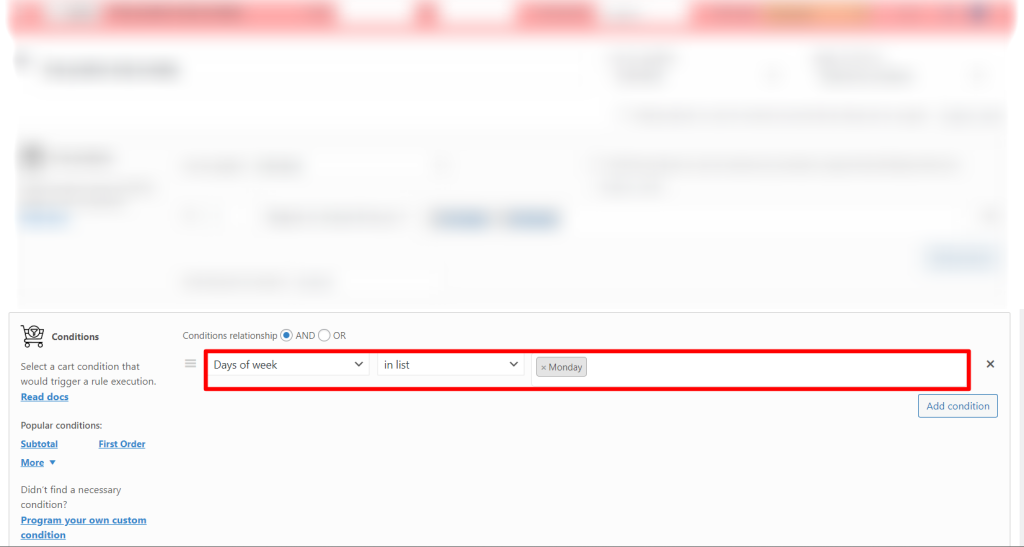
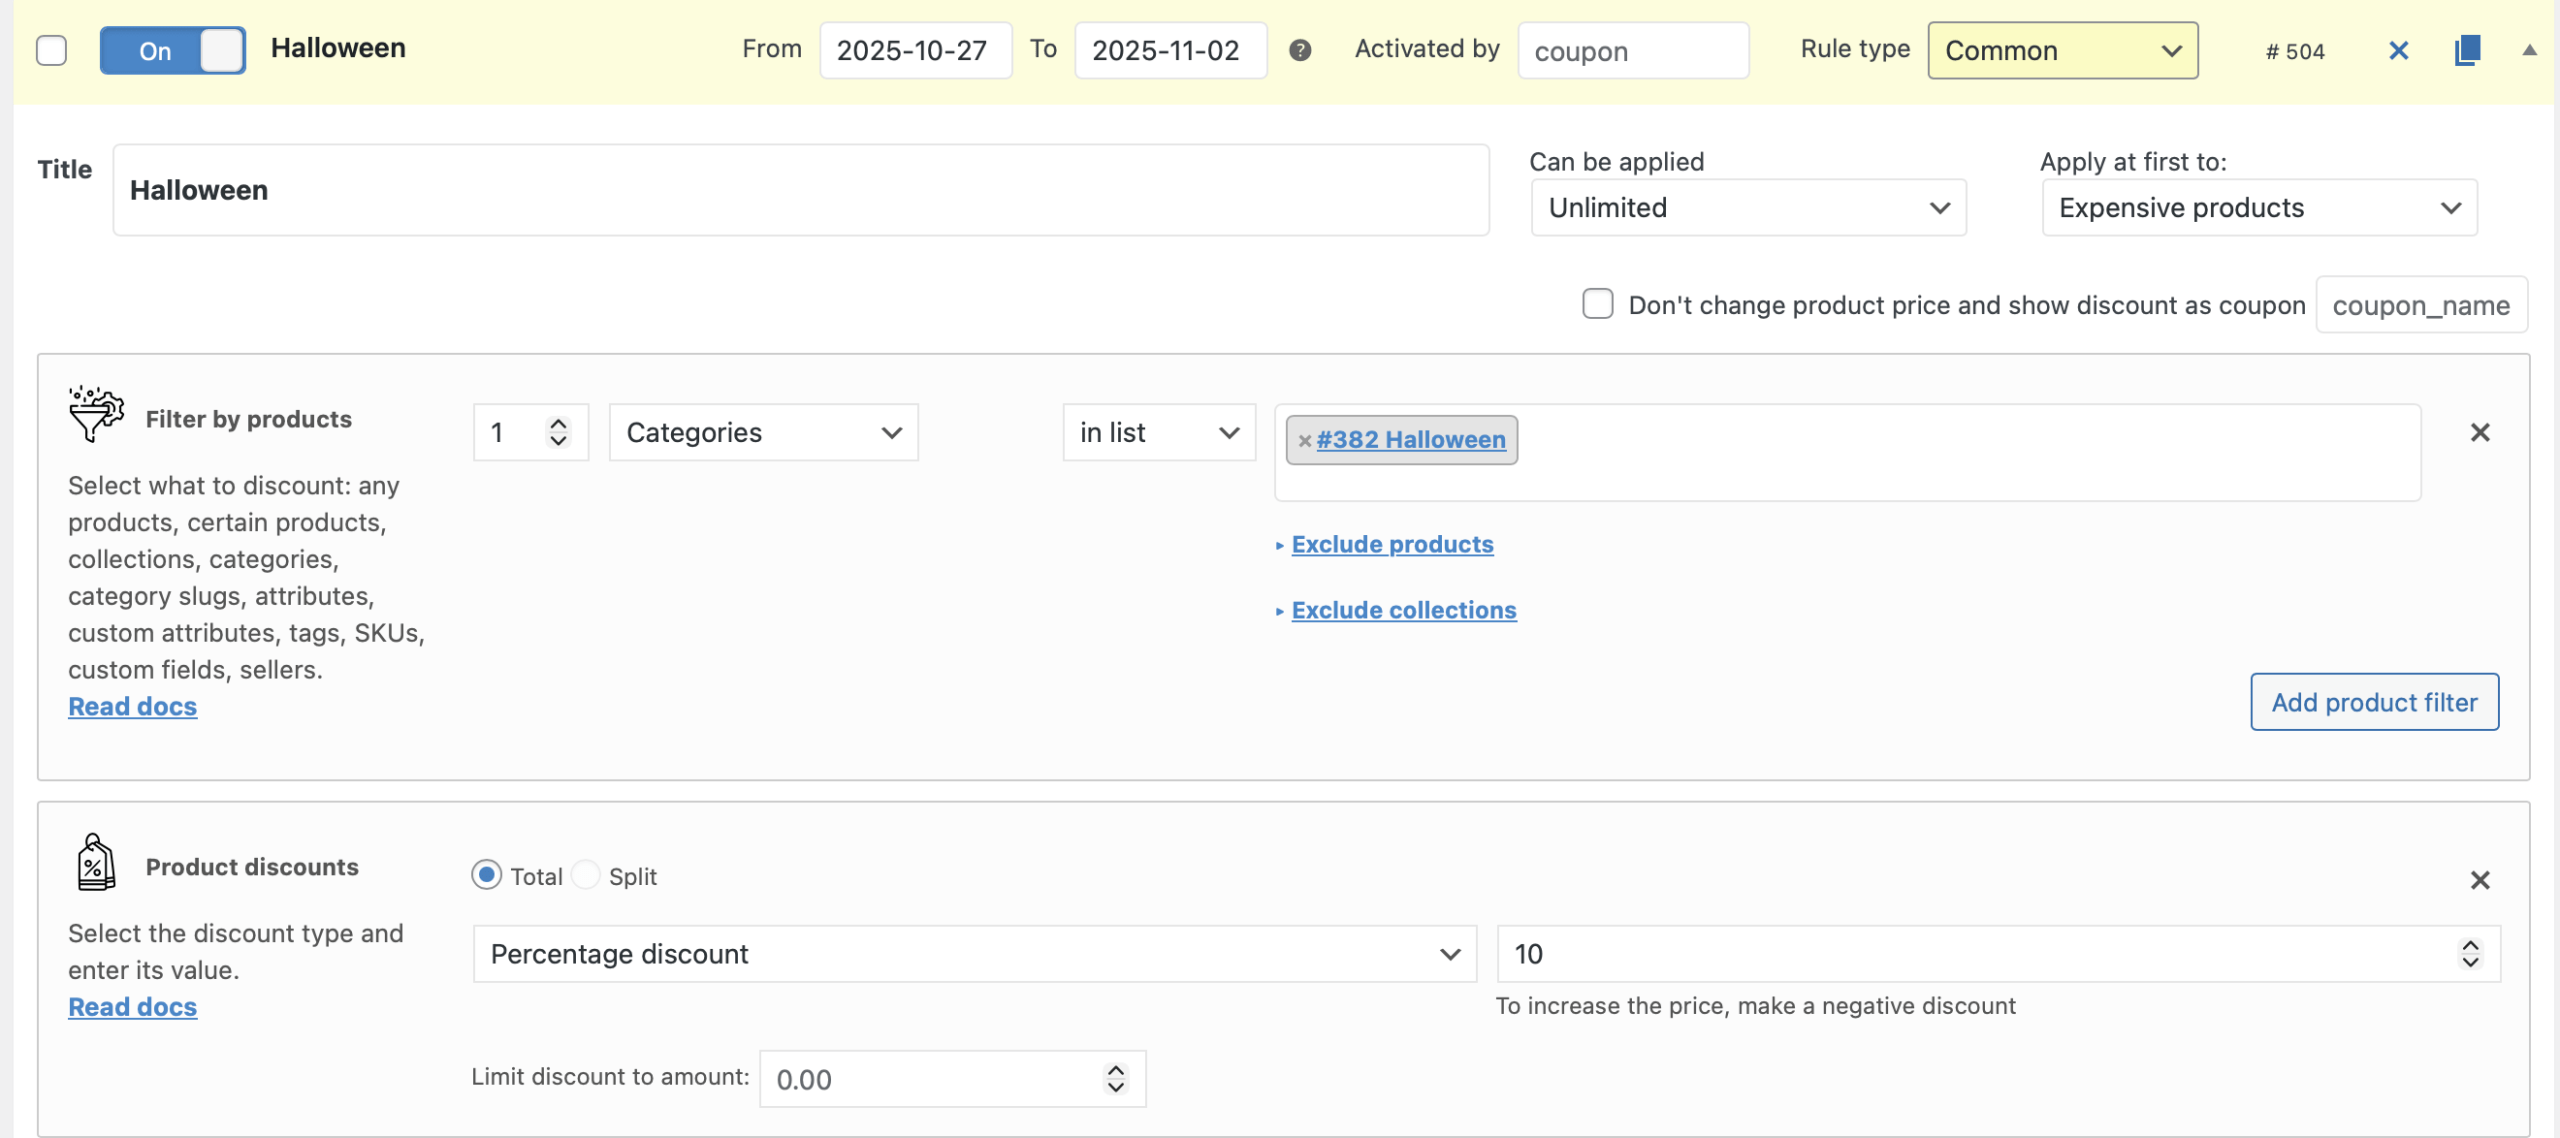
Category discounts enable businesses to spotlight certain product ranges, driving traffic and sales in those areas. There’s also a possibility in the WooCommerce to create a separate category for the season sales, for example, Halloween products, and make a discount only by this category on the Halloween. Customers benefit from reduced prices on items within specific categories, encouraging exploration and trials.
Let’s create a discount for the Halloween category of the products on the Halloween week with the Advanced Dynamic Pricing and Discount Rules for WooCommerce. It’s also need to choose the Product discount template and find the “Category” value in the “Product filter” drop-down. Let’s find the “Halloween” category. Also, let’s limits the rule’s applying only on the Halloween week and input the dates near the rule’s name.
Role Discount
Providing discounts based on user roles fosters loyalty among key customer segments, such as members or wholesale buyers, boosting long-term profits for the store. Customers in these roles enjoy special pricing, enhancing their loyalty to the WooCommerce store.
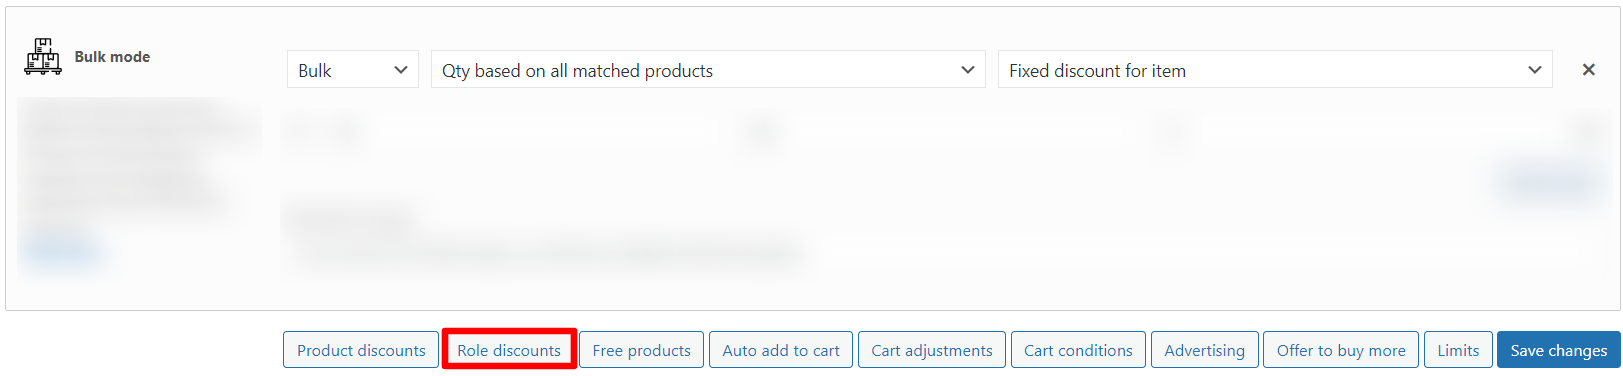
One of the frequently asked rule for the role discount model is a discount for the wholesalers. In Advanced Dynamic Pricing and Discount Rules for WooCommerce plugin it’s possible to create in a few clicks: just choose the template “Role discount”, find the “Wholesaler” role and input the discount value and type.

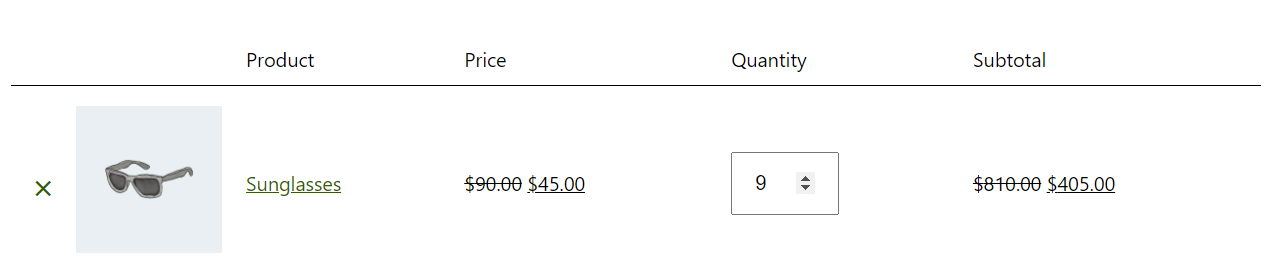
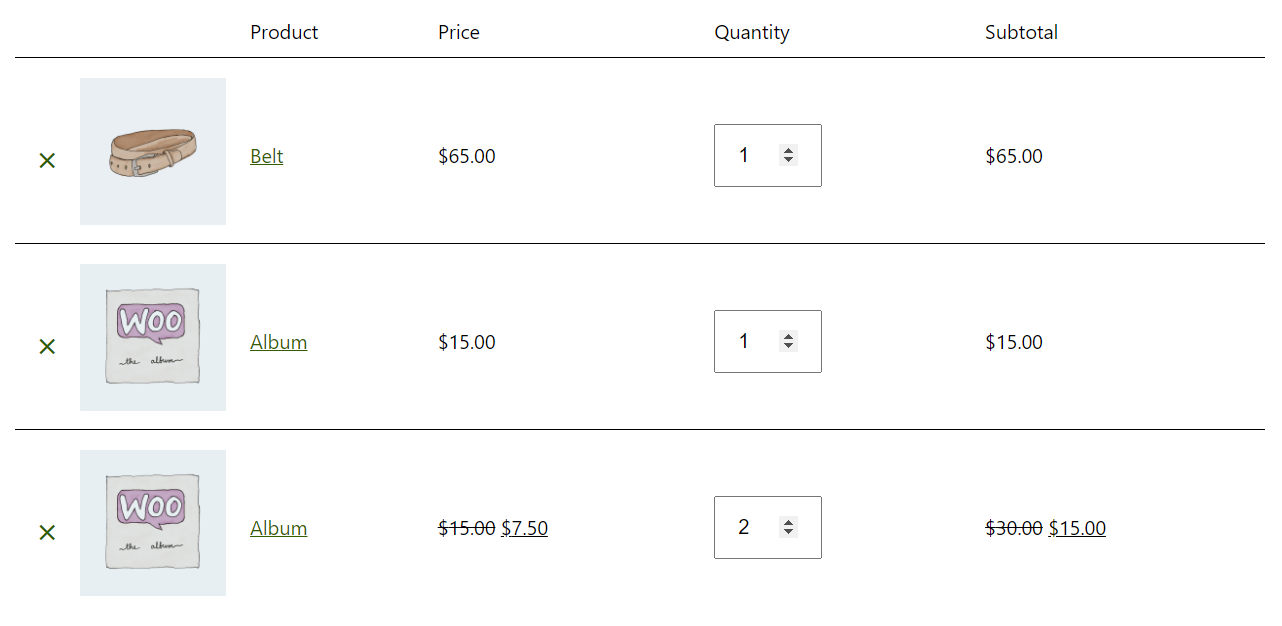
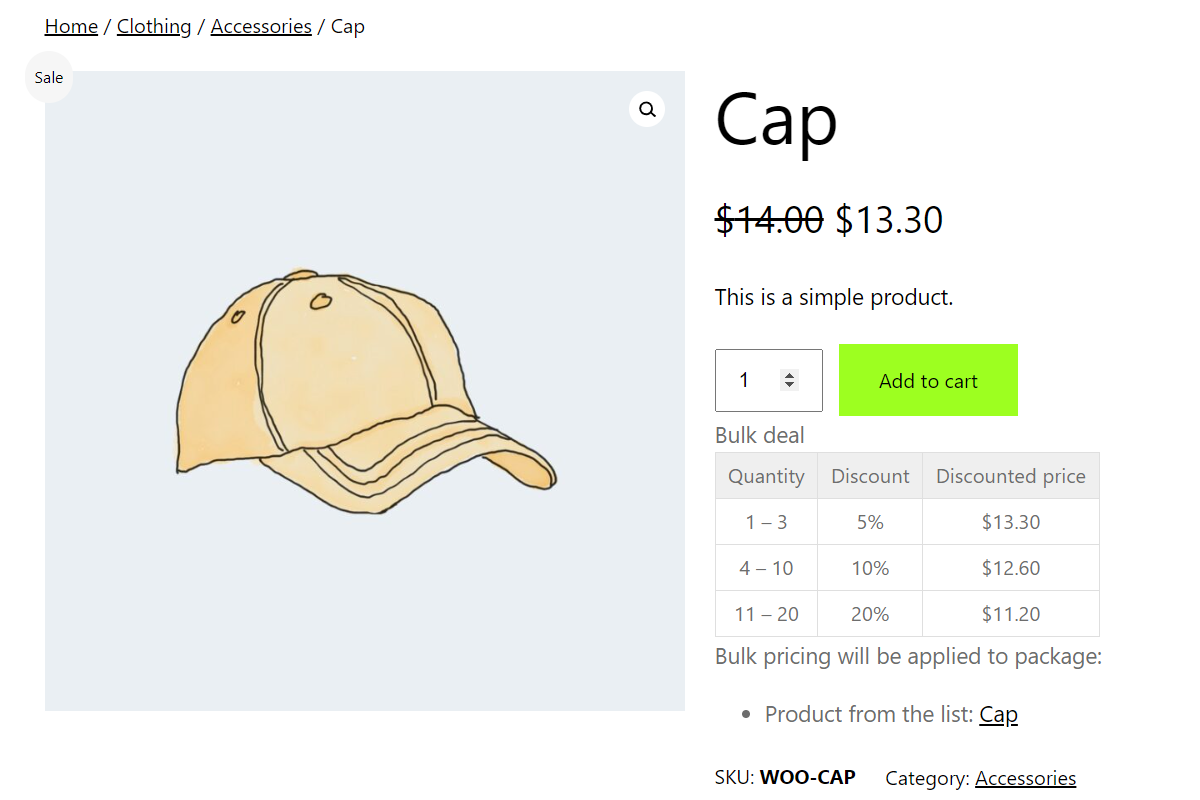
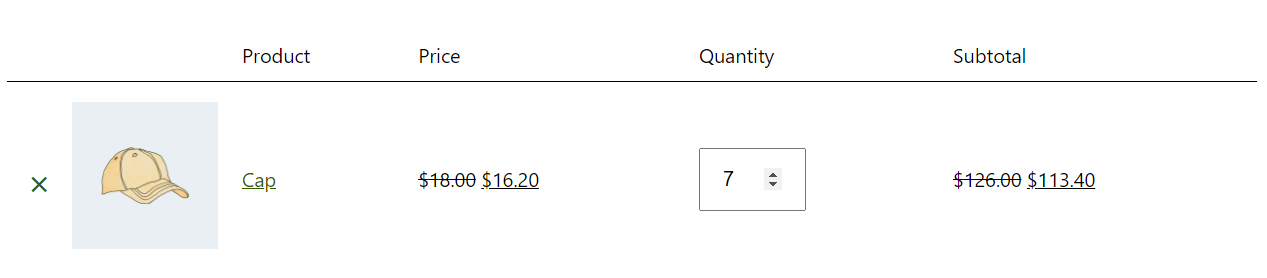
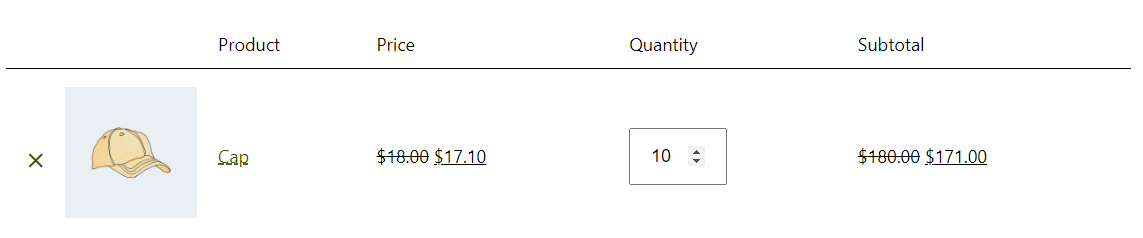
Bulk Discount
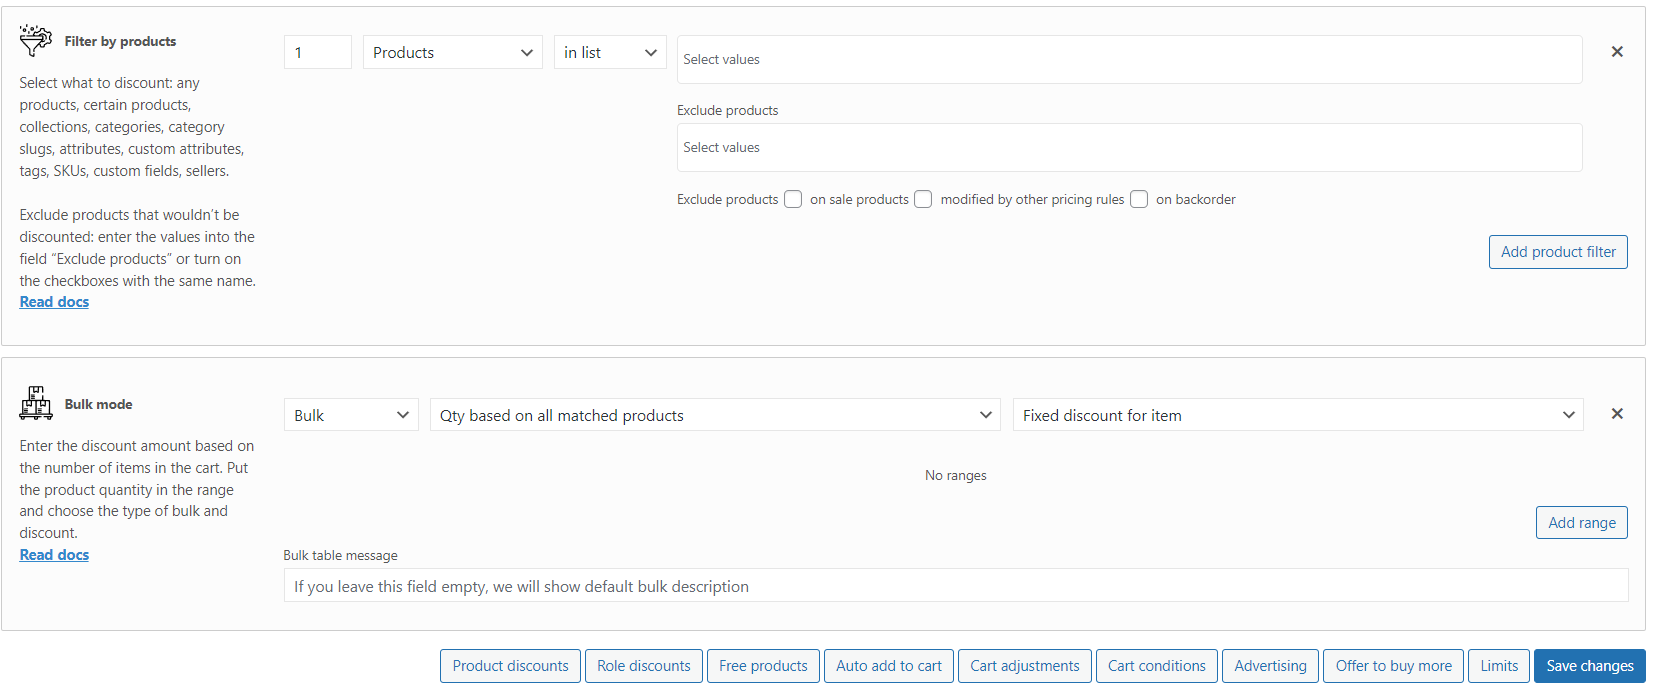
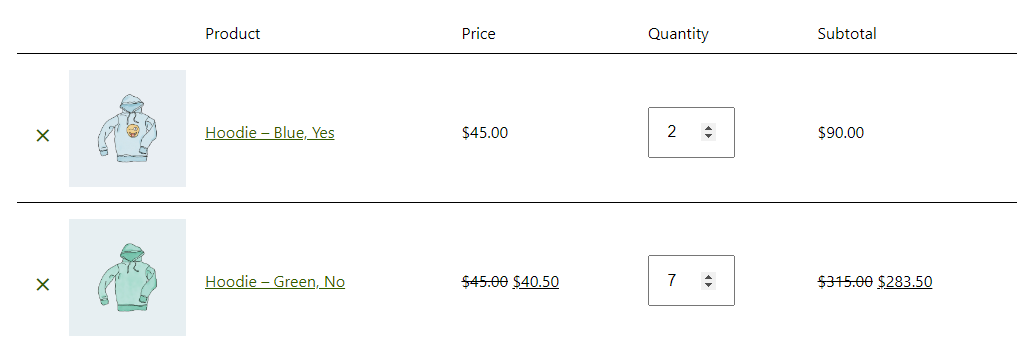
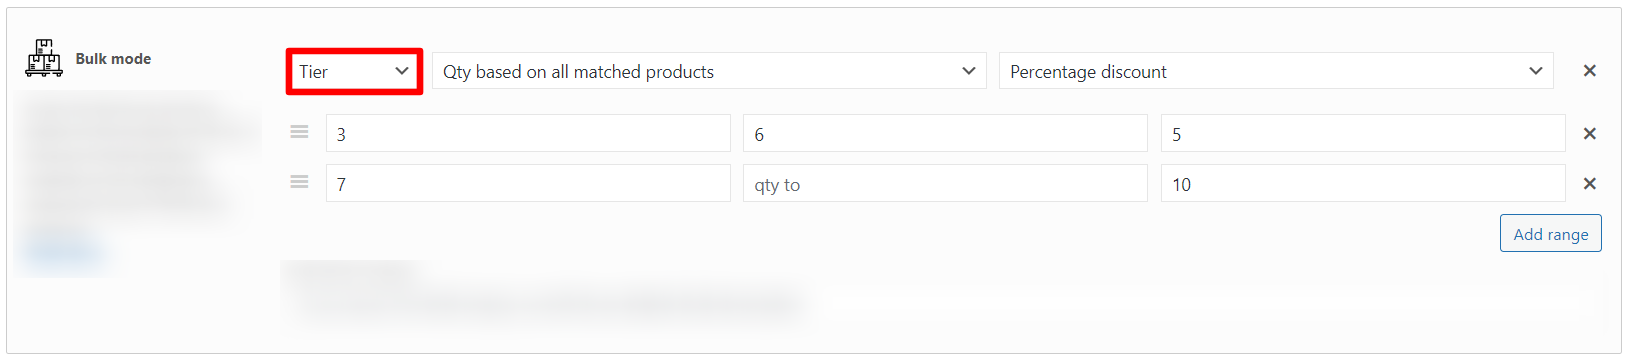
Encouraging bulk purchases increases overall sales and reduces inventory for the business. Customers benefit from reduced pricing on large quantities, making it attractive for them to buy in bulk and save more.
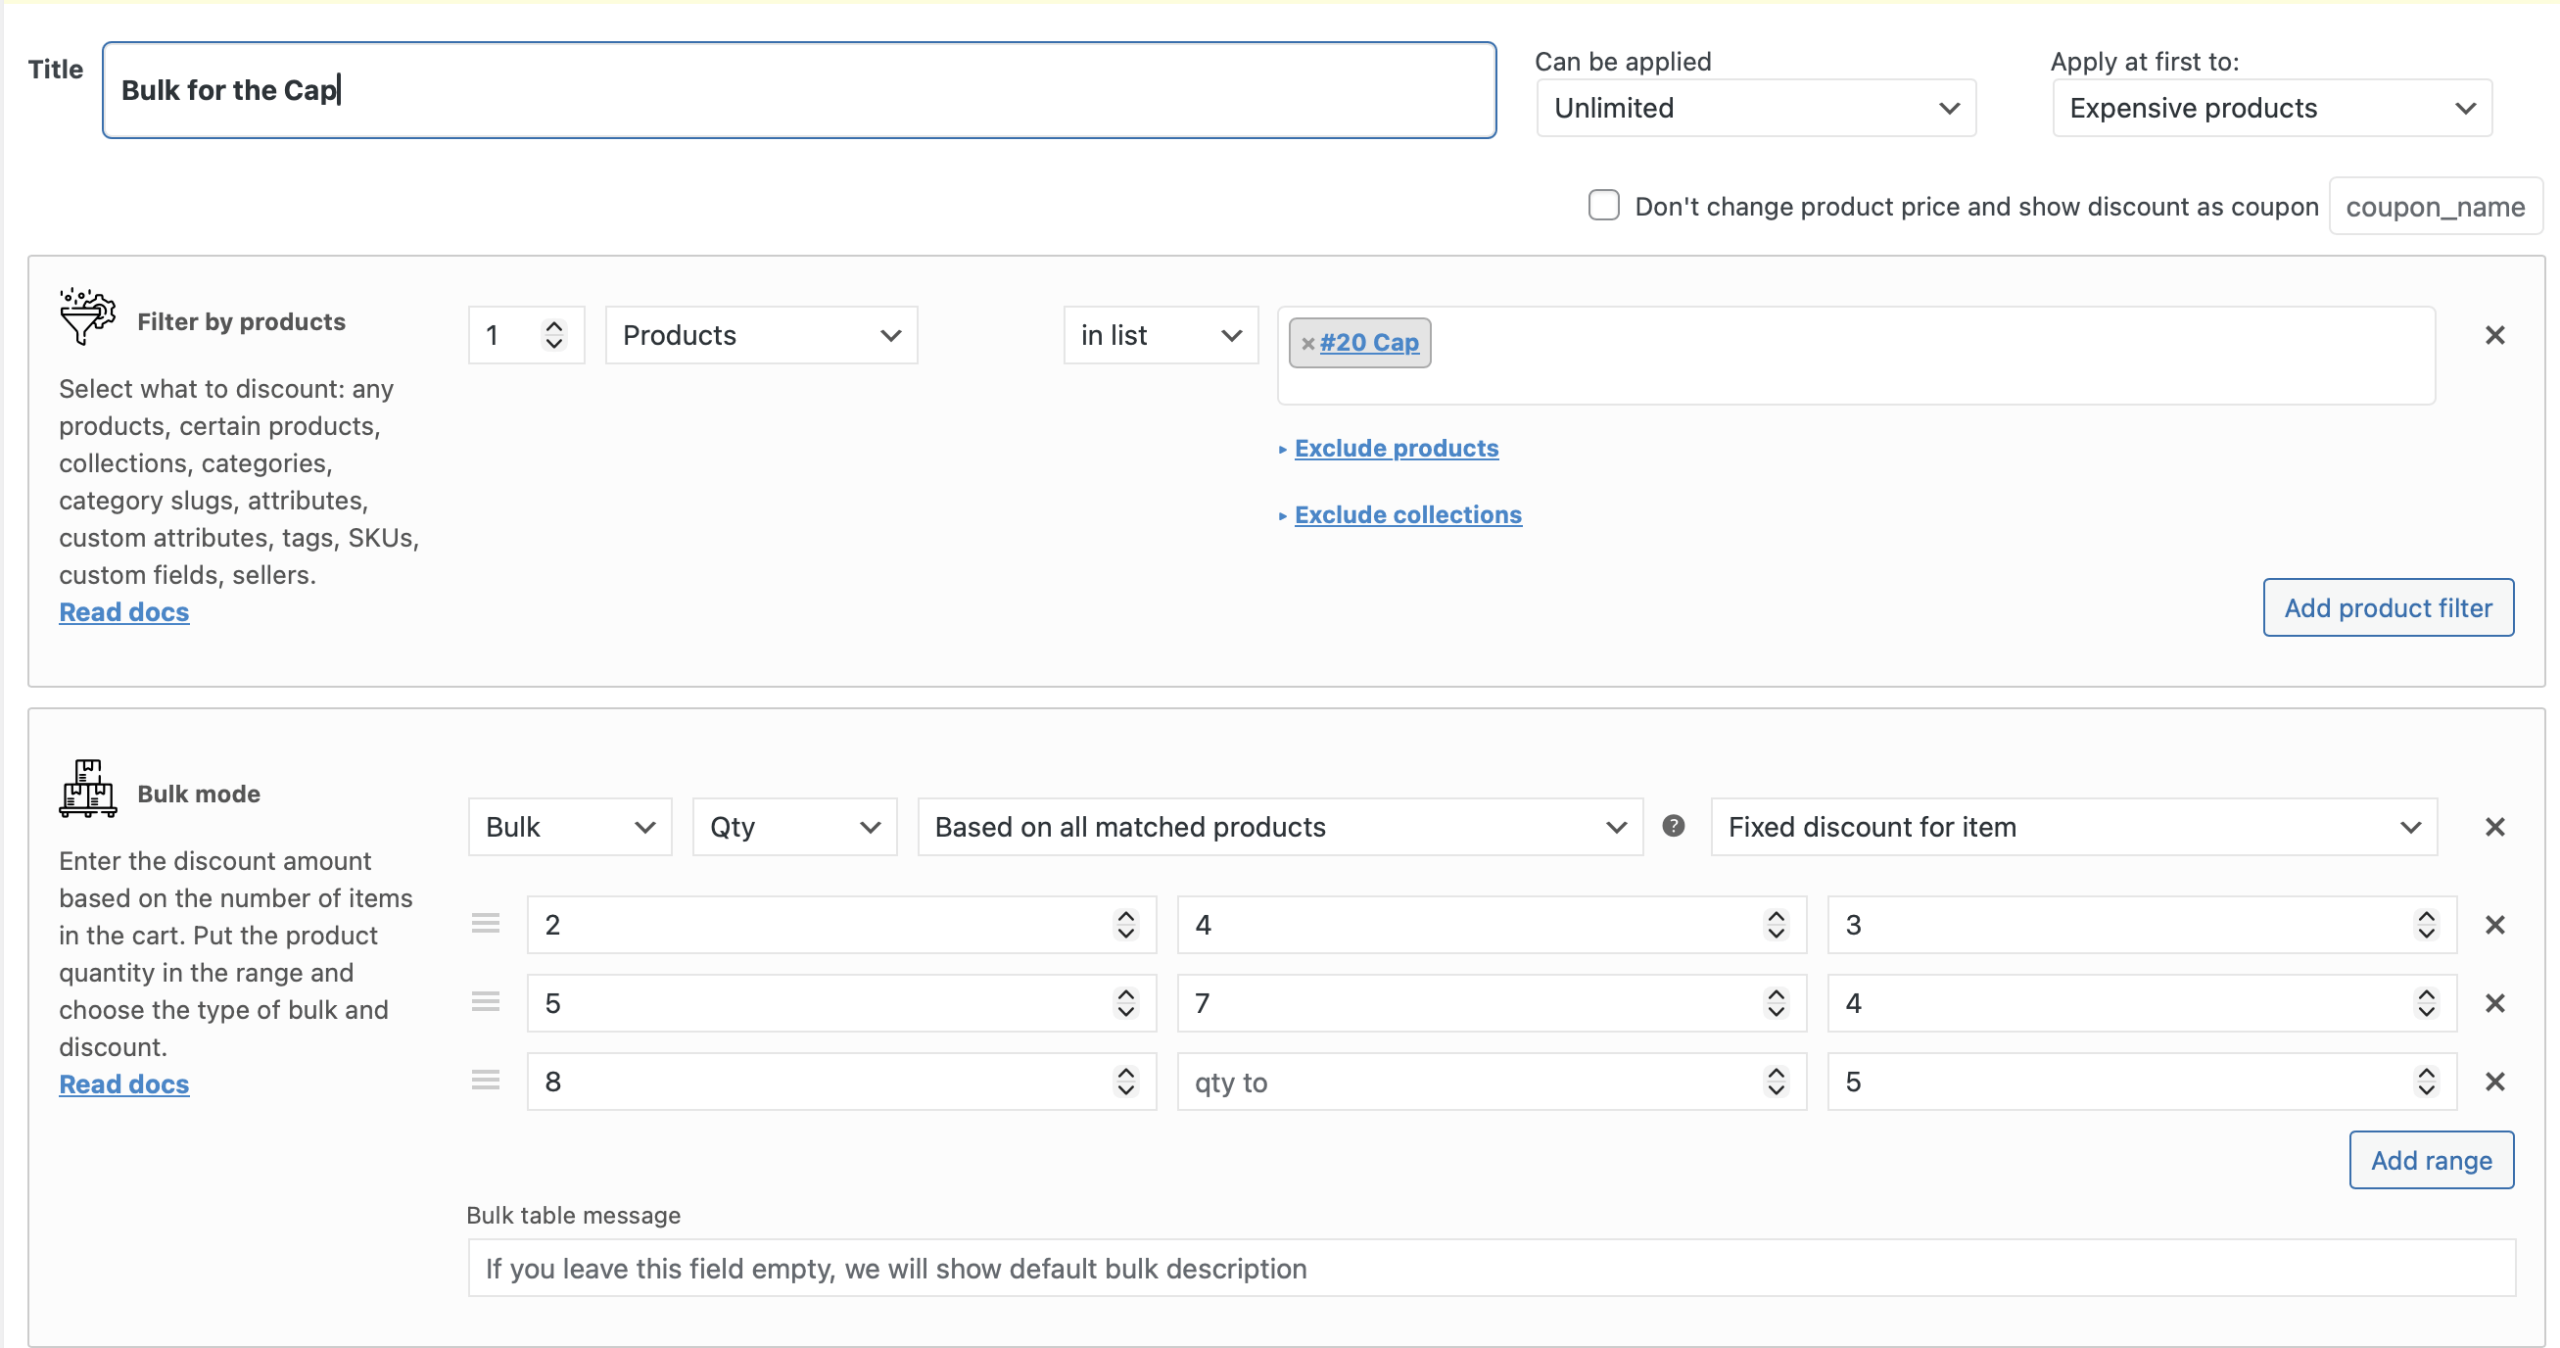
Let’s create a simple bulk discount for the filtered product with the Advanced Dynamic Pricing and Discount Rules for WooCommerce: click “Add rule” button and choose “Bulk” template. There are a lot of bulk modes and discount modes for the bulk rules, read more about them all on our doc site.
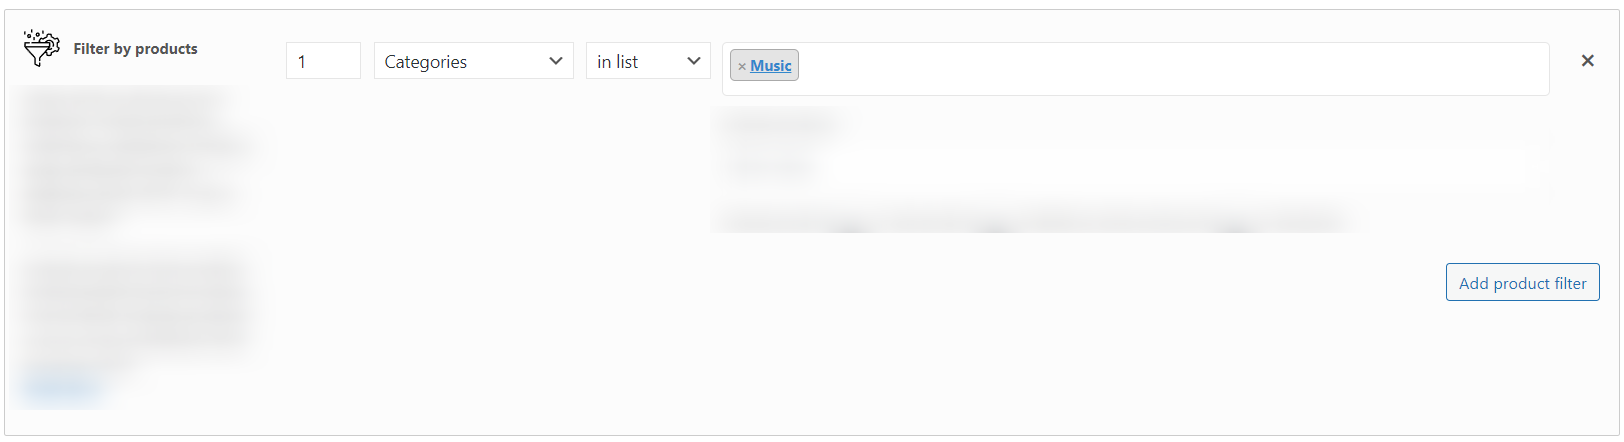
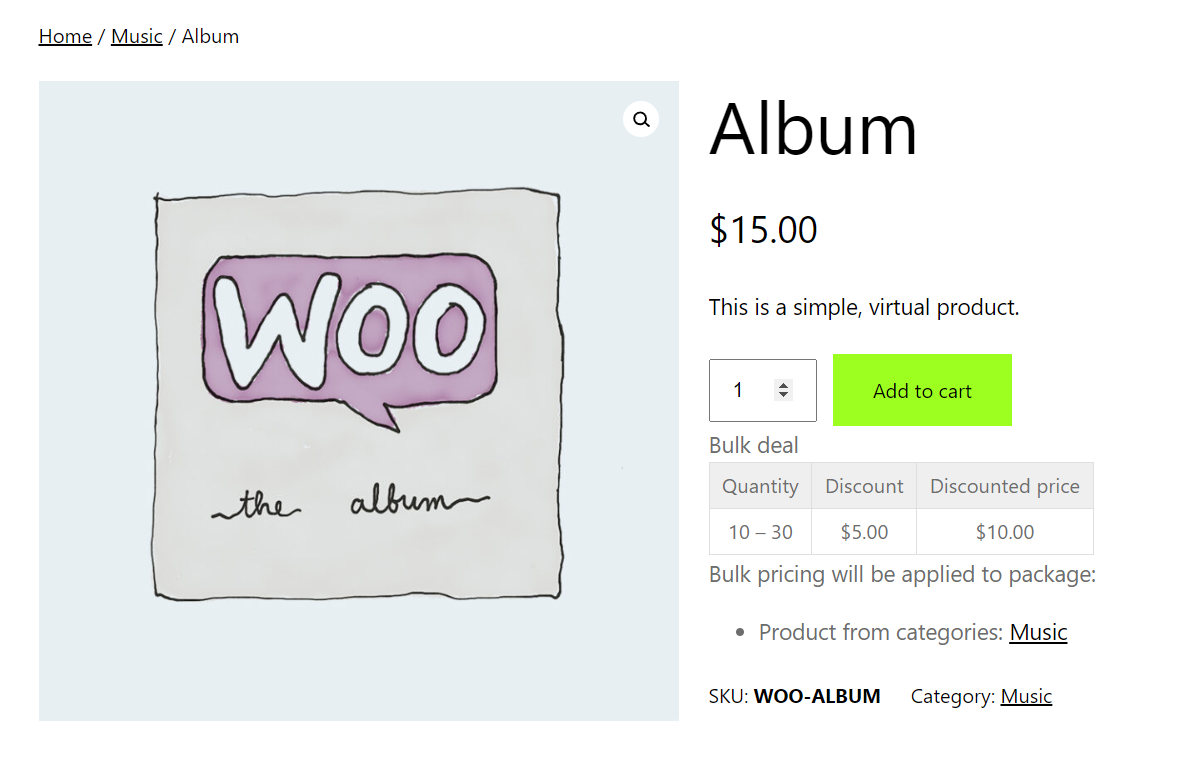
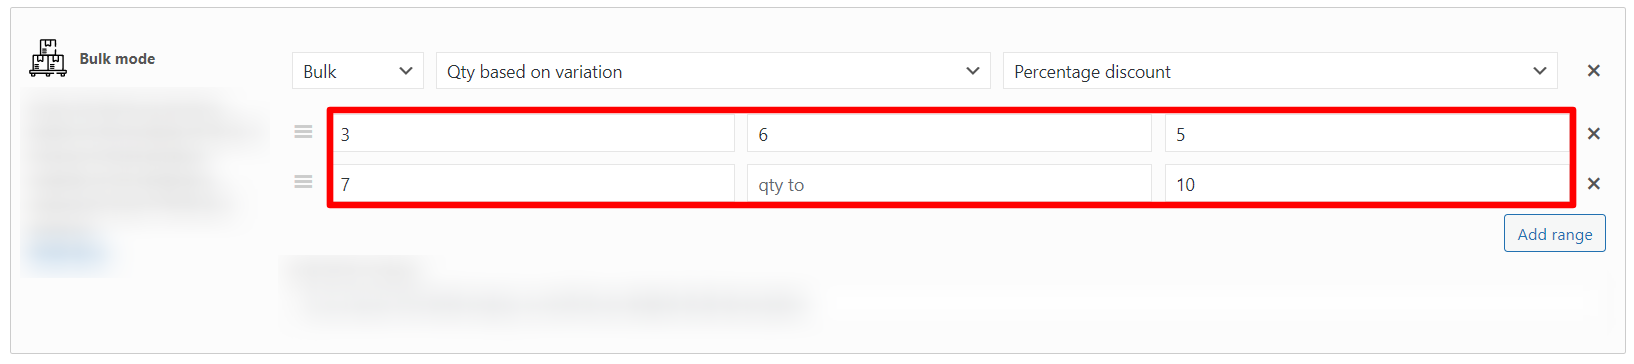
Bulk Discount for Category
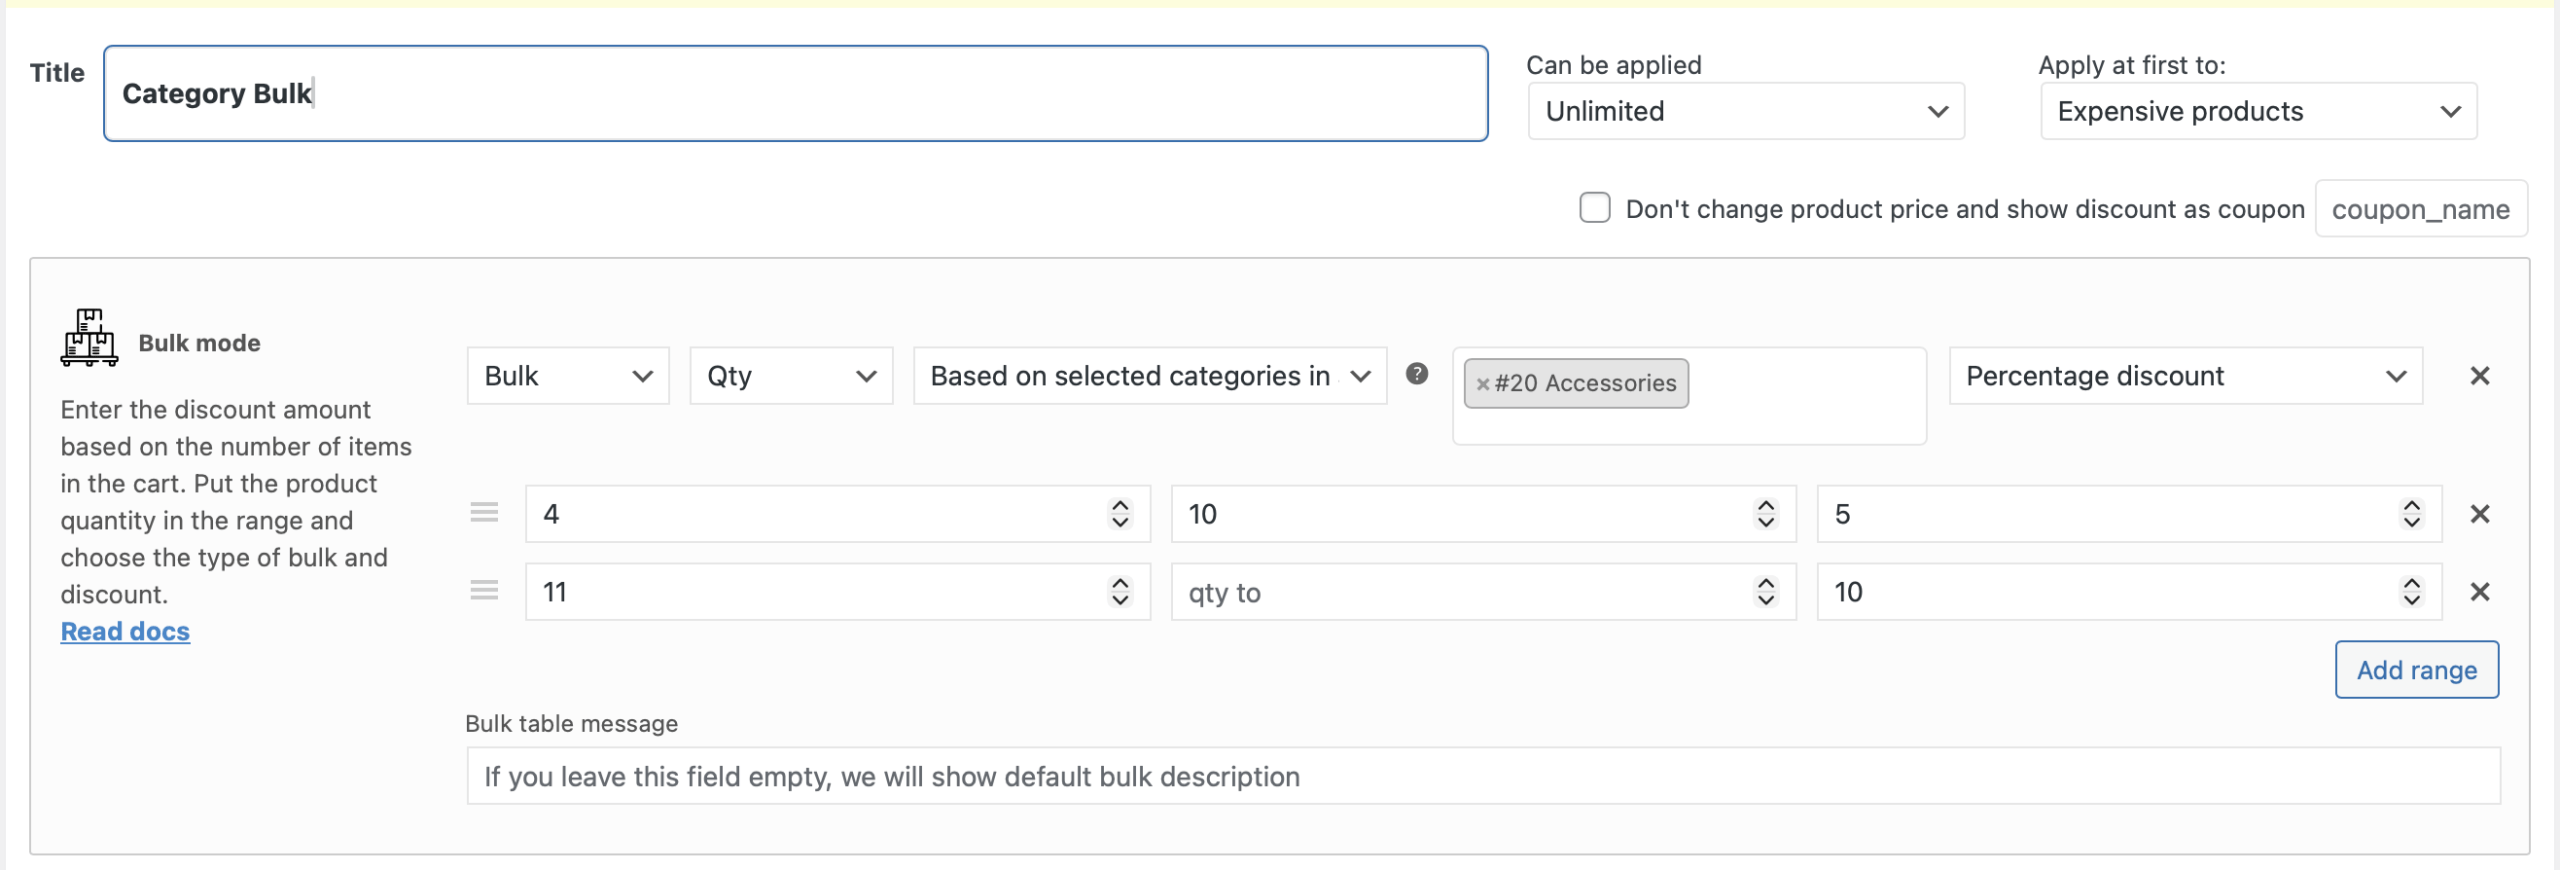
This strategy increases the movement of products within specified categories, generating profits for the business. Customers find value in purchasing bulk quantities at discounted prices within chosen categories. It’s easy to create the bulk rule for category: just change the Product Filter type in the example above, or change the bulk’s mode to the “Qty based on the selected category”:
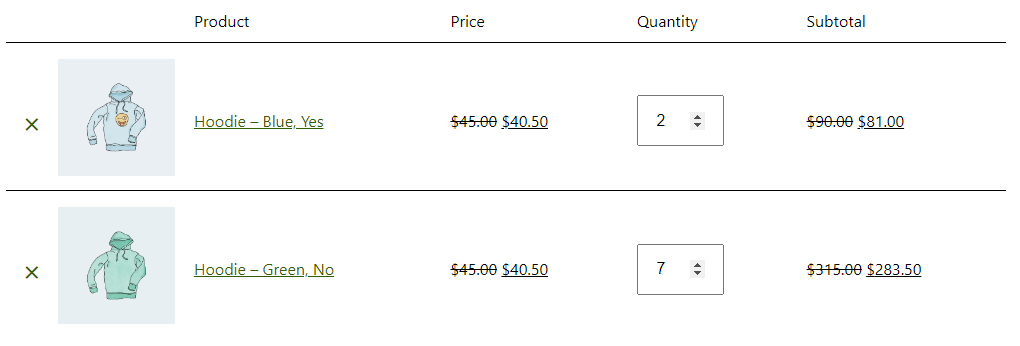
Bulk Discount for Role
Employing bulk discounts for specific roles optimizes sales and loyalty among segmented customer groups. Role-specific customers enjoy additional savings on bulk purchases, underscoring their value to the store.
For creating a bulk role rule, just choose the “Role Bulk” template:

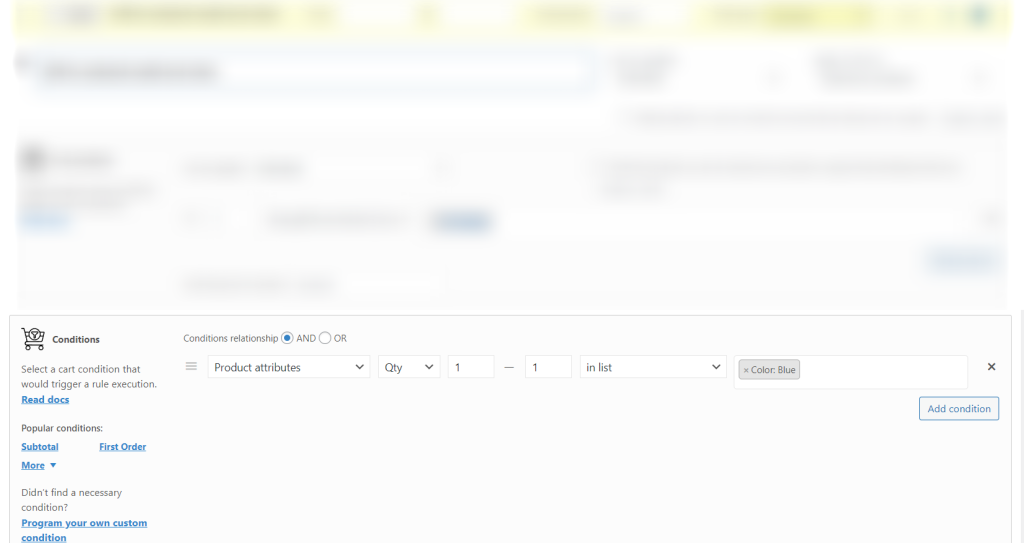
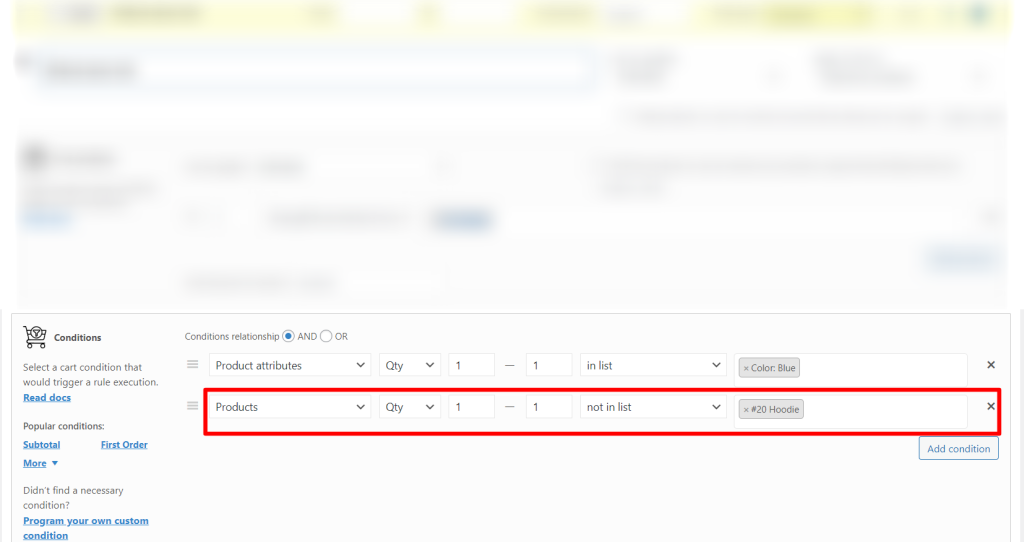
BOGO (Buy One Get One)
BOGO deals enhance customer engagement and inventory turnover, boosting store profitability for your WooCommerce store. Customers enjoy receiving additional products for free, enticing them to purchase and return for future offers.
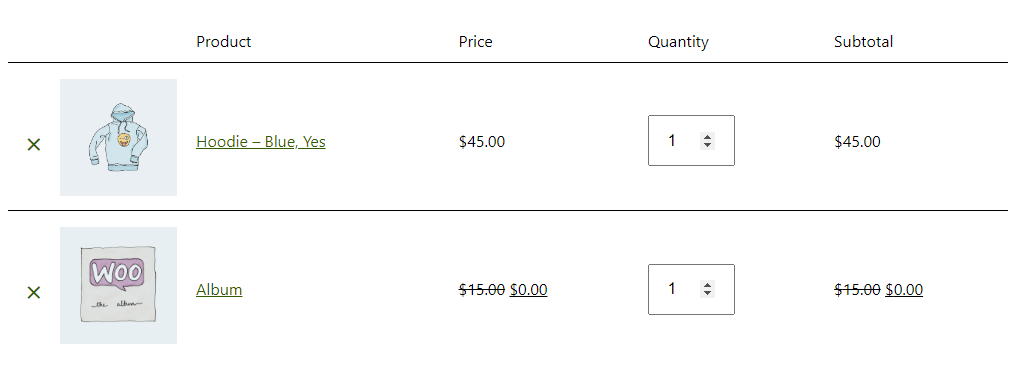
Using the Advanced Dynamic Pricing for WooCommerce you can create a BOGO rule using the corresponding template: “BOGO (free)”. It’s easy to choose the product that will be added to the cart for free with the filtered product.

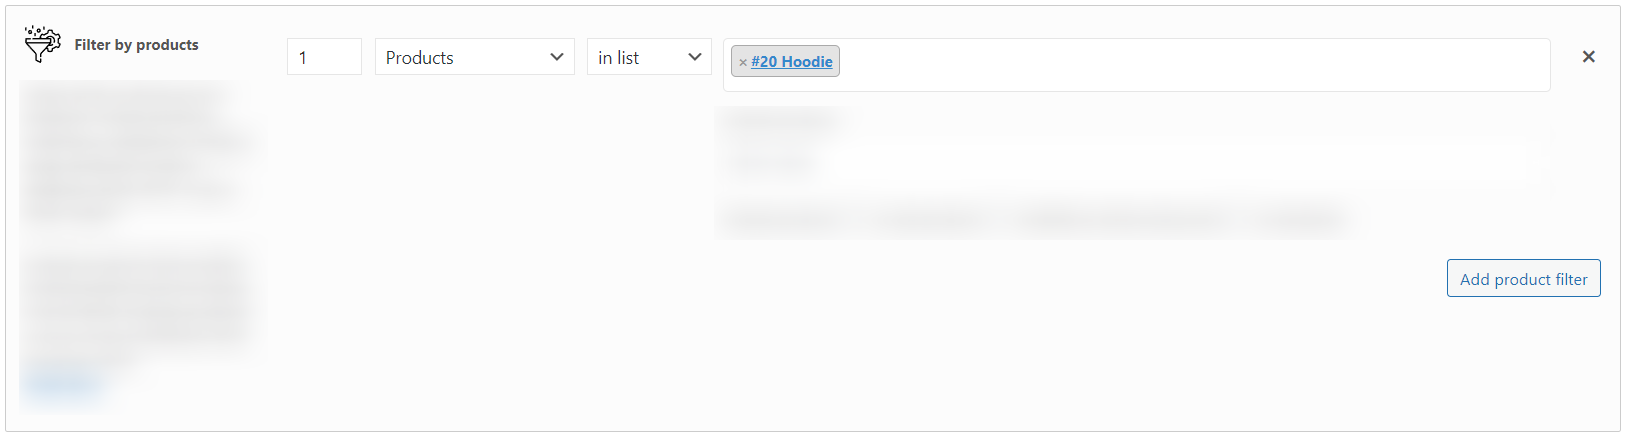
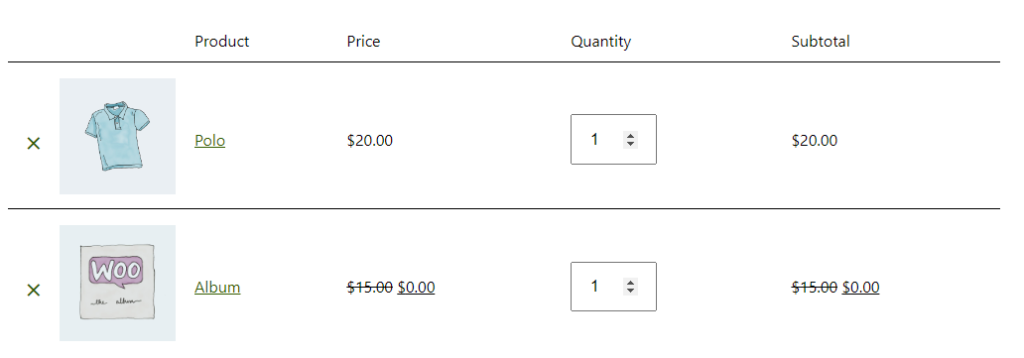
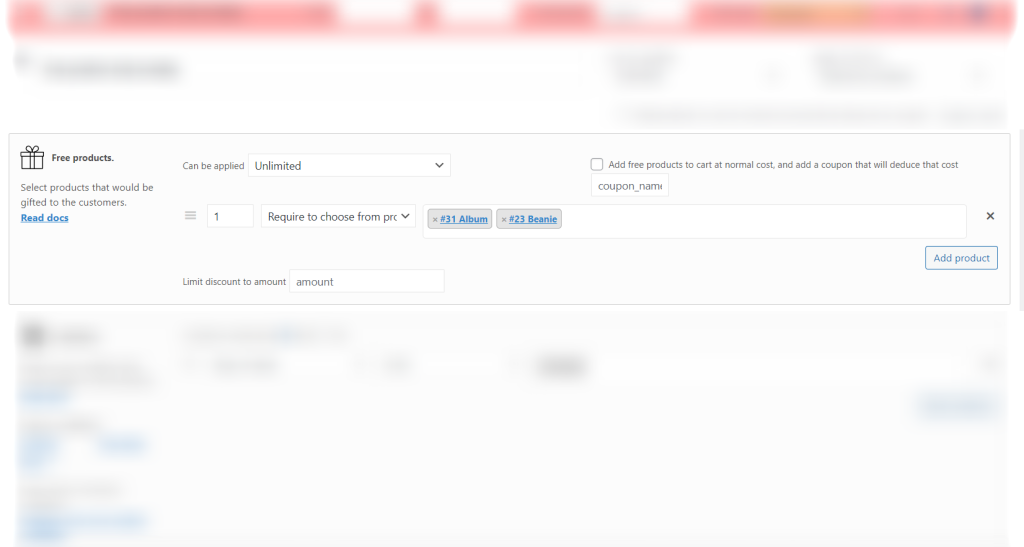
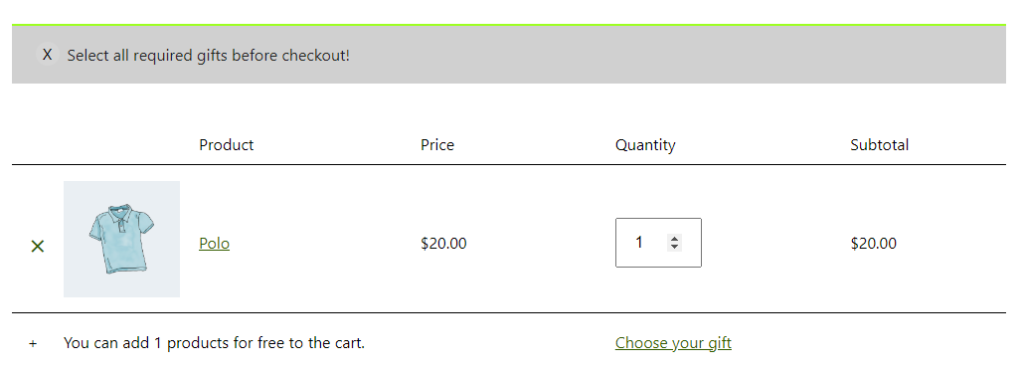
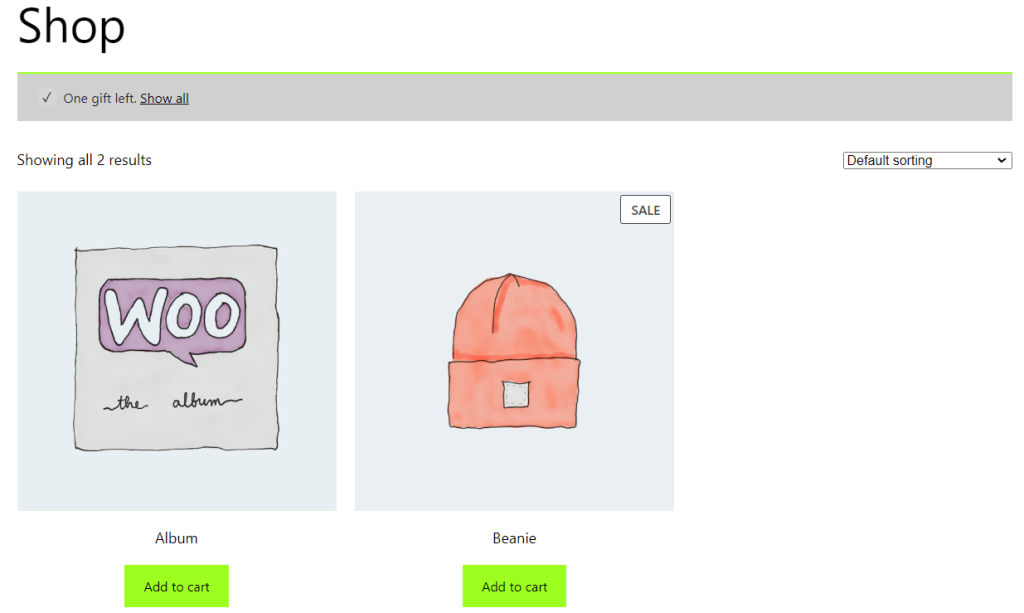
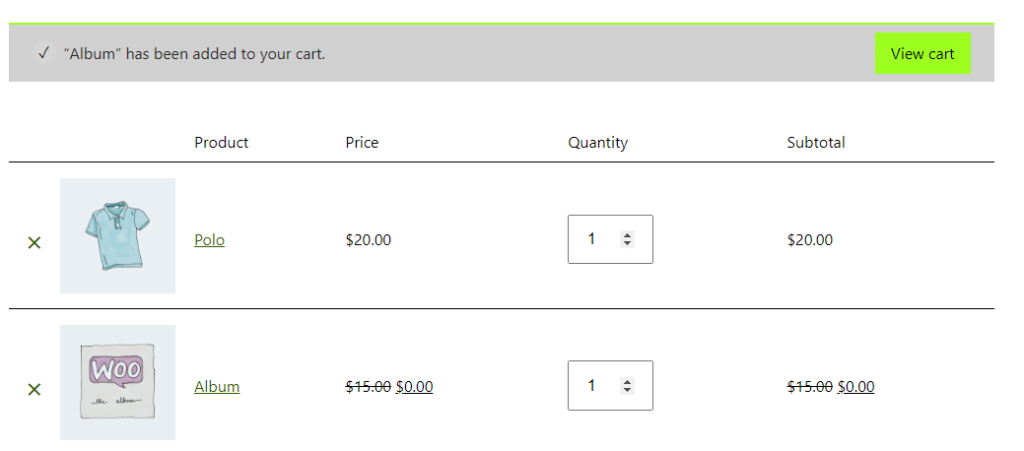
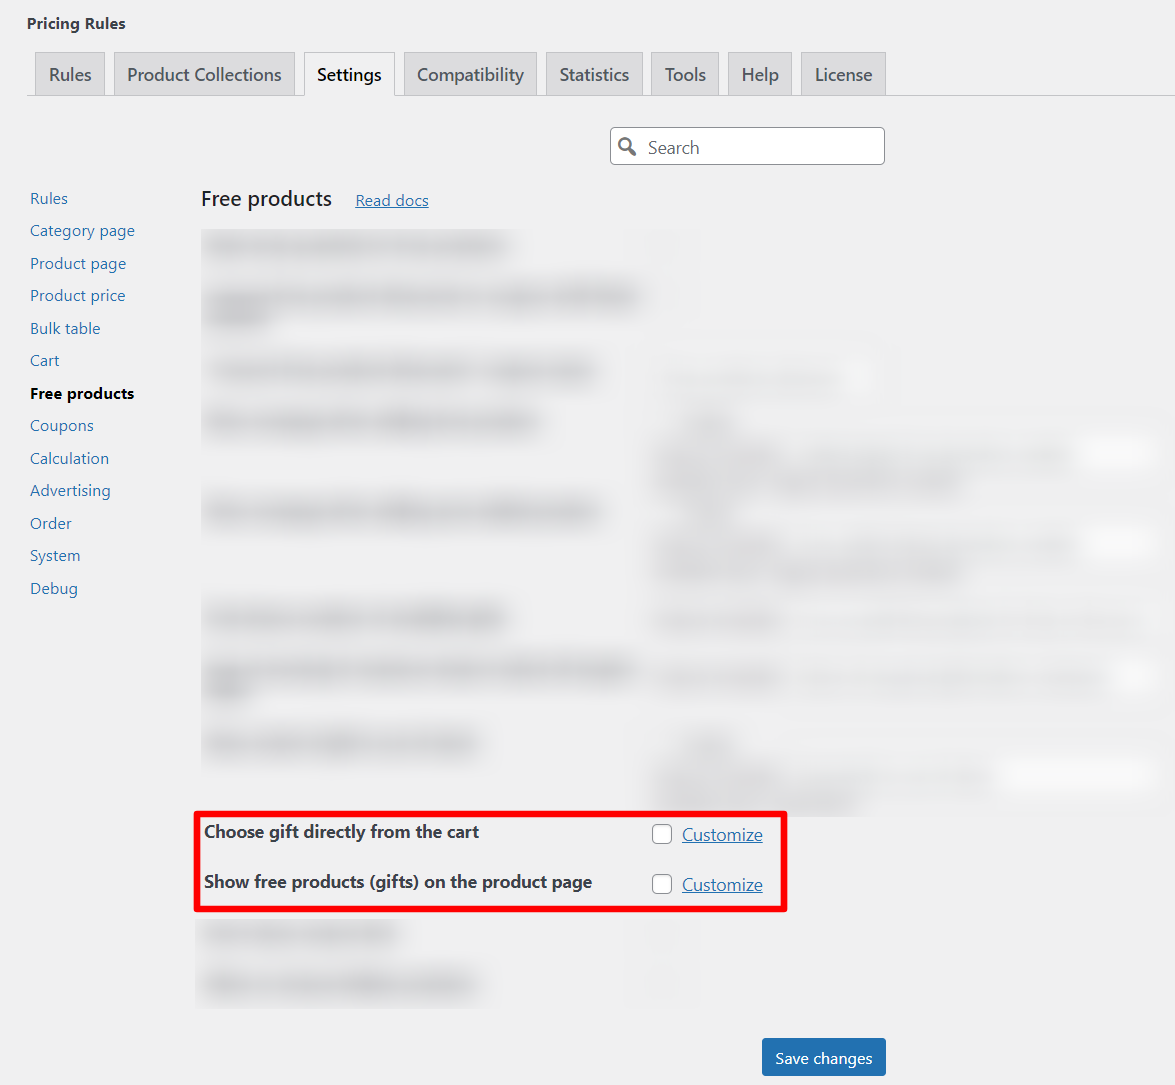
Gift Discounts
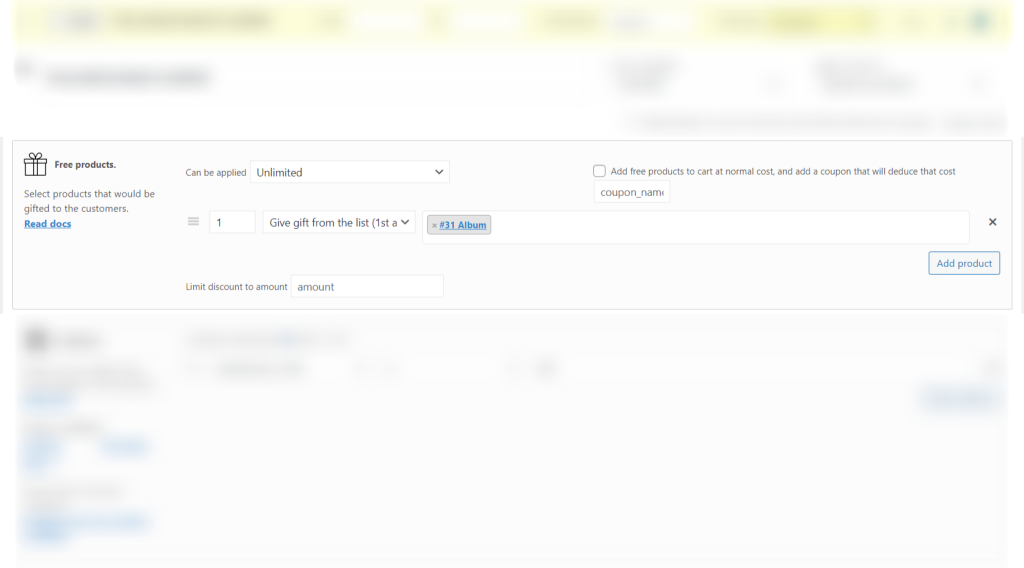
Offering discount strategies on gifts can increase store traffic during special occasions, maximizing seasonal revenue. Customers benefit by obtaining potential gifts at reduced prices, making shopping more appealing and economical.
You can give as a gift a small merch of your brand for every customer who will buy on $20 and more. That’s how to implement it with the Advanced Dynamic Pricing and Discount Rules for WooCommerce:

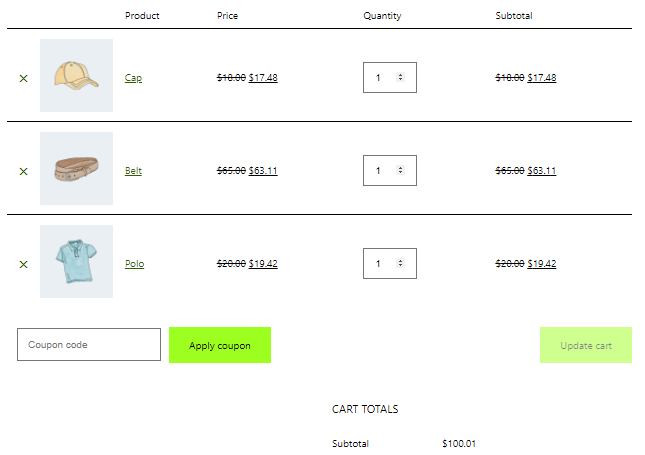
Cart Fee (for payment gateway)
Some banks get an additional fees for the transactions. Although not a typical discount, strategically incorporating a cart fee for payment gateways helps businesses offset transaction processing costs, maintaining overall profitability. Customers are made aware of the transparent pricing structure, increasing their trust in the WooCommerce store.
To create a cart fee for the selected payment method rule, you need PRO version of the Advanced Dynamic Pricing and Discount Rules for WooCommerce plugin. Then, click “Add rule” button and choose “Cart Discount” template. Then find a “Percentage fee” in the “Cart/Shipping discount” section and the Cart condition “Cart payment method”. Input the necessary values and get the additional fee for the payment gateway.

You can choose any discount and pricing strategies to harmonize business and customer interests, ensuring profitability and customer satisfaction, our Advanced Dynamic Pricing and Discount Rules for WooCommerce plugin helps you to implement it on your WooCommerce store.