10 Of The Most Inspiring Advanced Dynamic Pricing Ideas

In today’s highly competitive market, businesses are constantly looking for new and innovative ways to boost their sales and stay ahead of the competition. One strategy that has gained a lot of attention in recent years is dynamic pricing. This is the process of adjusting prices based on demand, inventory levels, and other market factors. While the concept of dynamic pricing is not new, advancements in technology have opened up a whole new world of possibilities for businesses to implement creative and effective strategies. In this blog post, we will explore 10 of the most inspiring dynamic pricing ideas that are being used by businesses to drive sales and increase revenue. We will also show our readers how to create the appropriate rules in the Advanced Dynamic Pricing plugin.

Personalized Pricing

With the help of big data and analytics, businesses can now personalize their pricing strategies for individual customers. By analyzing customer data and purchase history, businesses can offer customized prices to each customer based on their preferences, spending habits, and other factors.

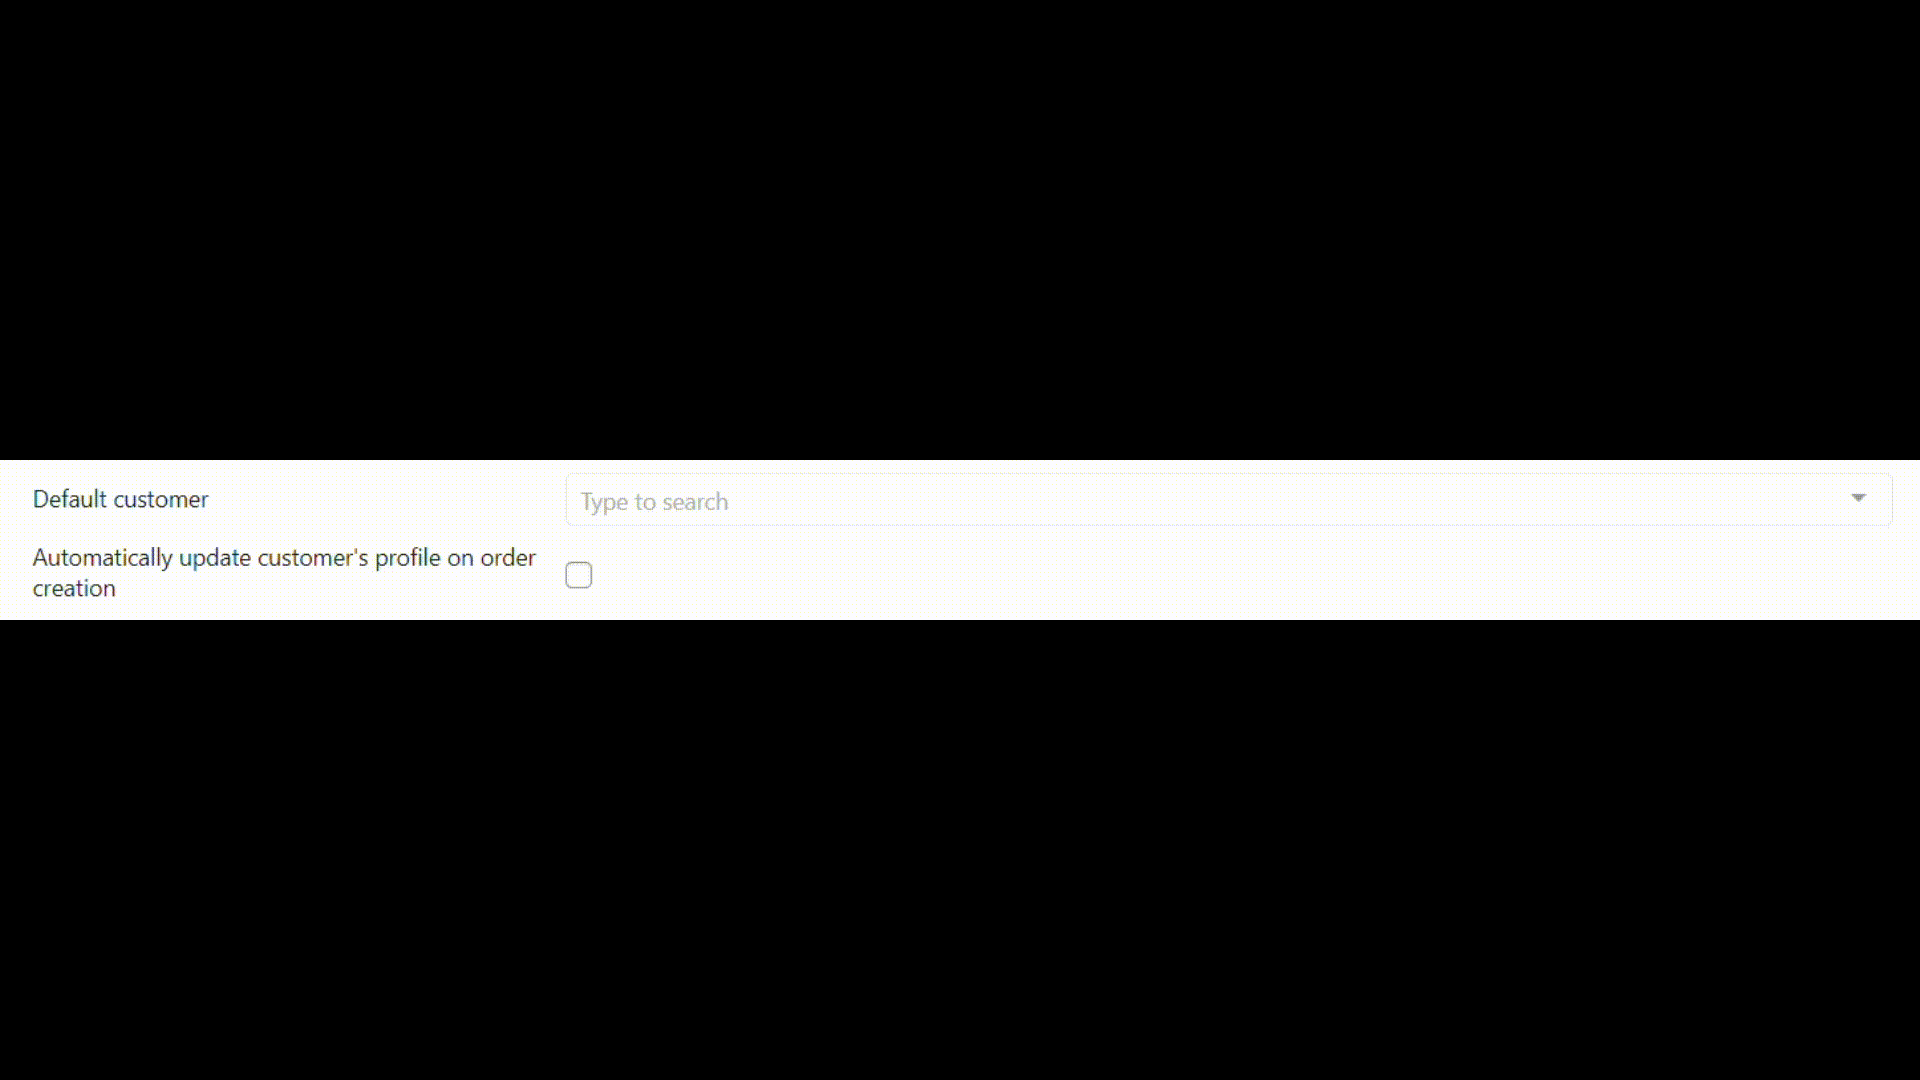
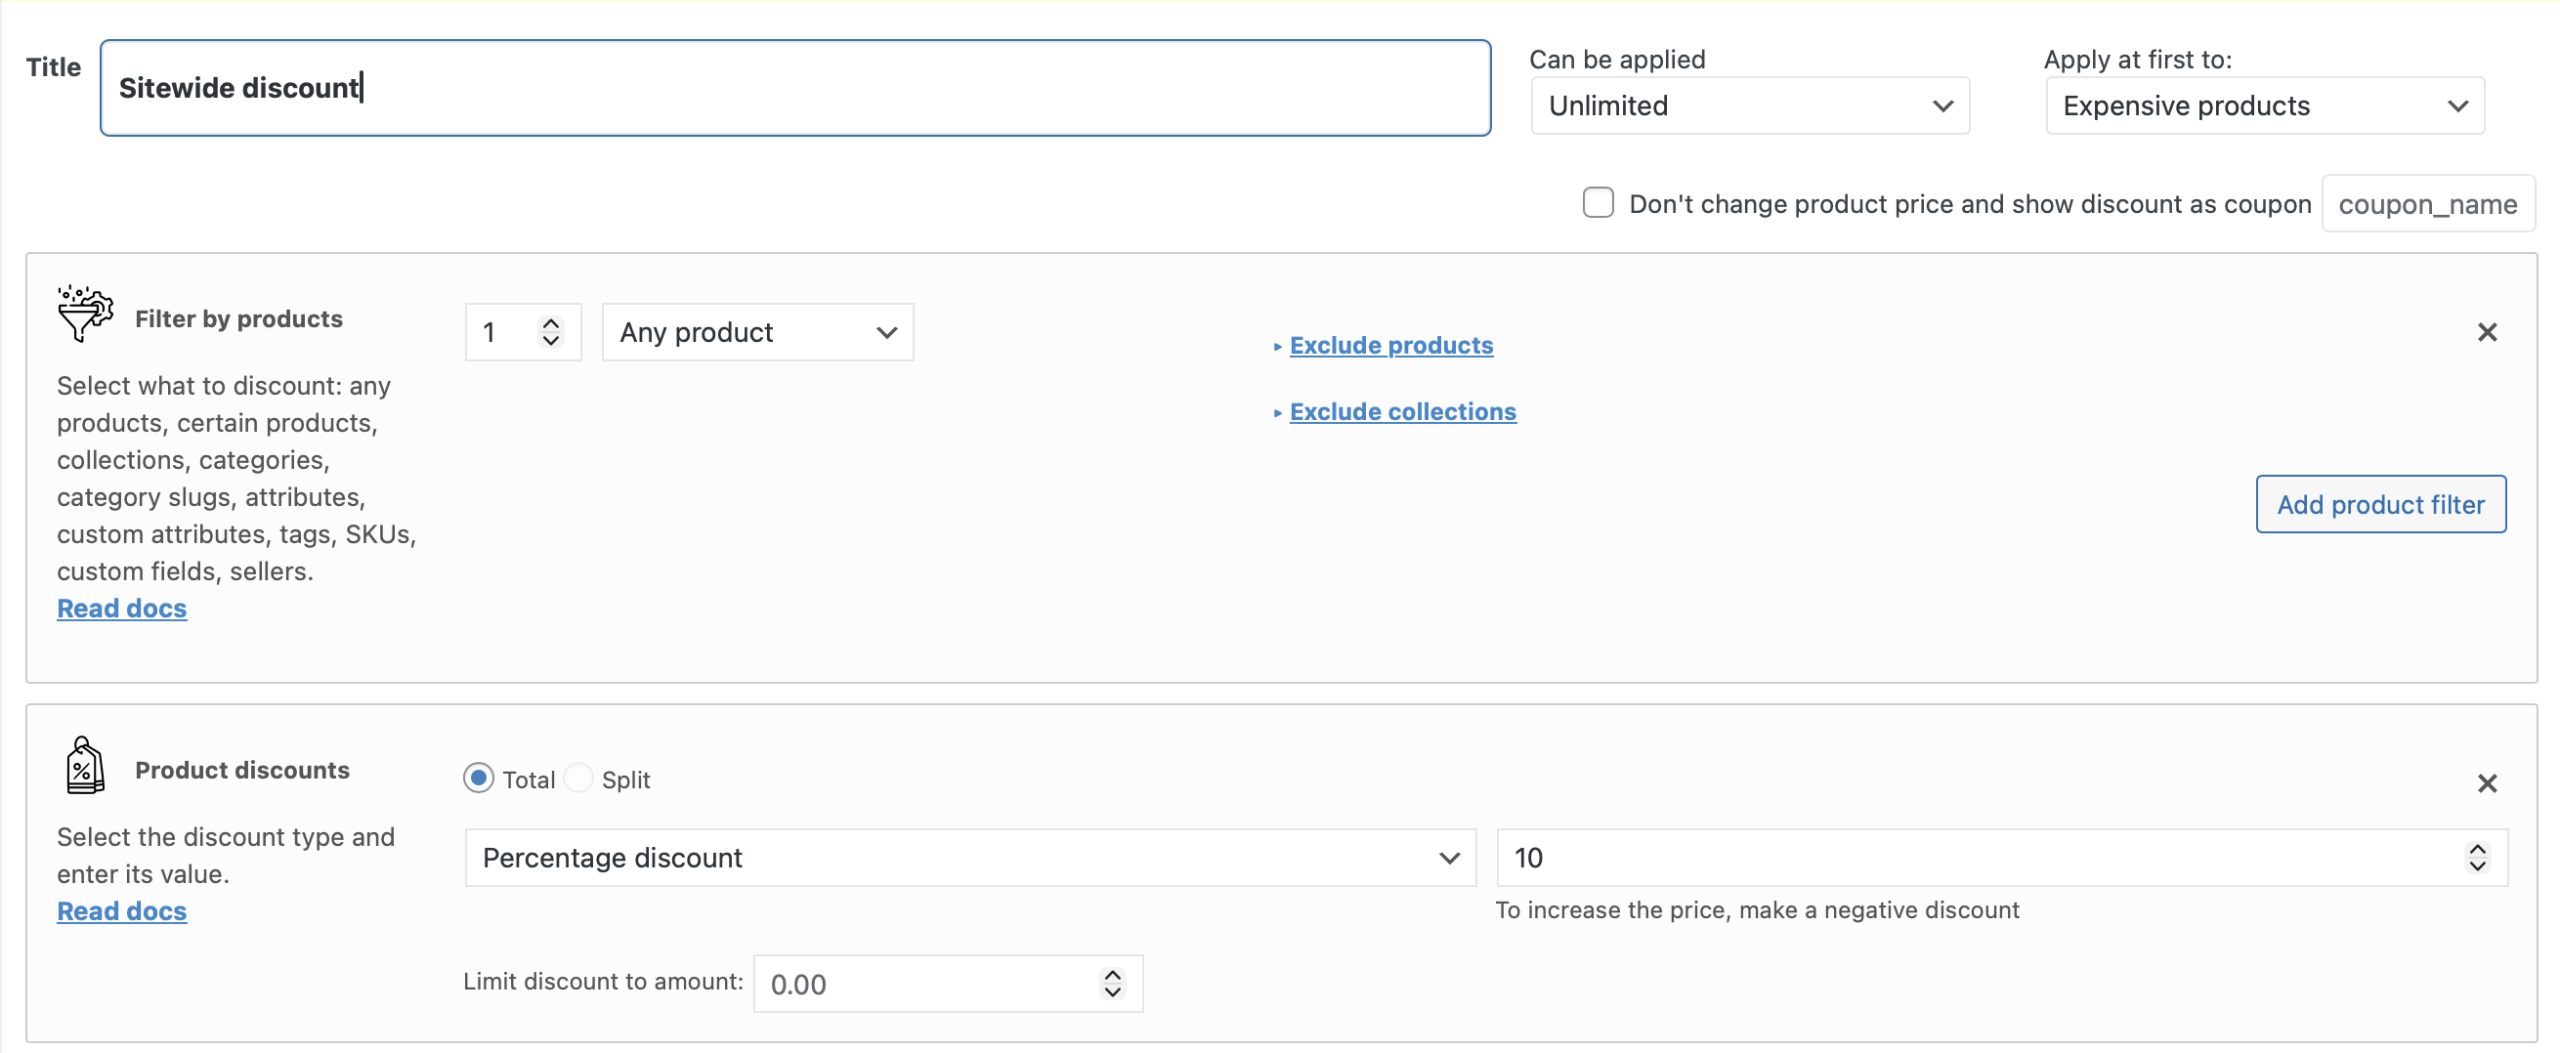
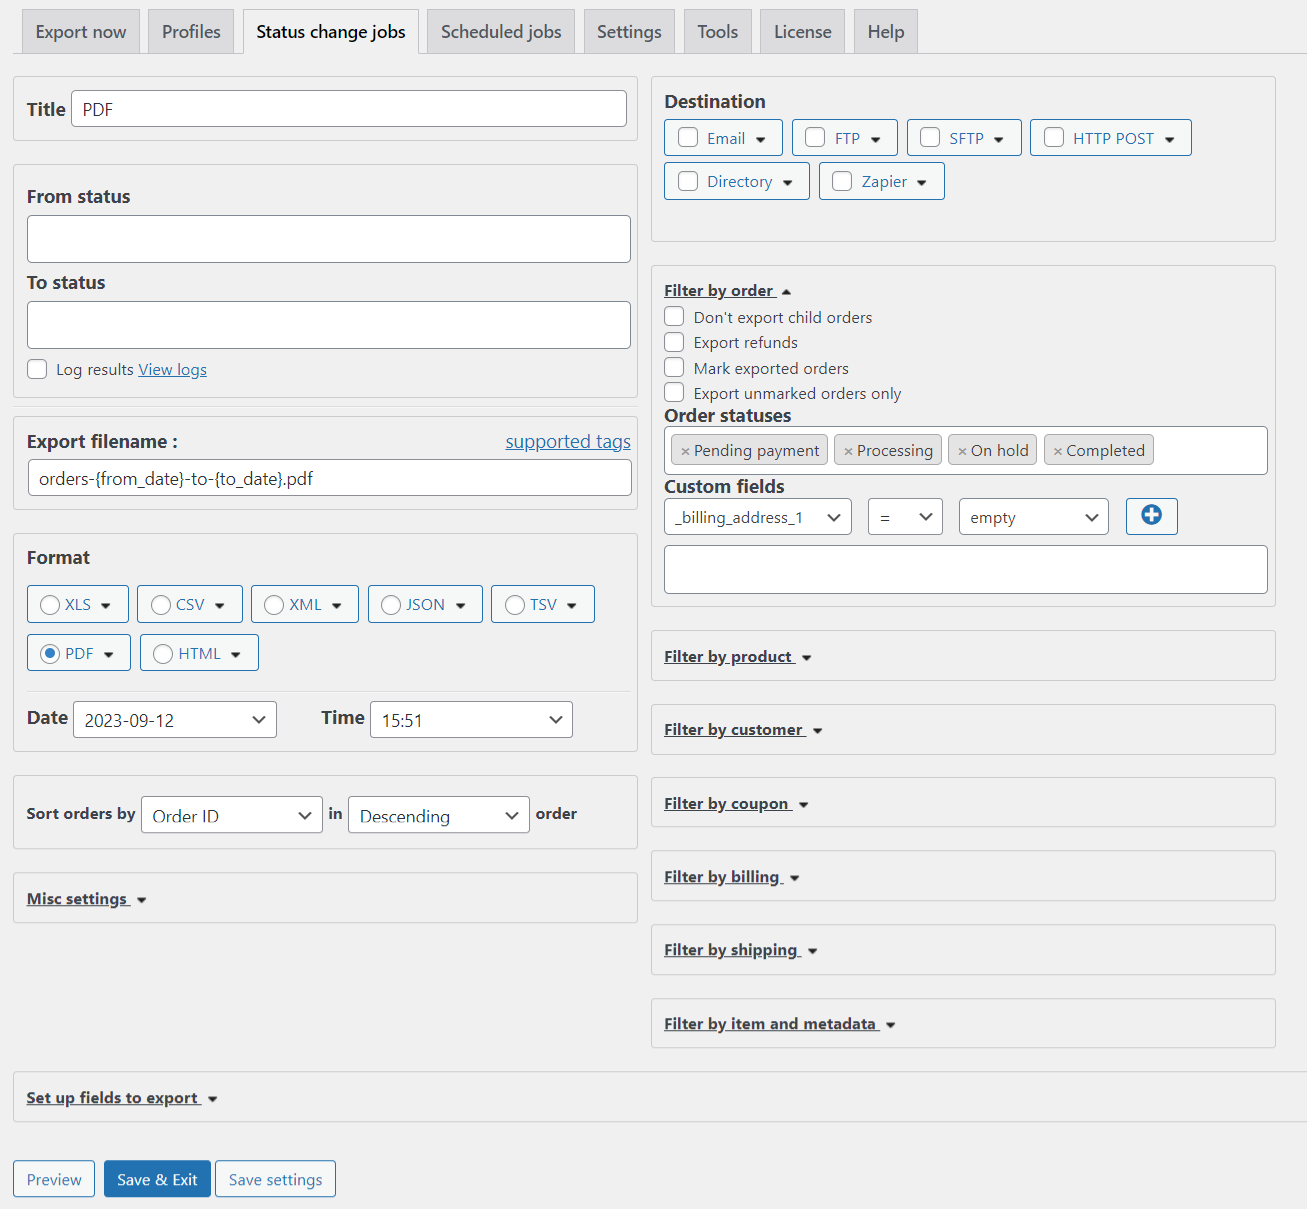
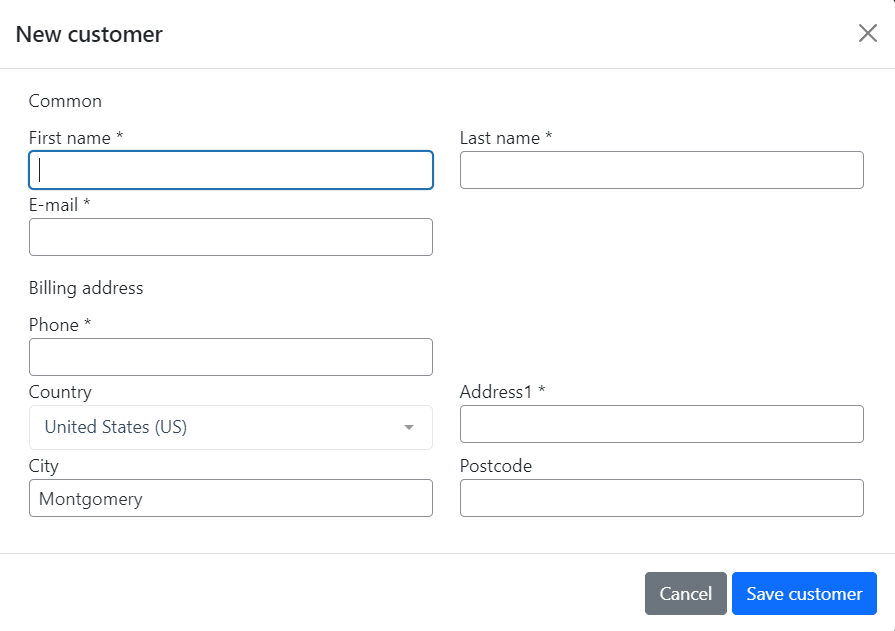
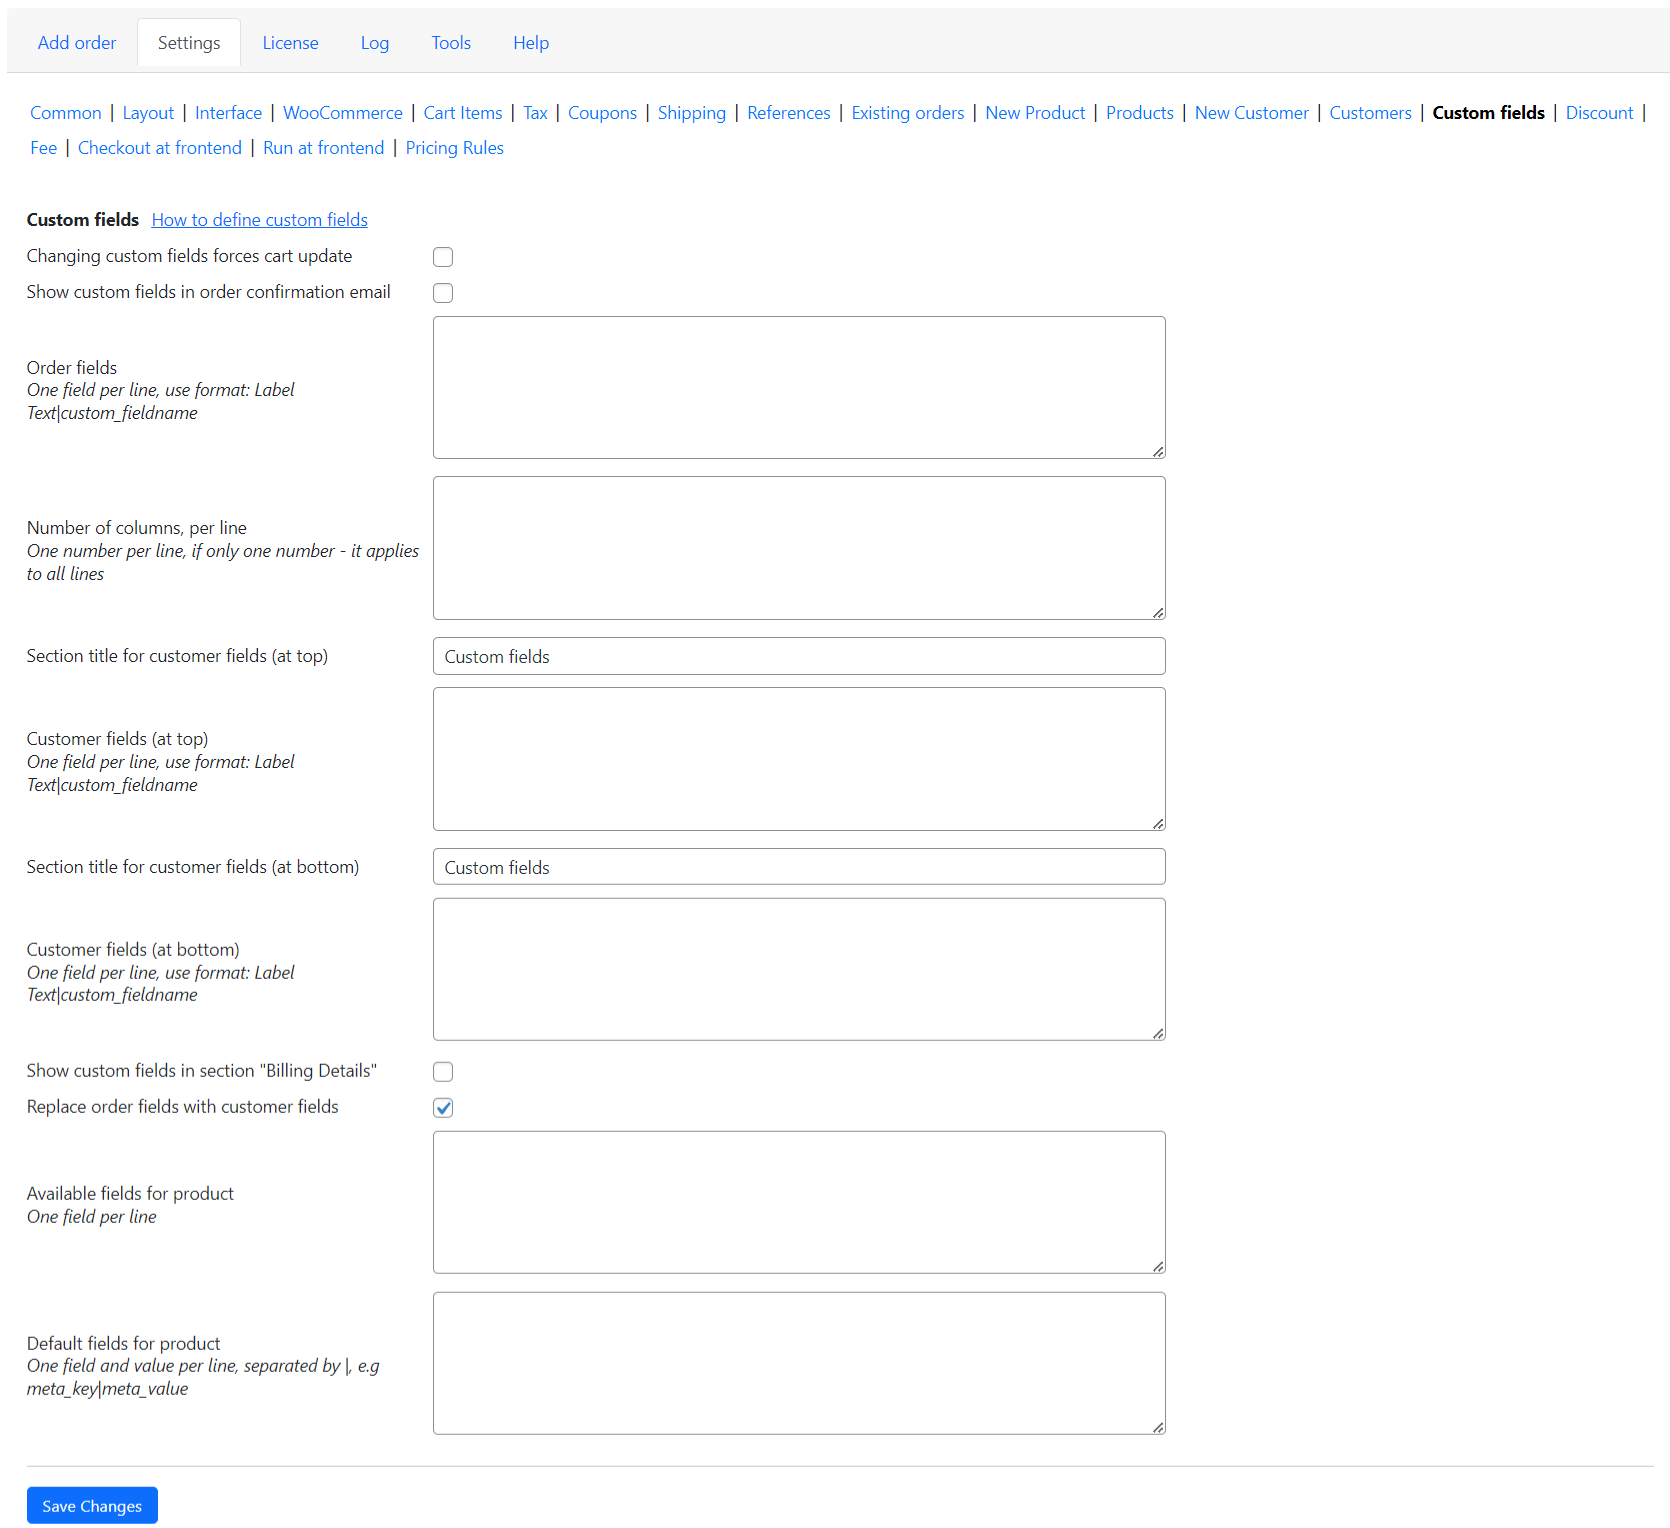
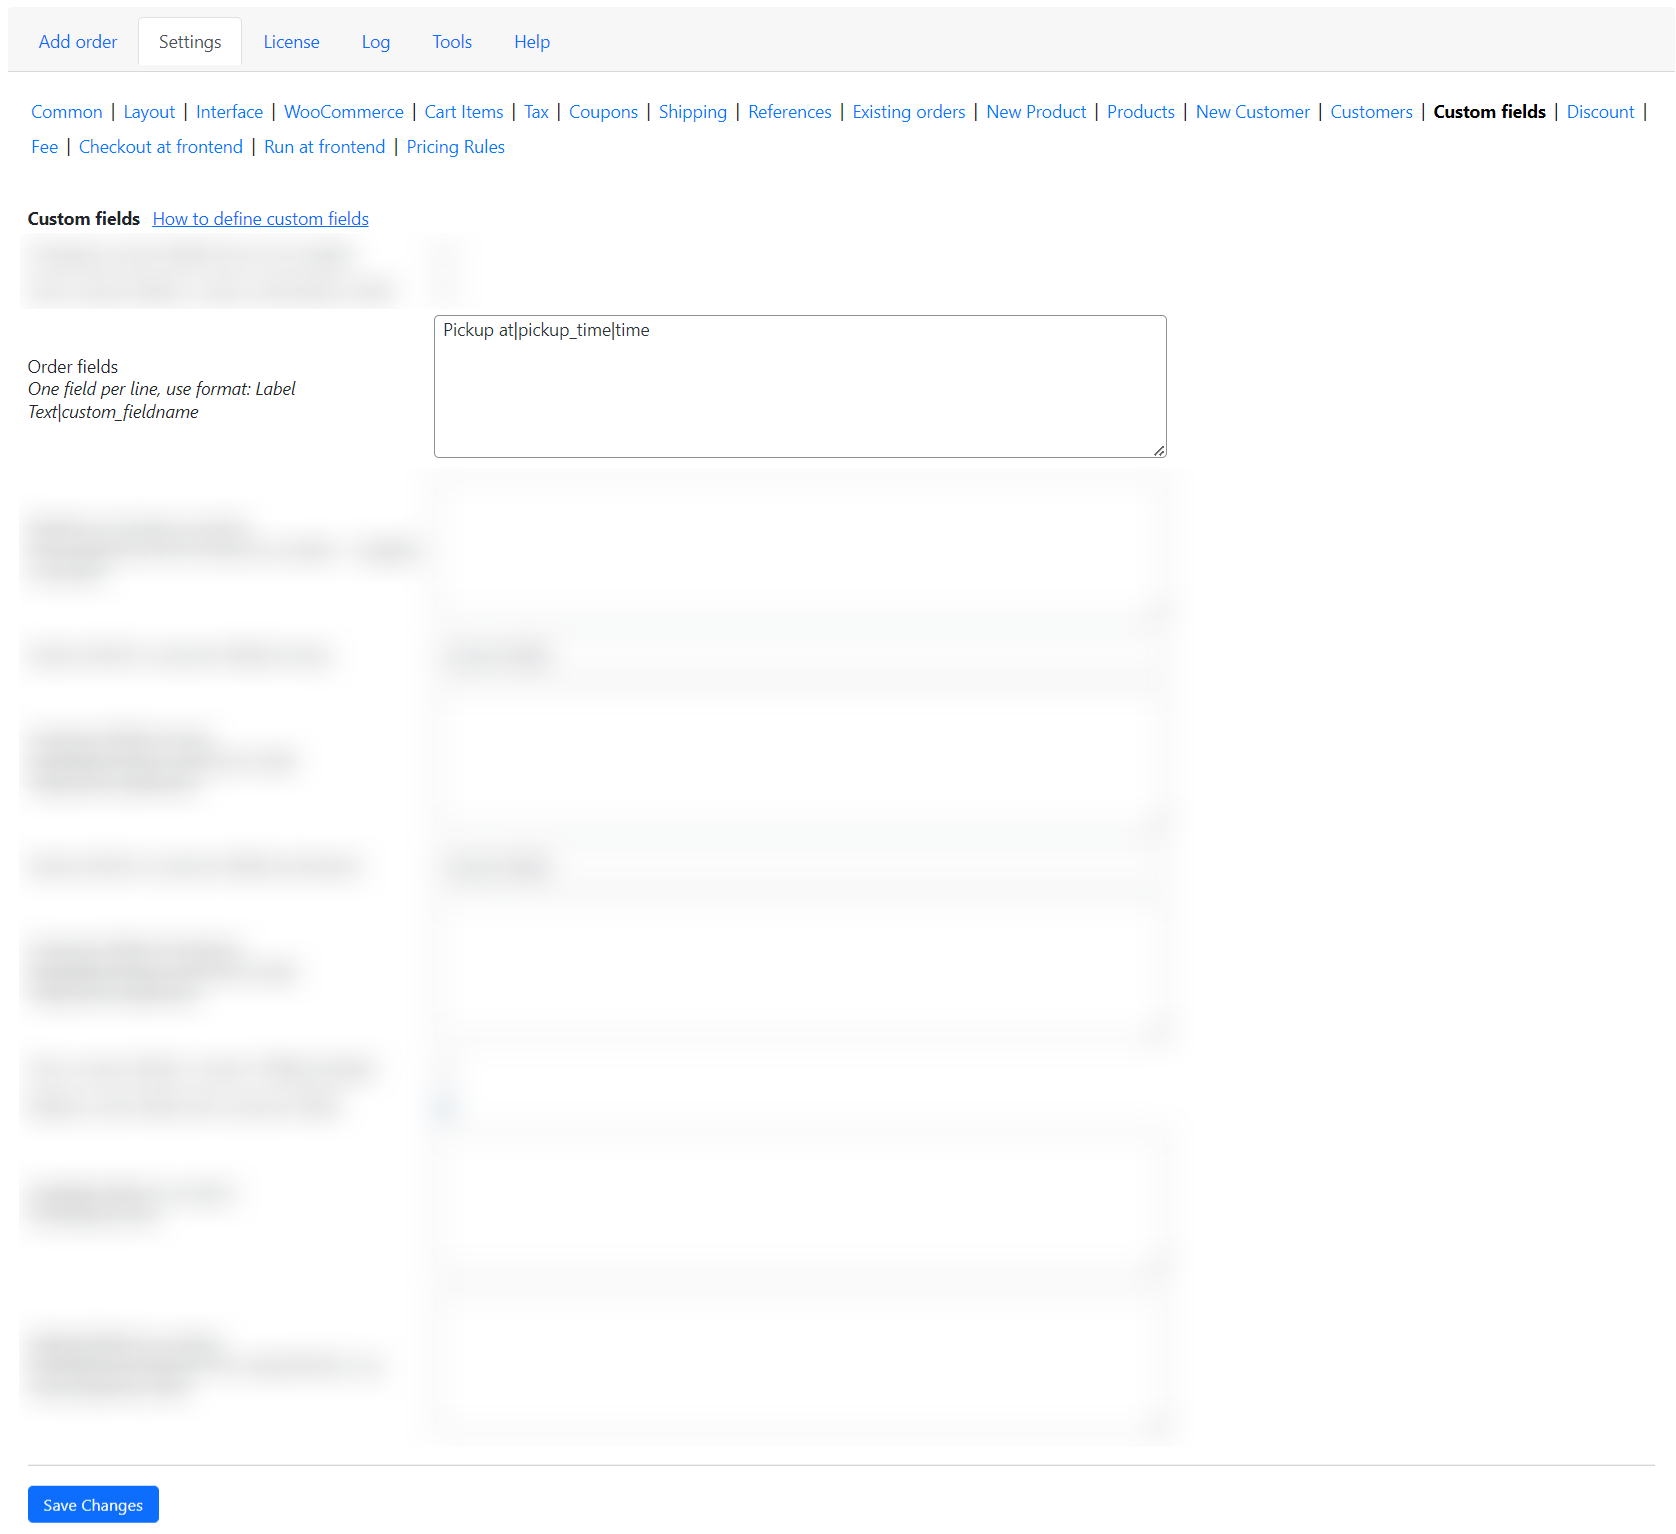
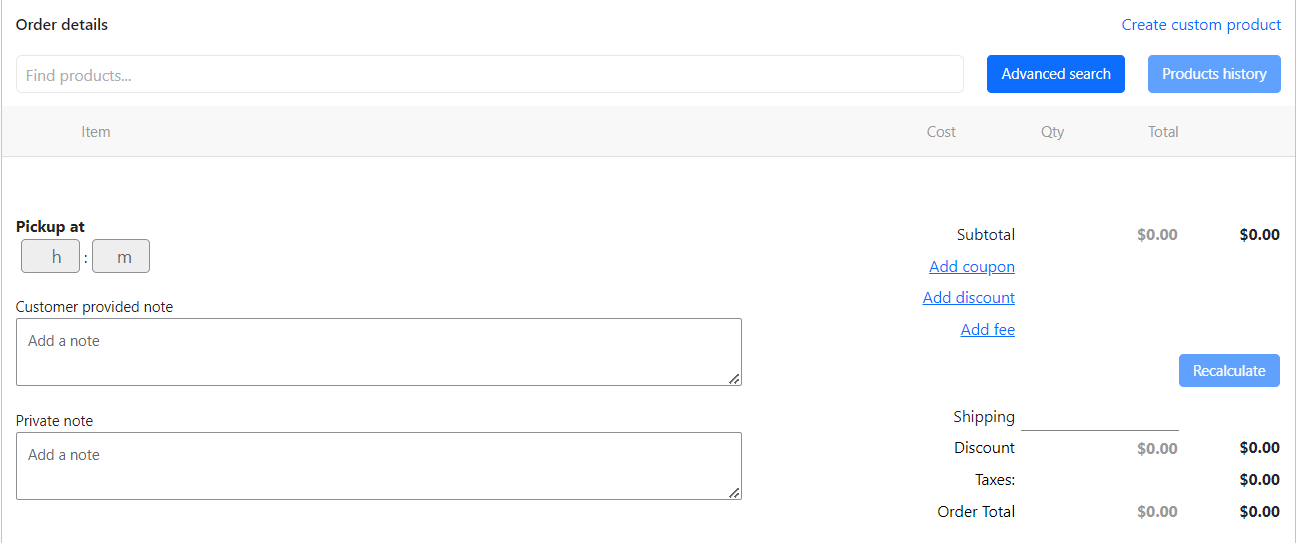
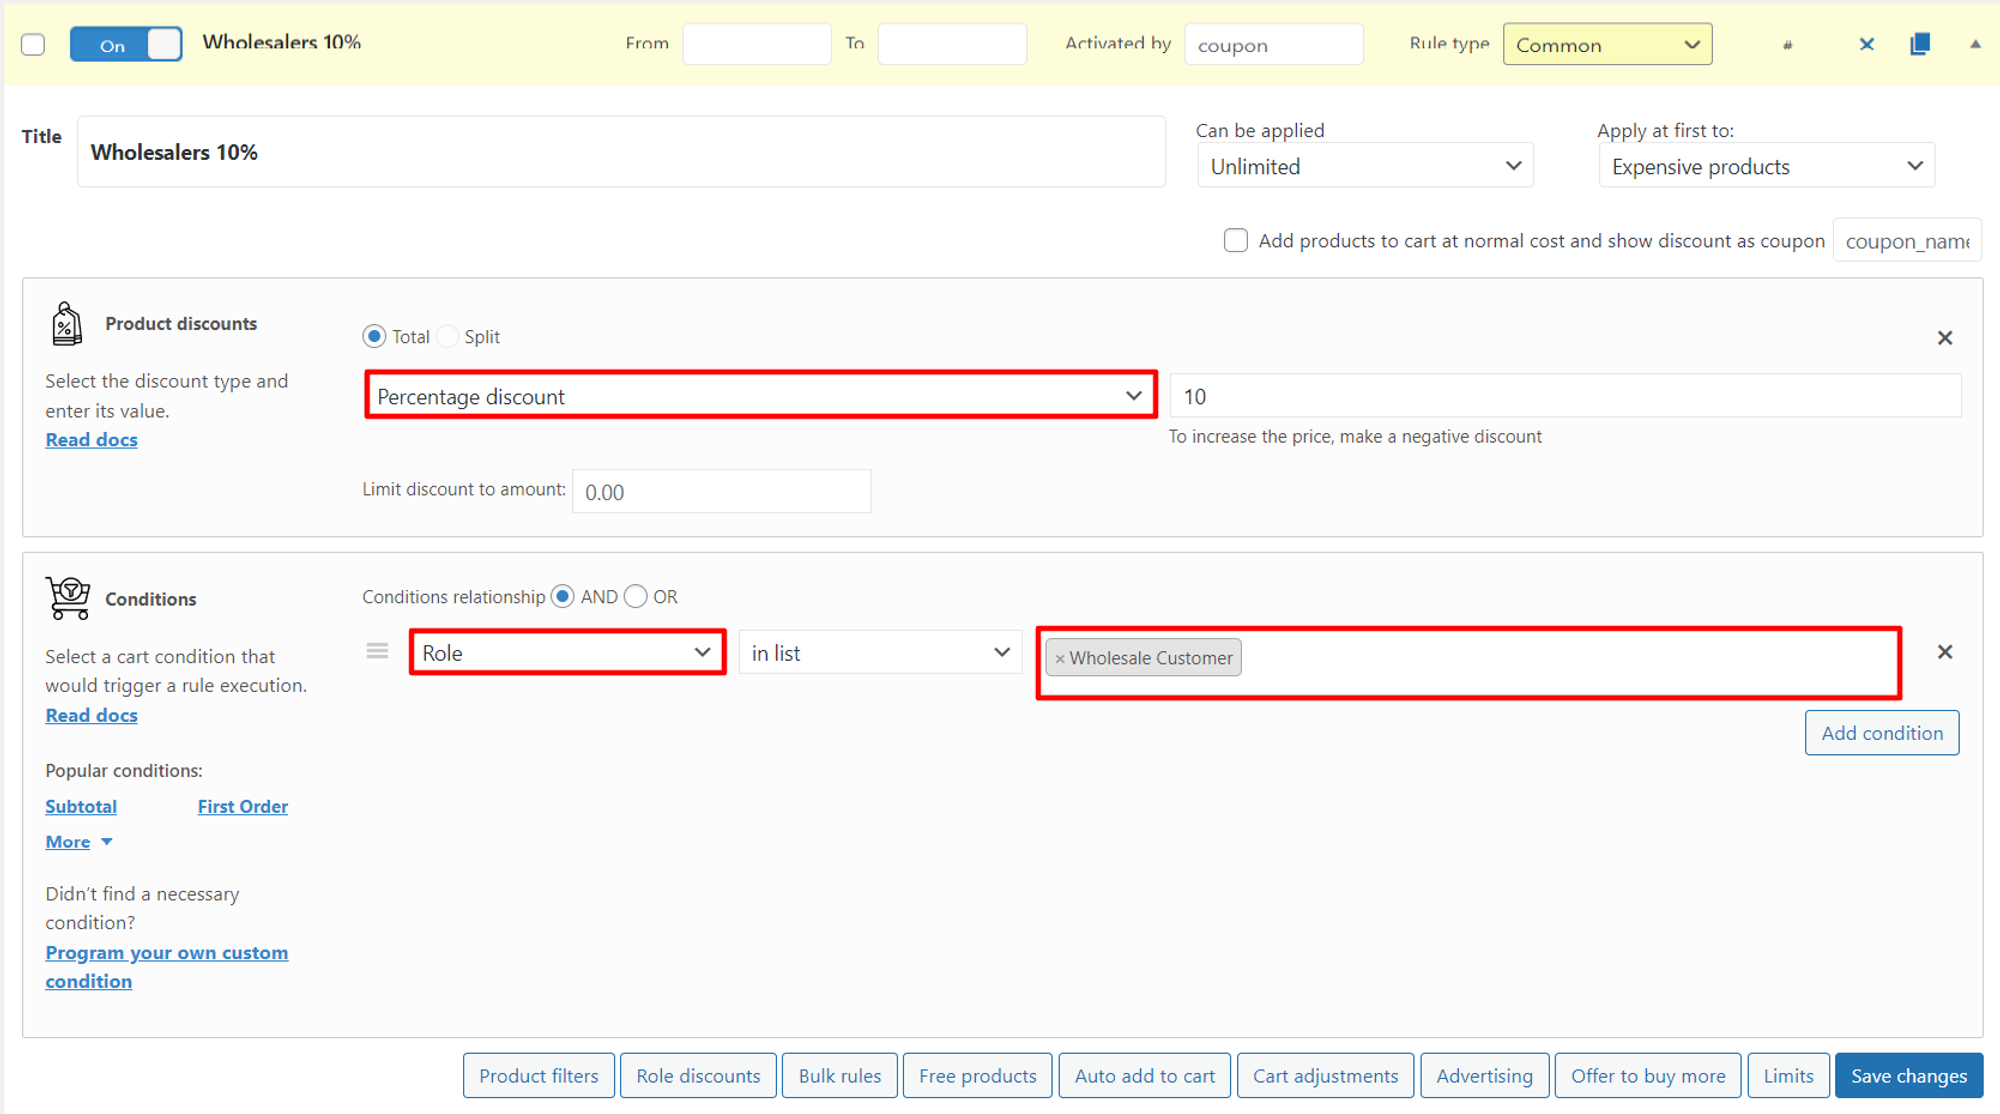
The simplest example is to give a discount based on the user’s role.

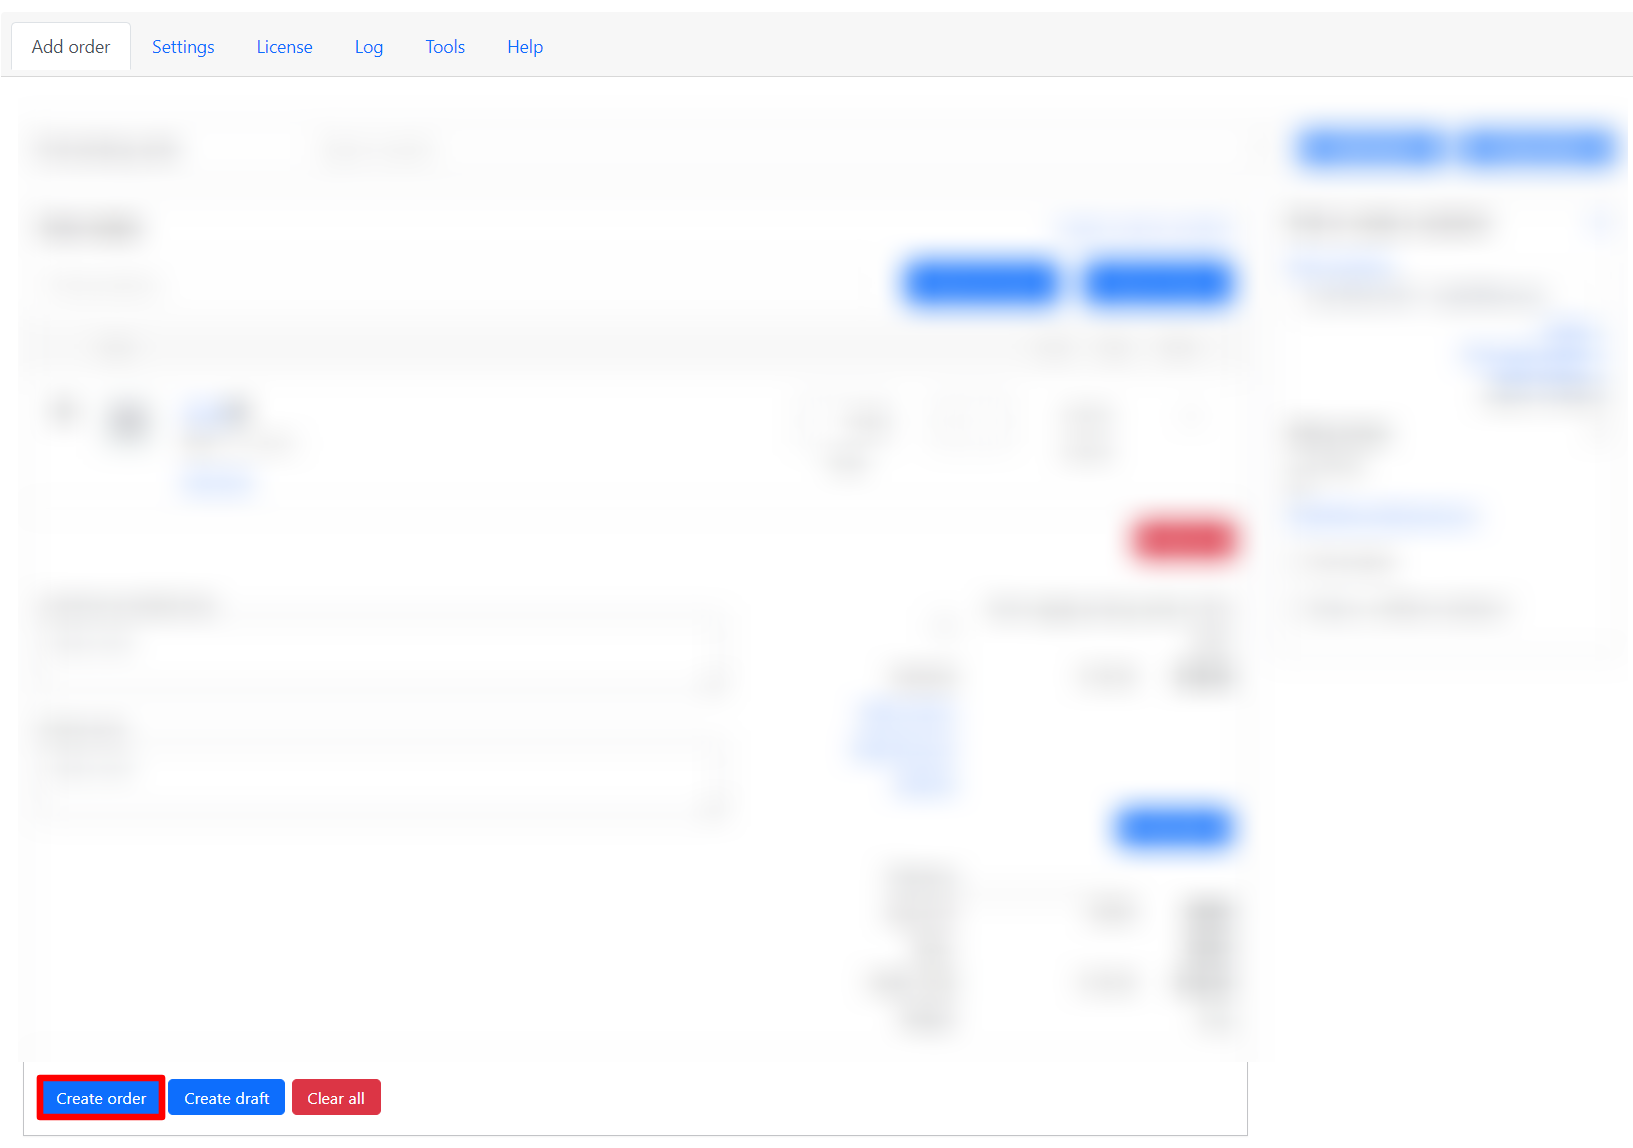
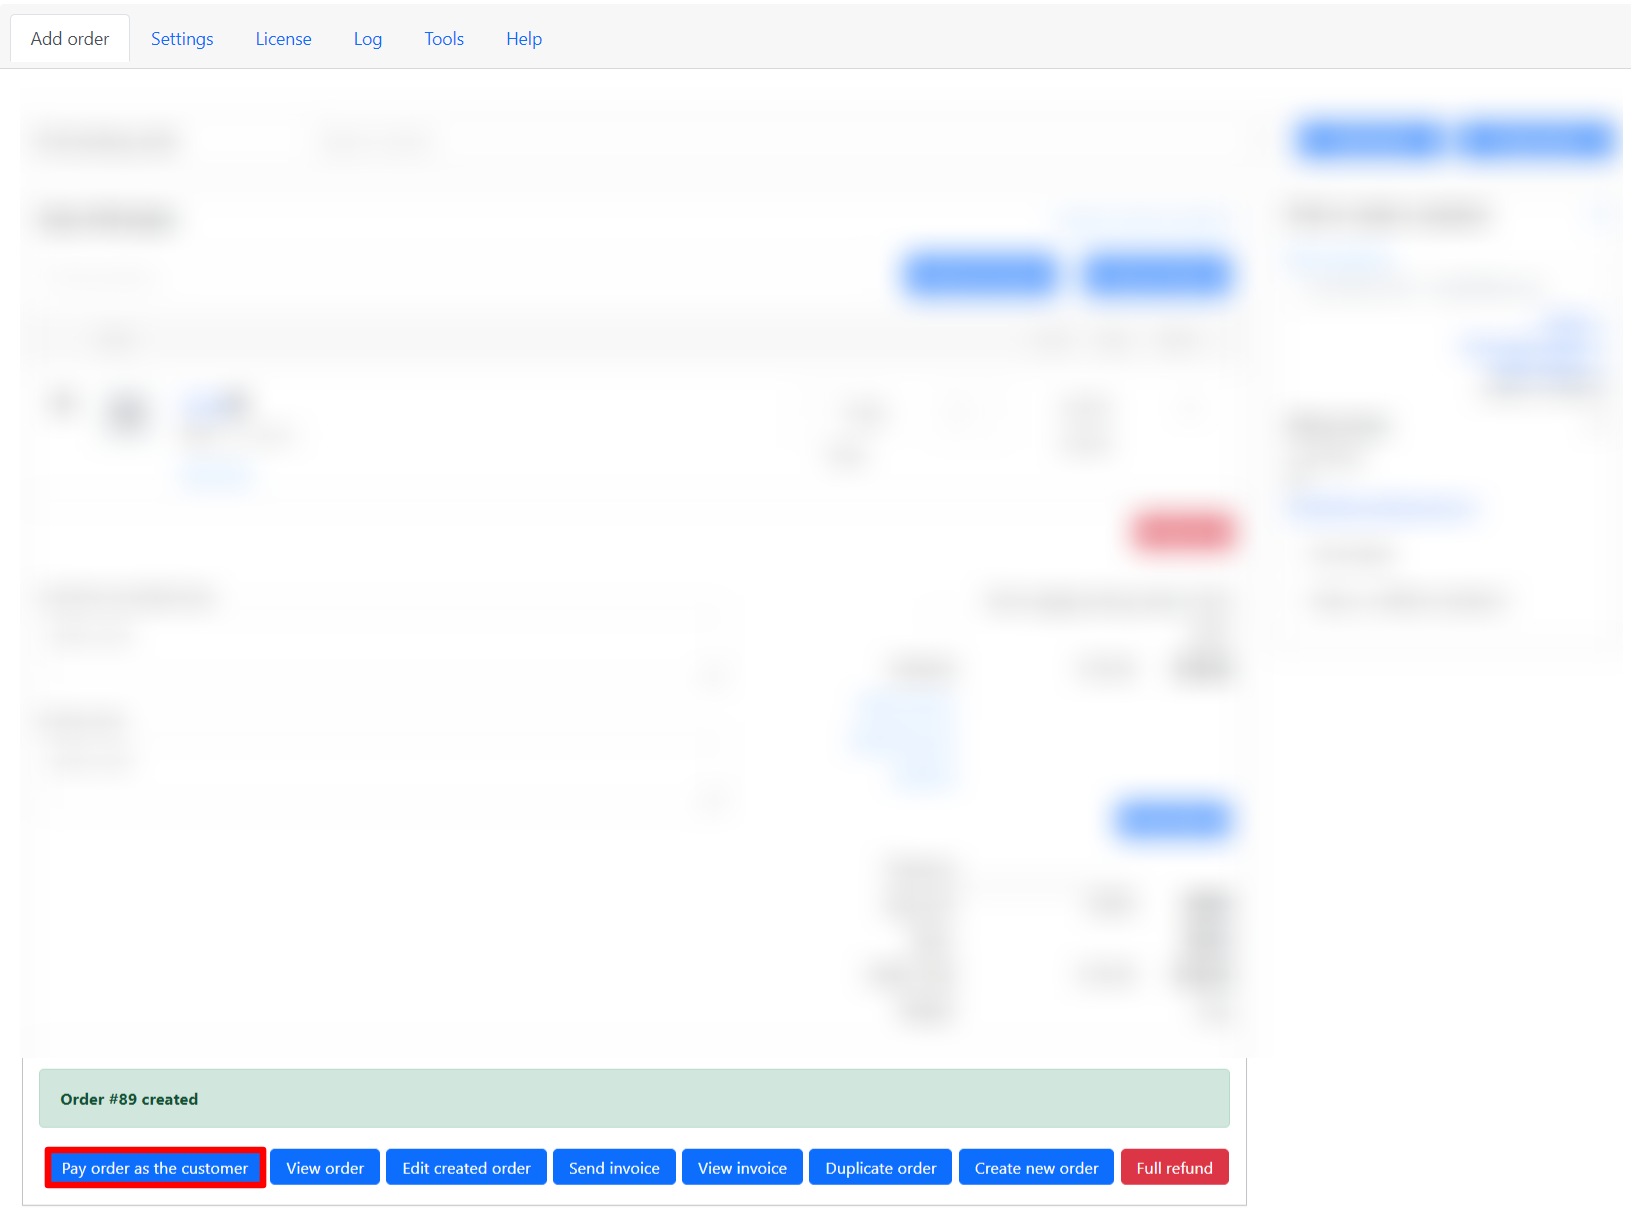
Create a rule (blank). Specify the role in Conditions section. In Product dicounts section choose the type of discount and its amount.

Time-based Pricing

This strategy involves adjusting prices based on the time of day, week, or month. For example, prices for a hotel room may be higher during peak tourist season compared to the off-season.

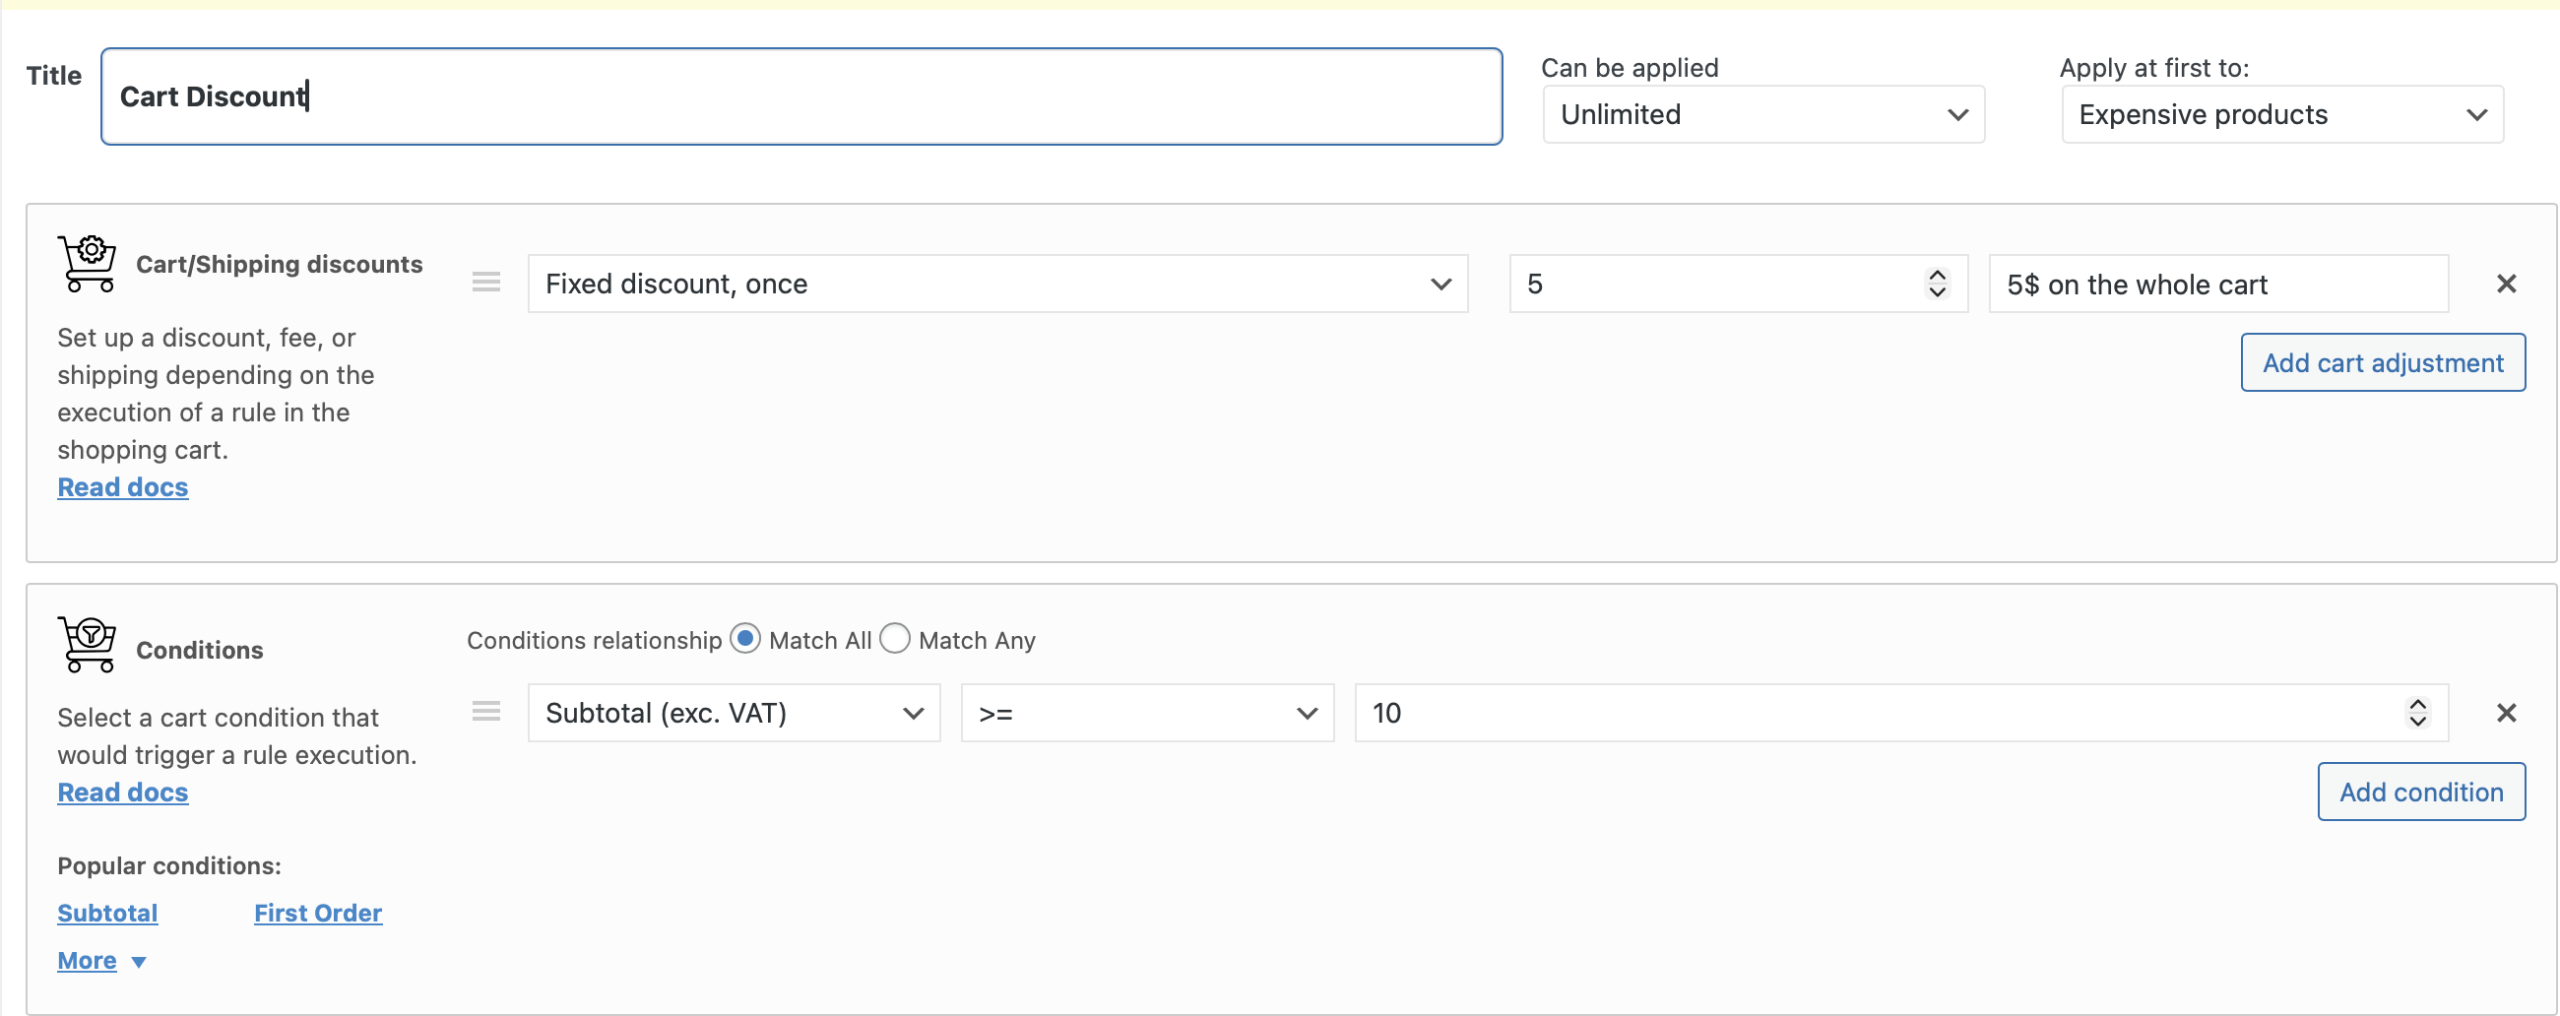
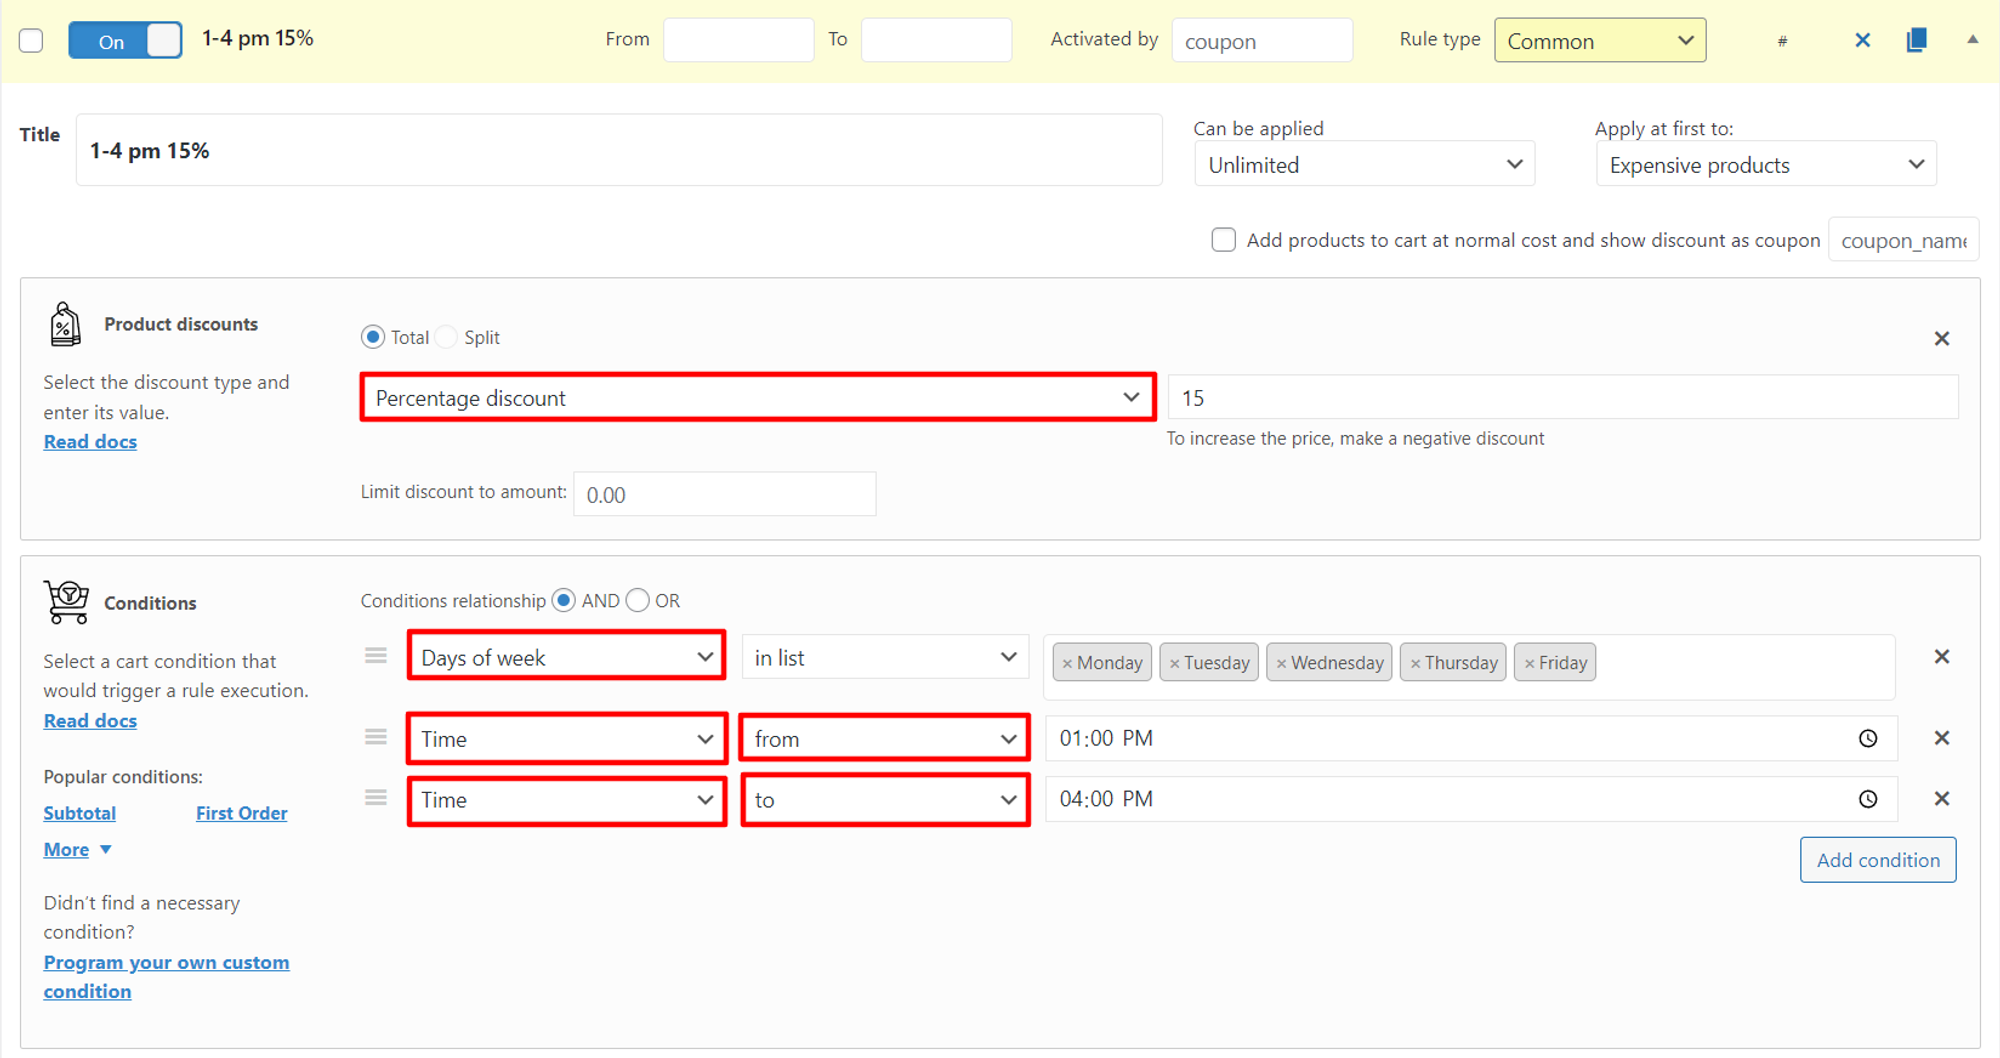
Let’s imagine that you are the owner of a restaurant. You began to notice that on weekdays in the afternoon hours (1-4 p.m.) there are fewer orders than at other times. Create a discount by date and time!

Create a rule (blank). Specify days of week and time (from 1 p.m. to 4 p.m.) in Conditions section. In Product discounts section choose the type of discount and its amount.

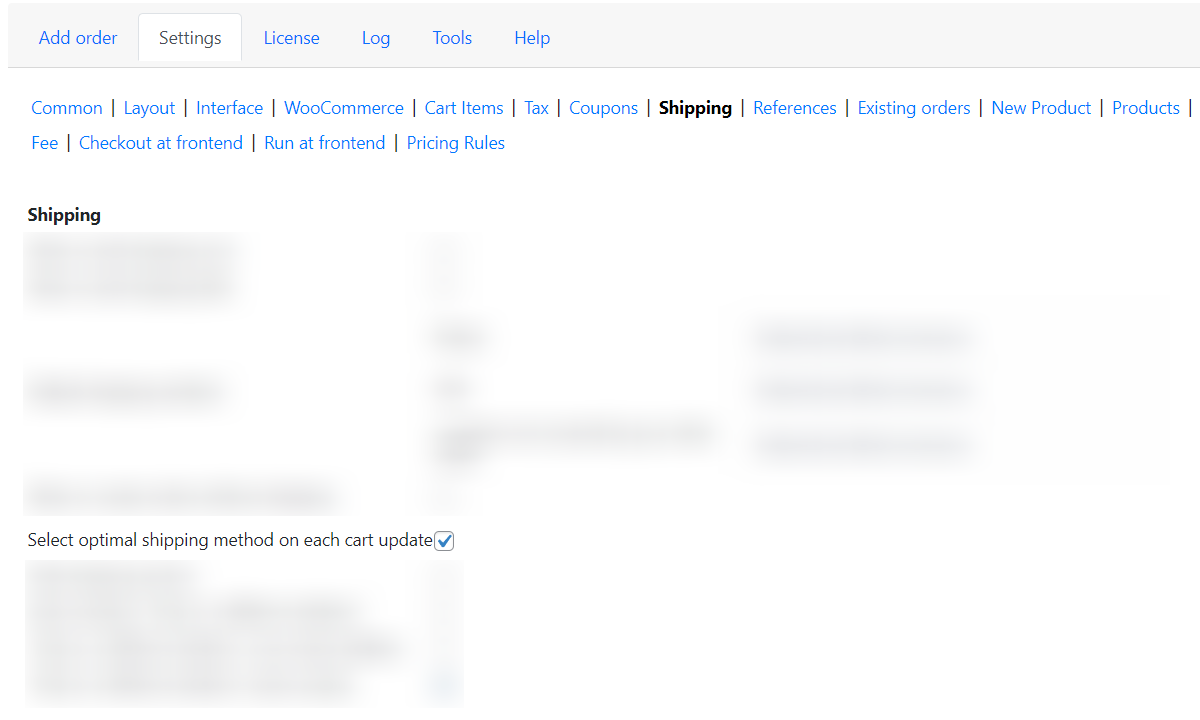
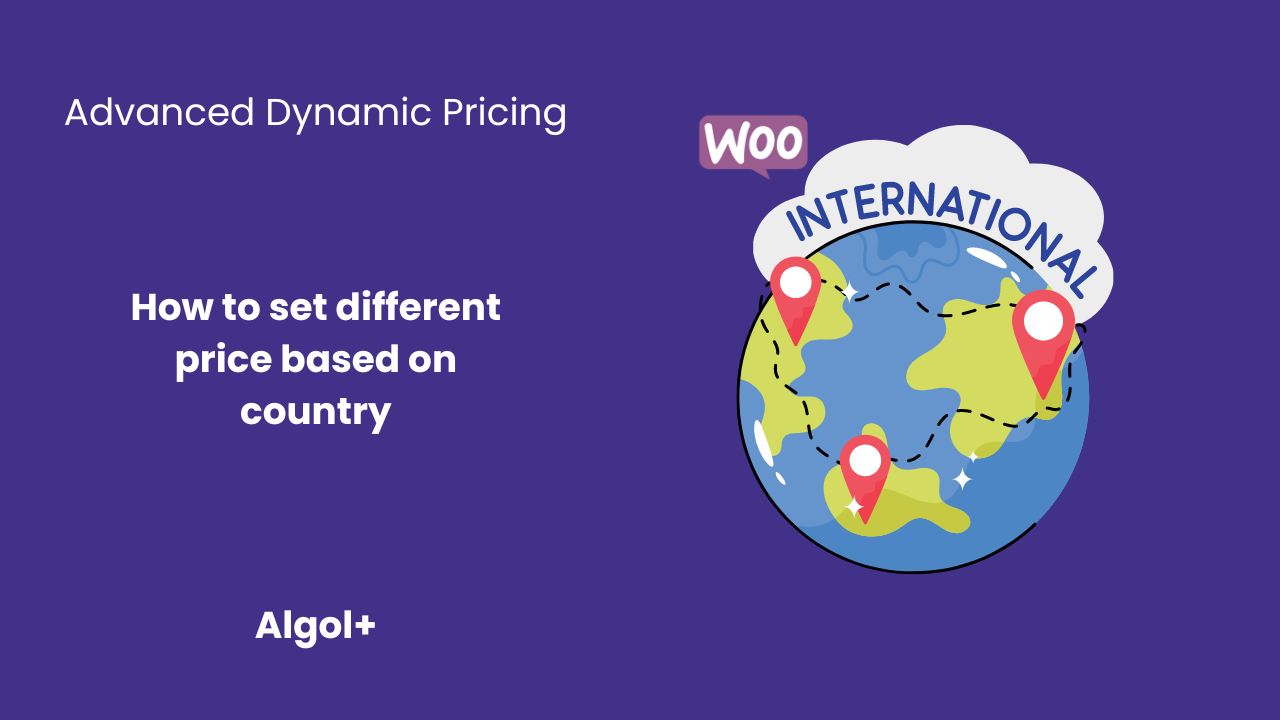
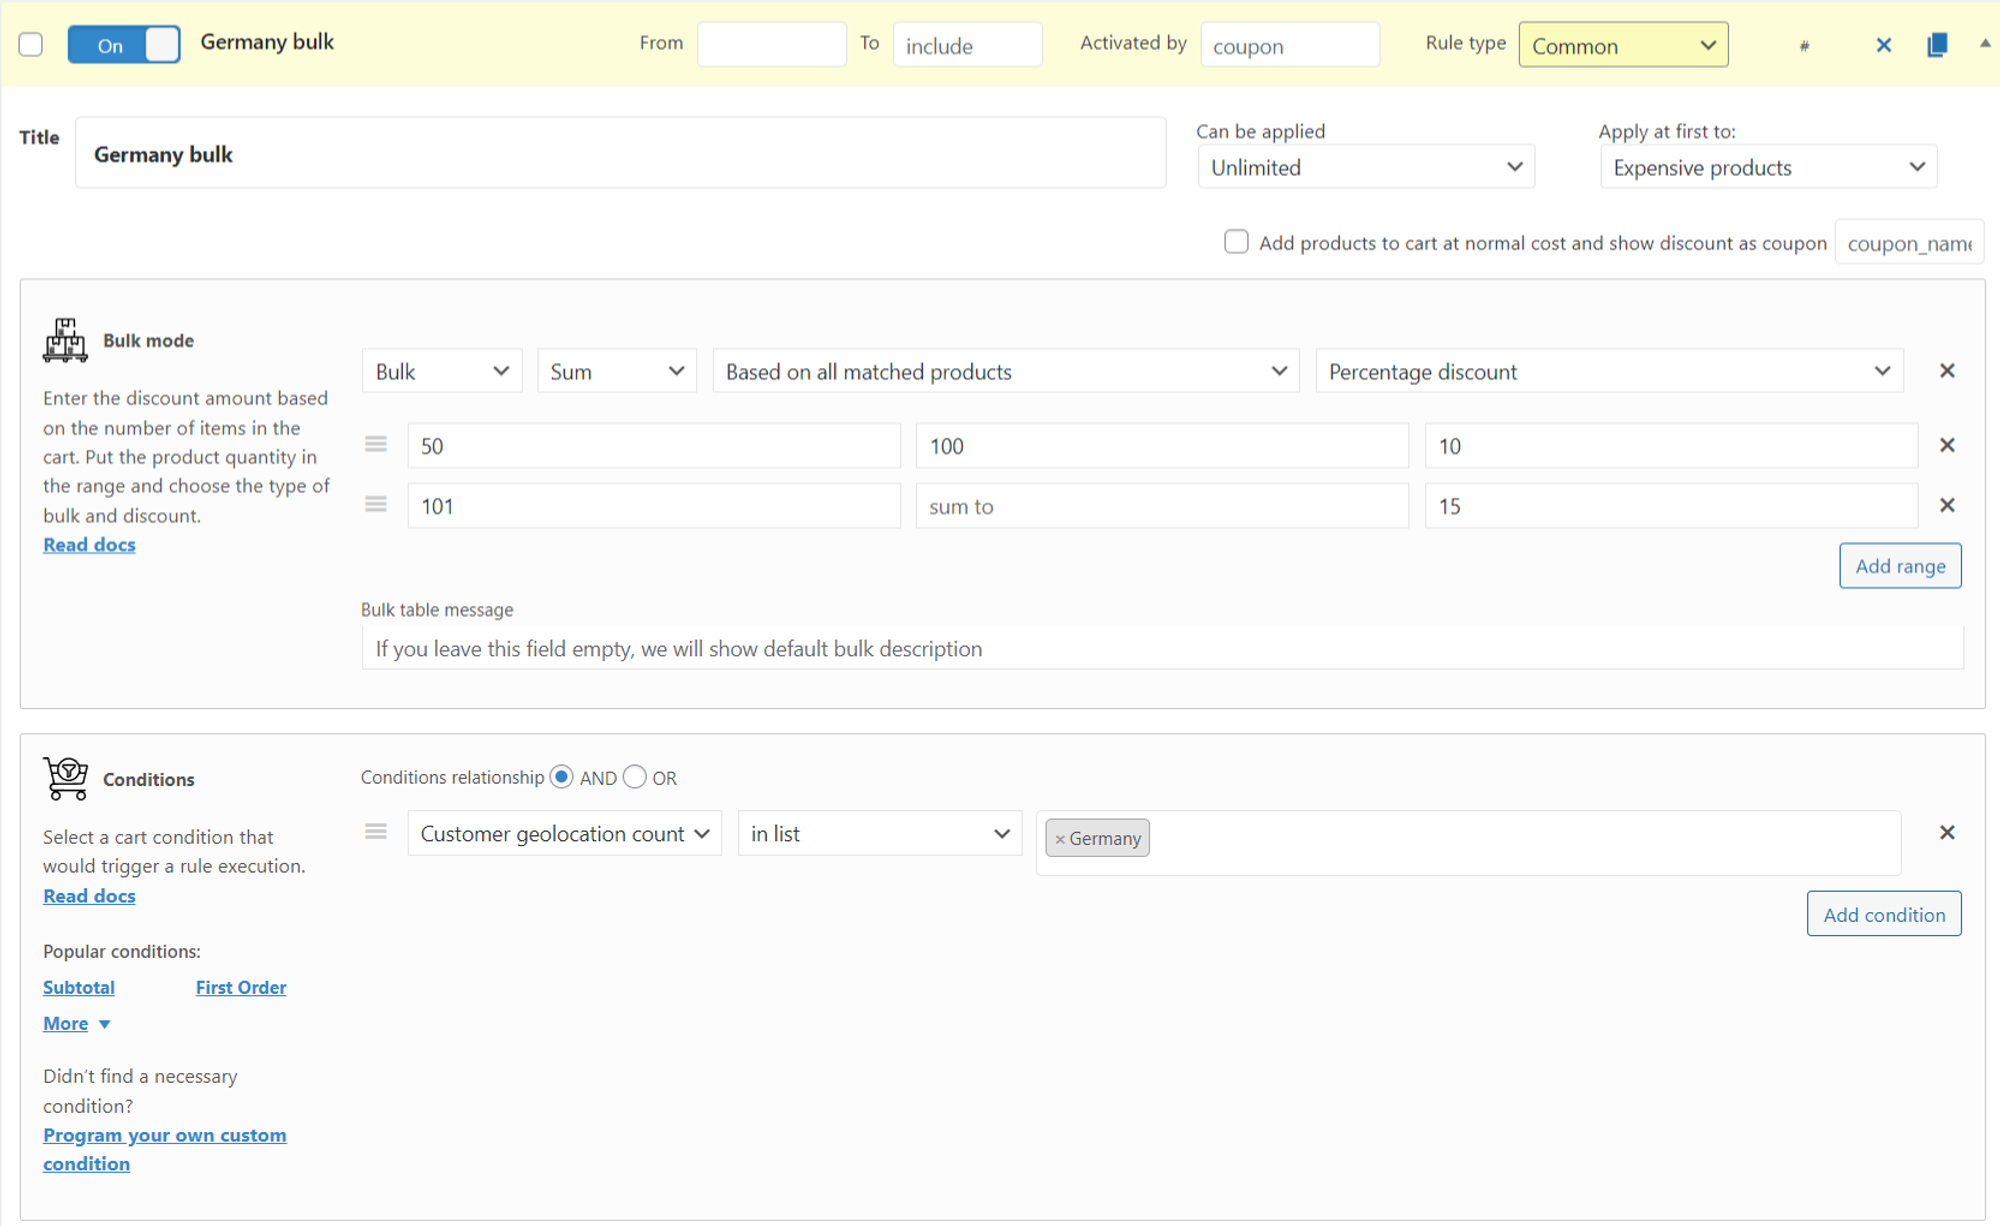
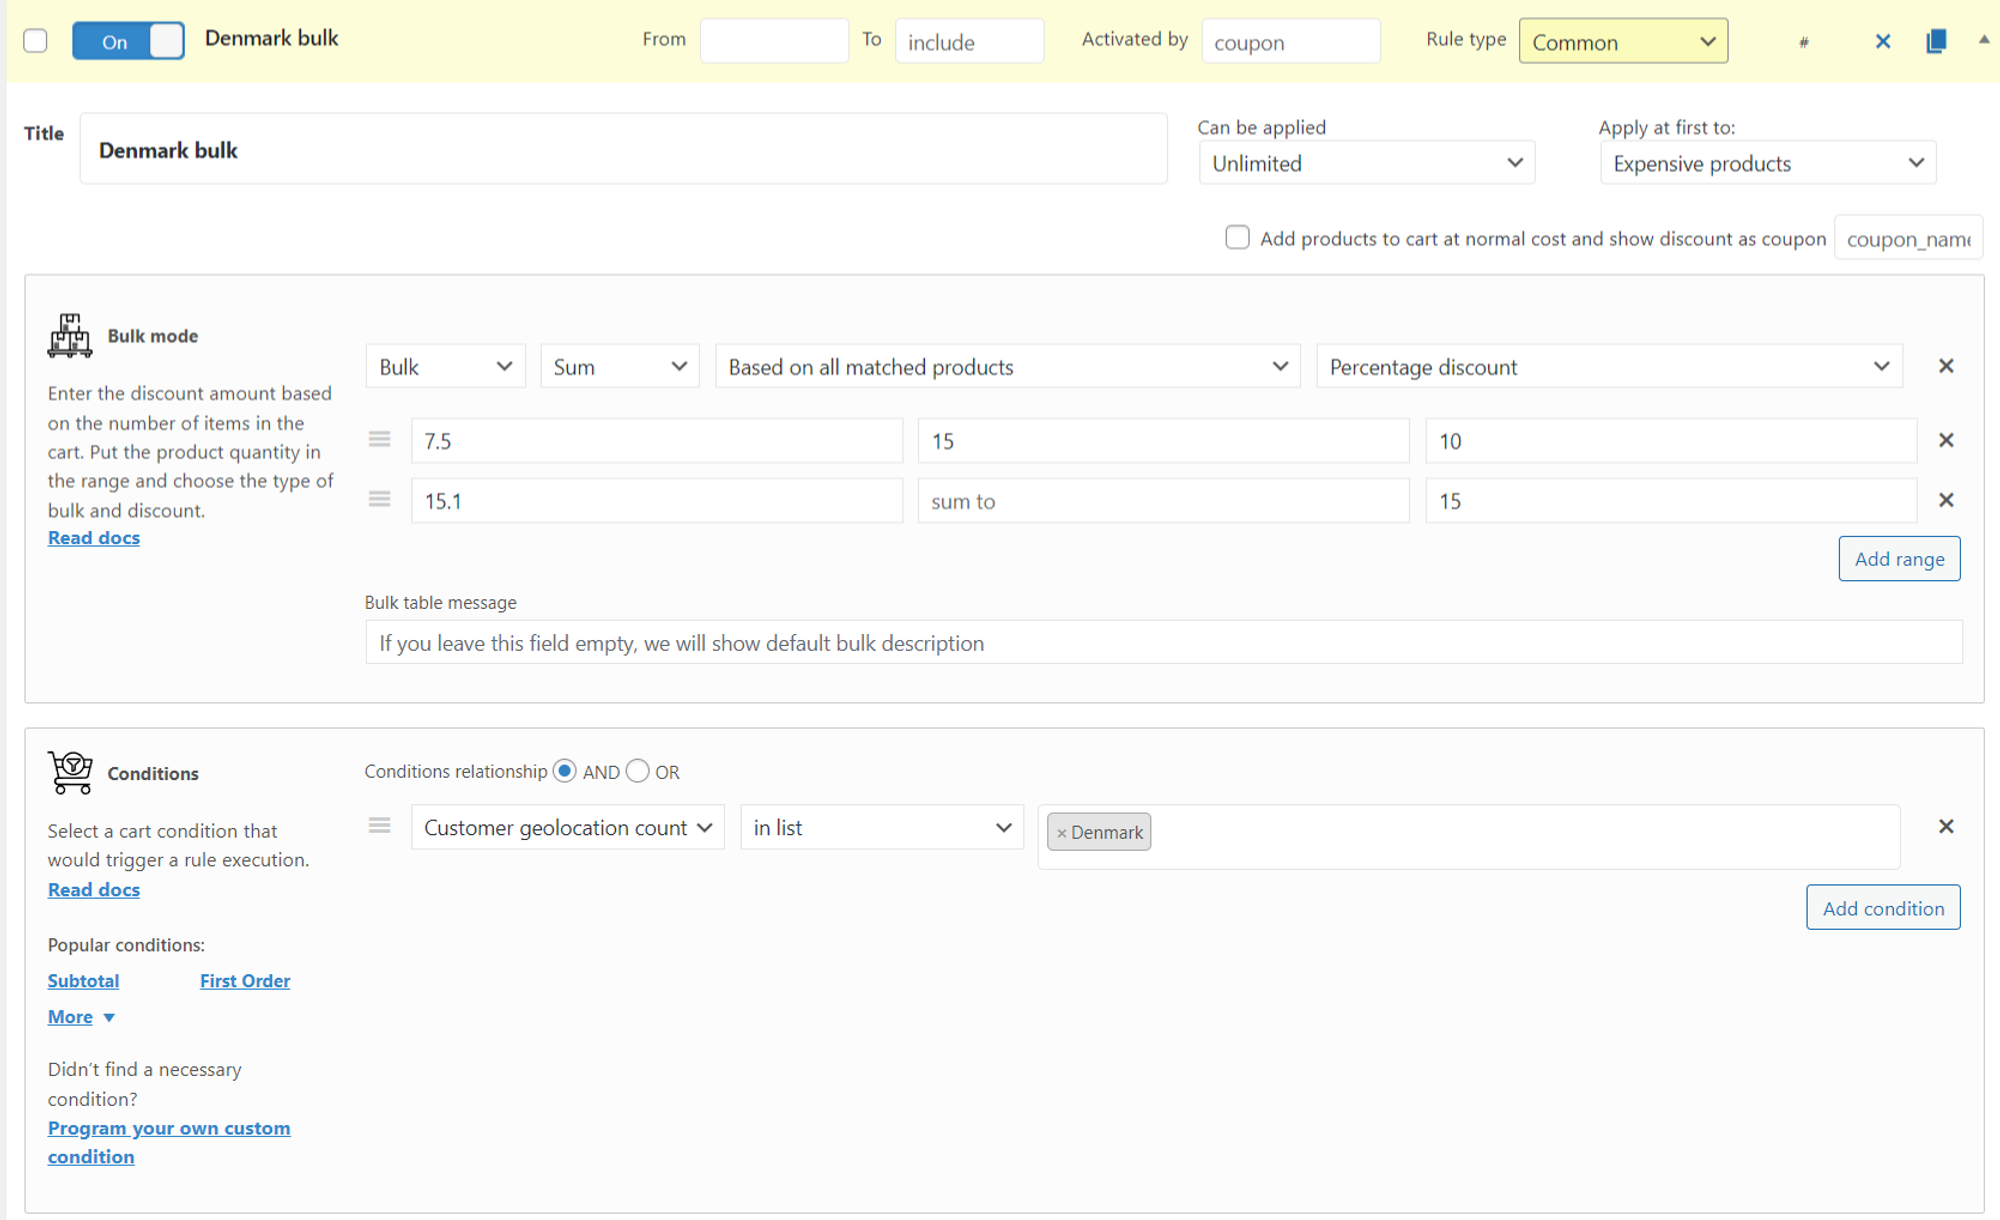
Location-based Pricing

Location-based pricing takes into account the geographical location of customers to determine prices. For example, a ride-sharing app may charge higher prices in a busy city center compared to a less busy suburb. This allows businesses to adapt their prices to local market conditions.

Setting up a pricing strategy by location is very easy. Follow these guide:

Create a rule (blank). Specify shipping zones in Conditions section. In Product discounts section choose the type of discount and its amount.
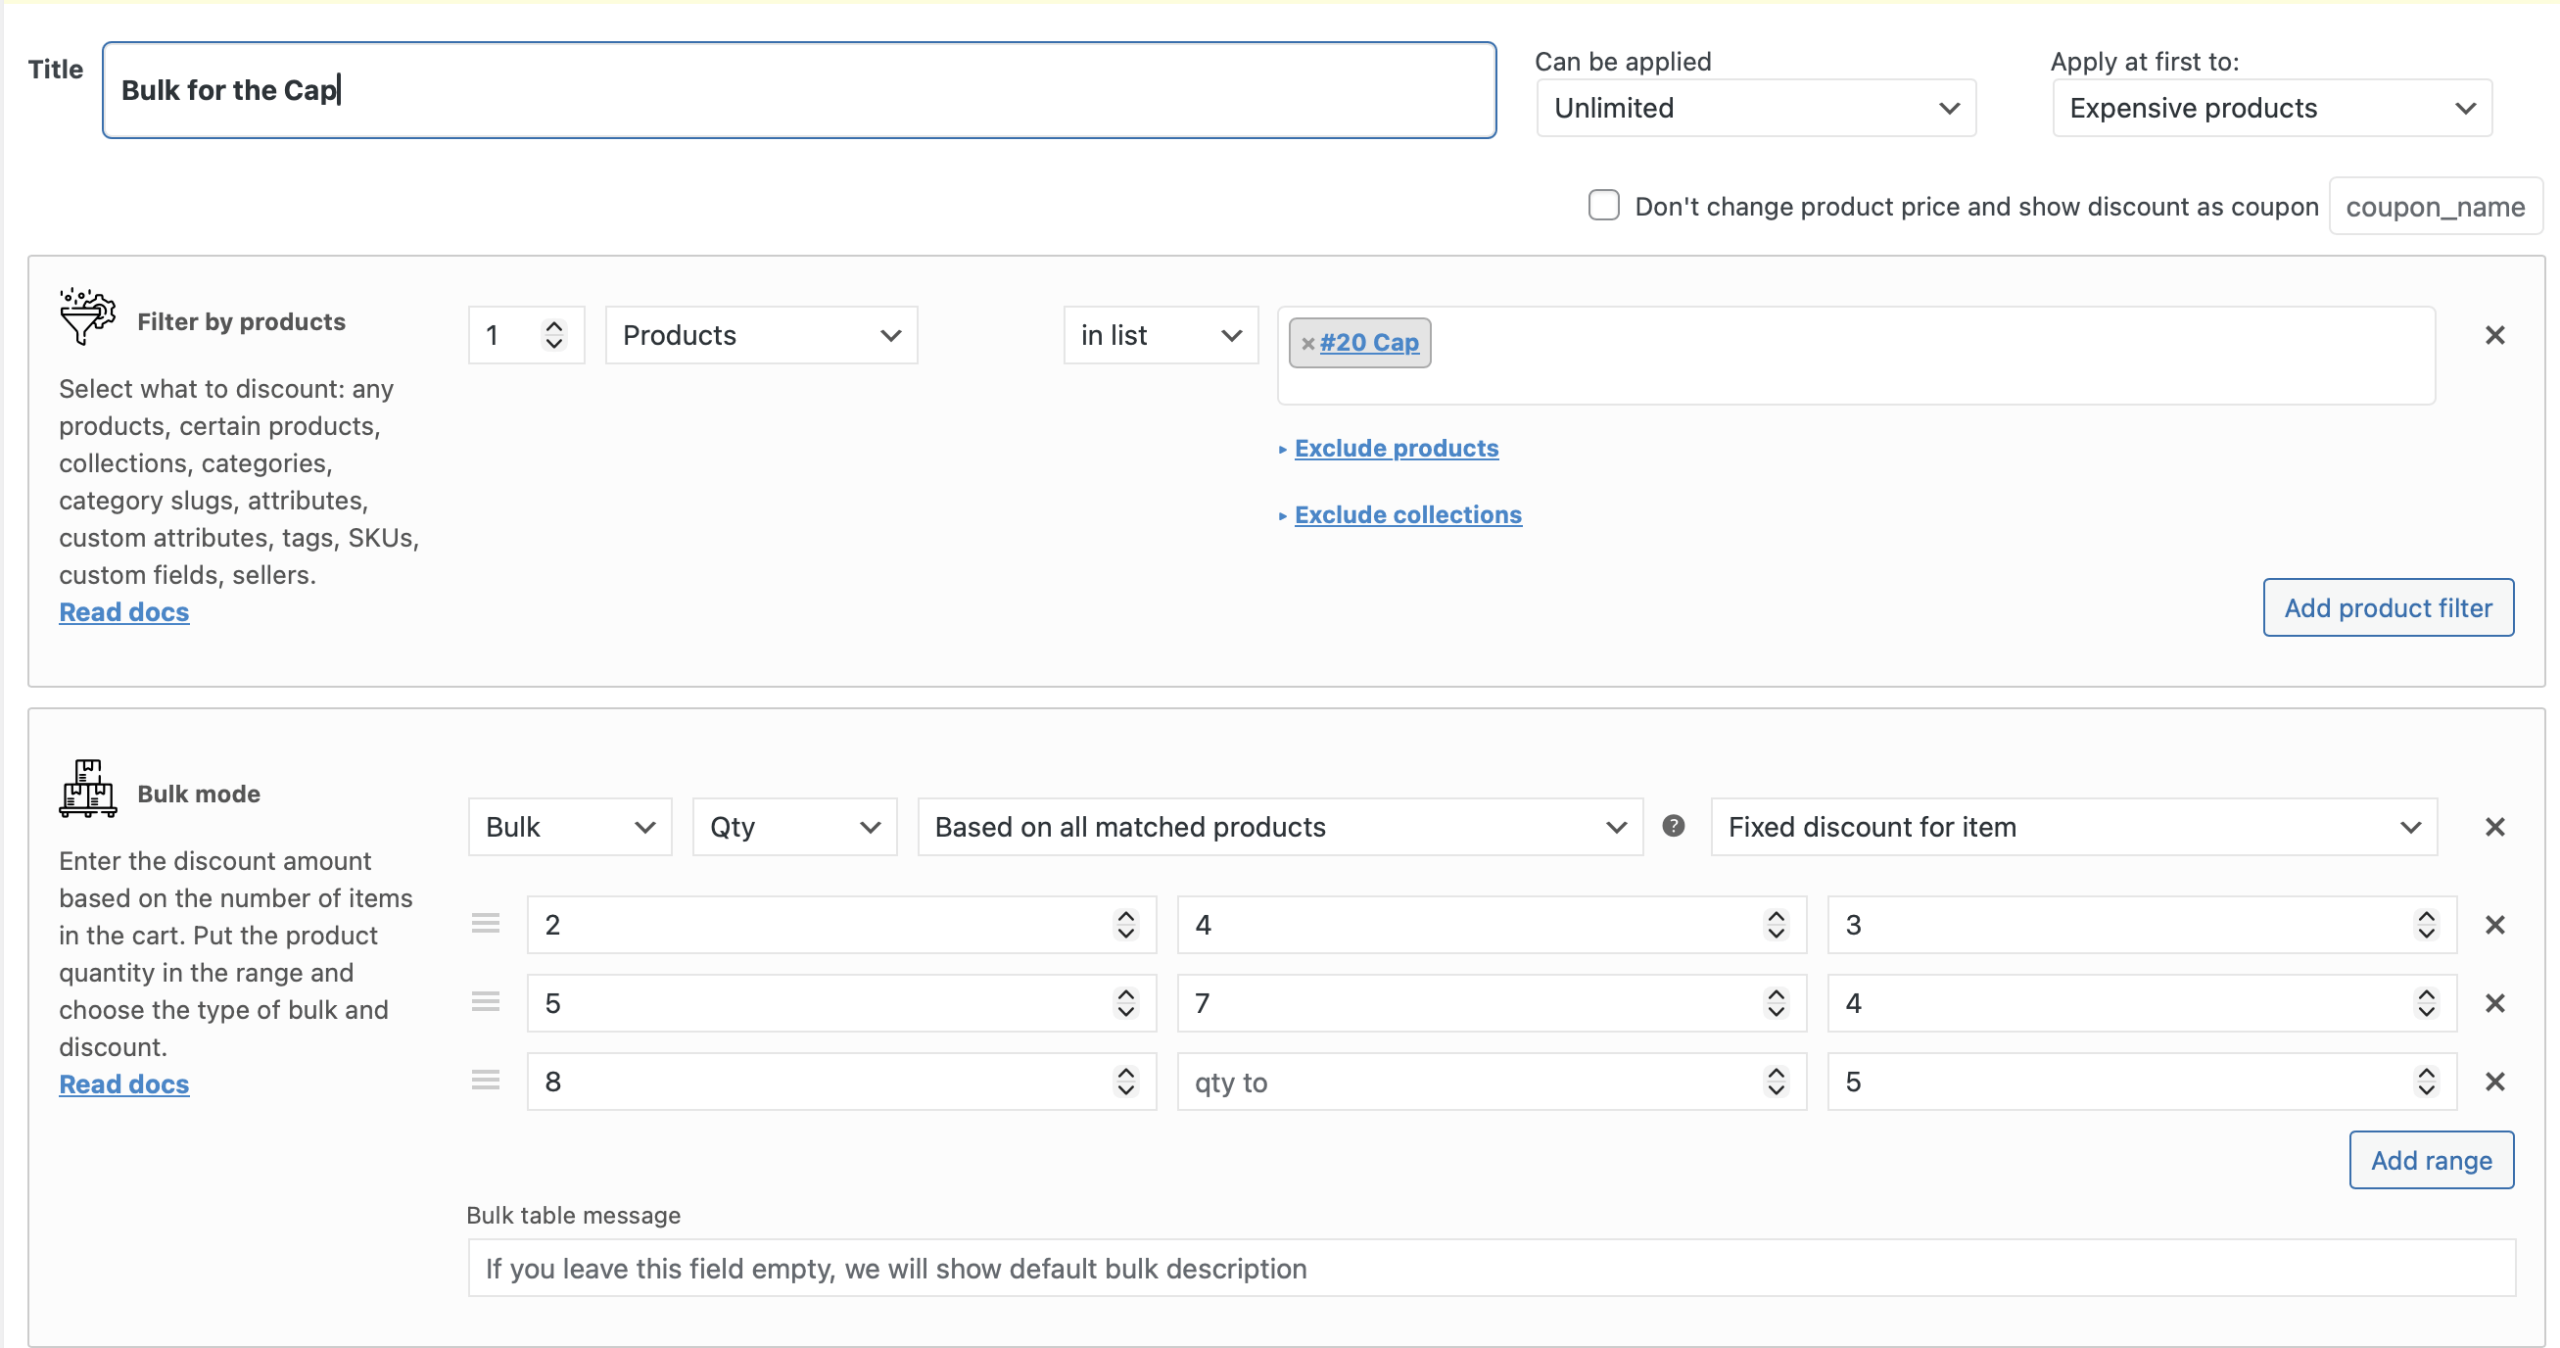
Limited Products

Limited edition products often generate a lot of buzz and demand. Businesses can use dynamic pricing to adjust prices for these products based on demand, making them more exclusive and desirable for customers.

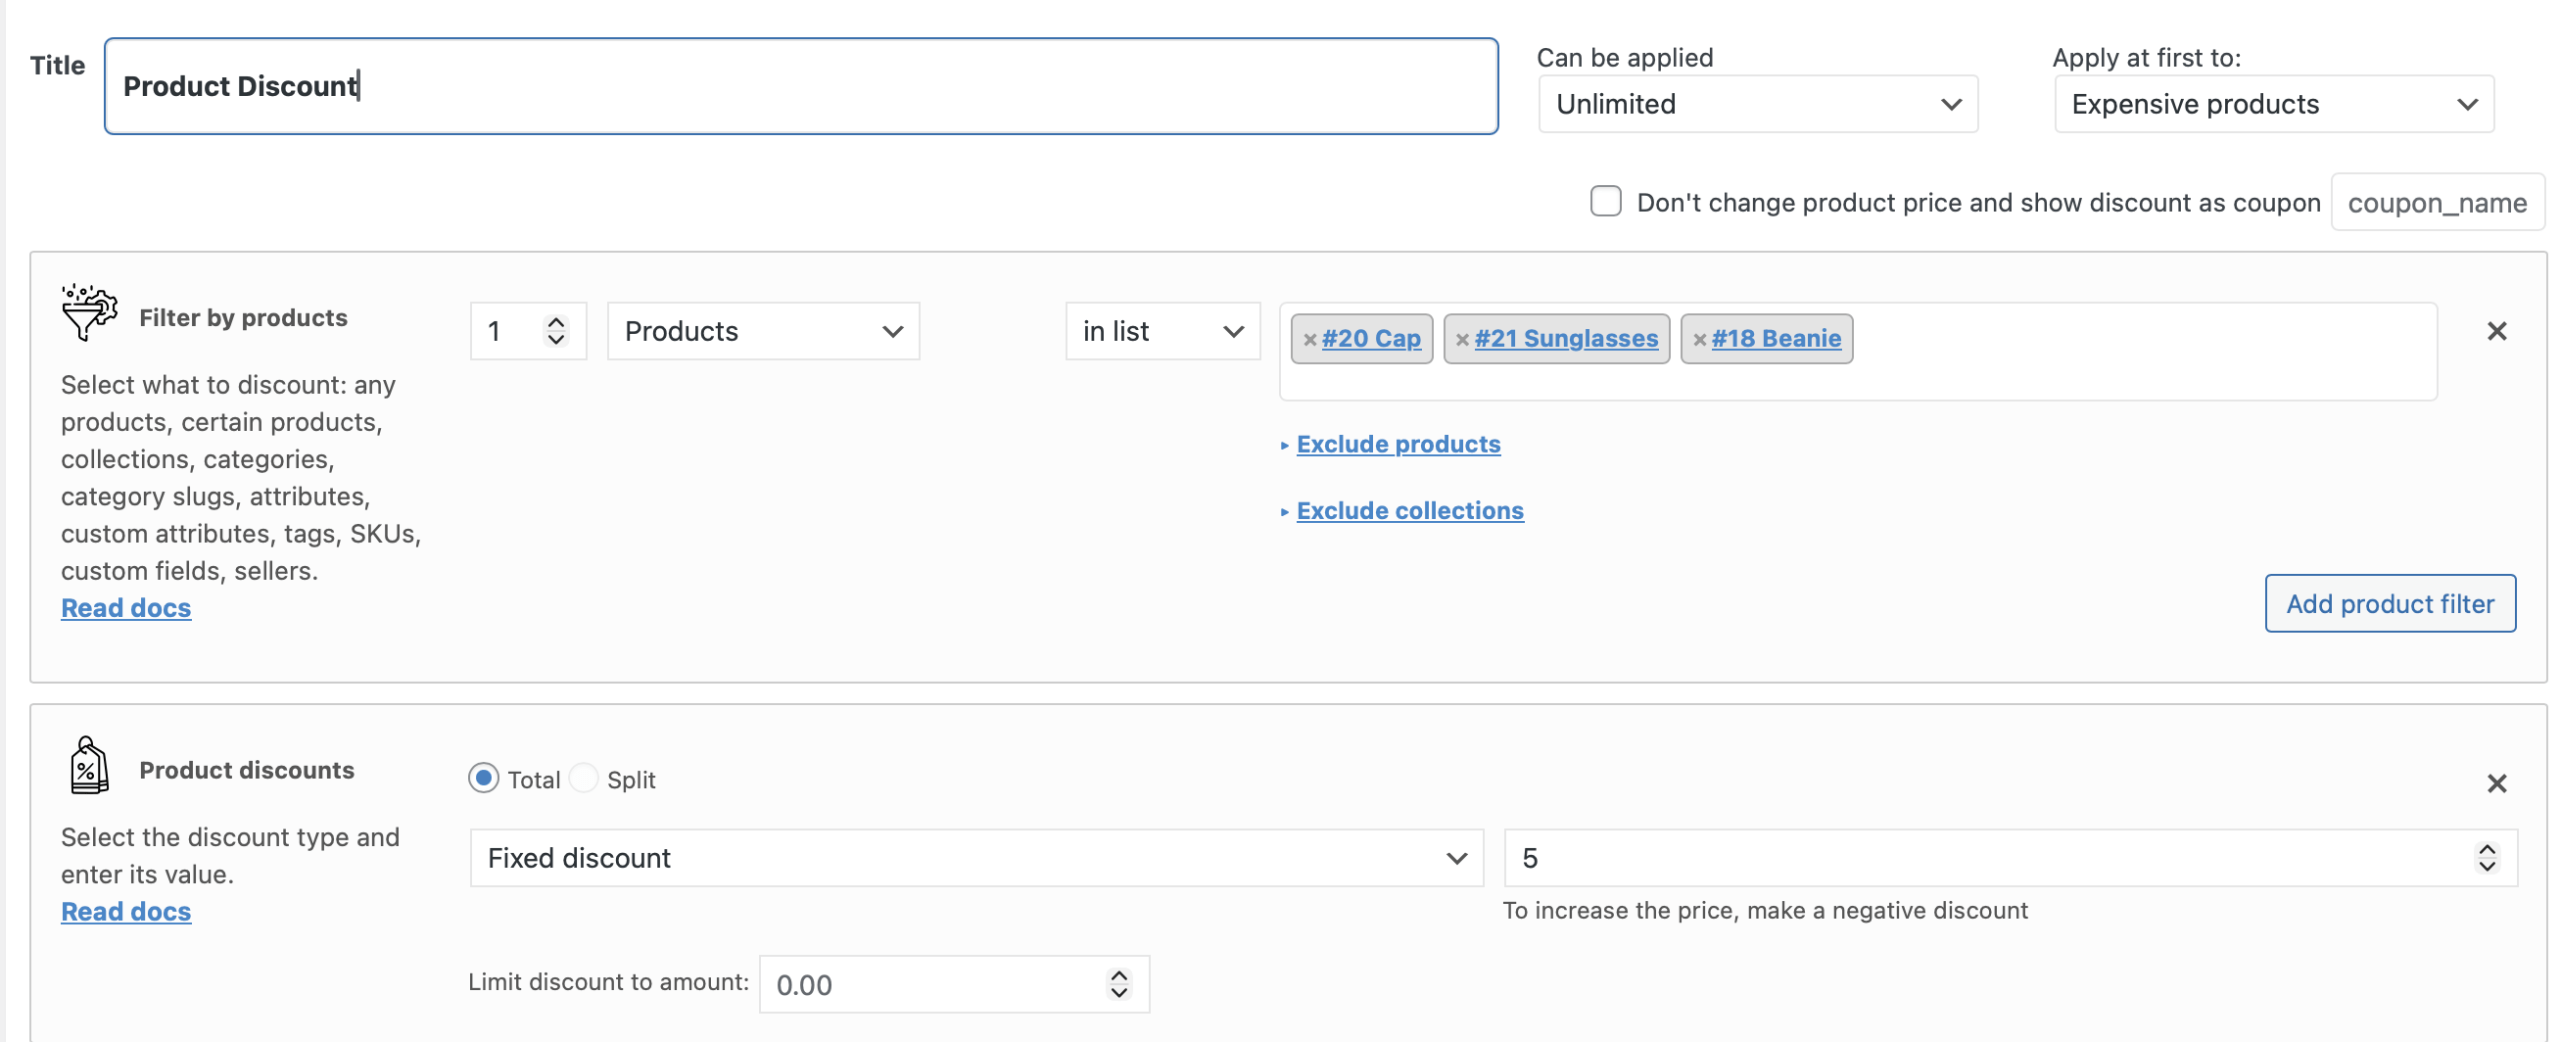
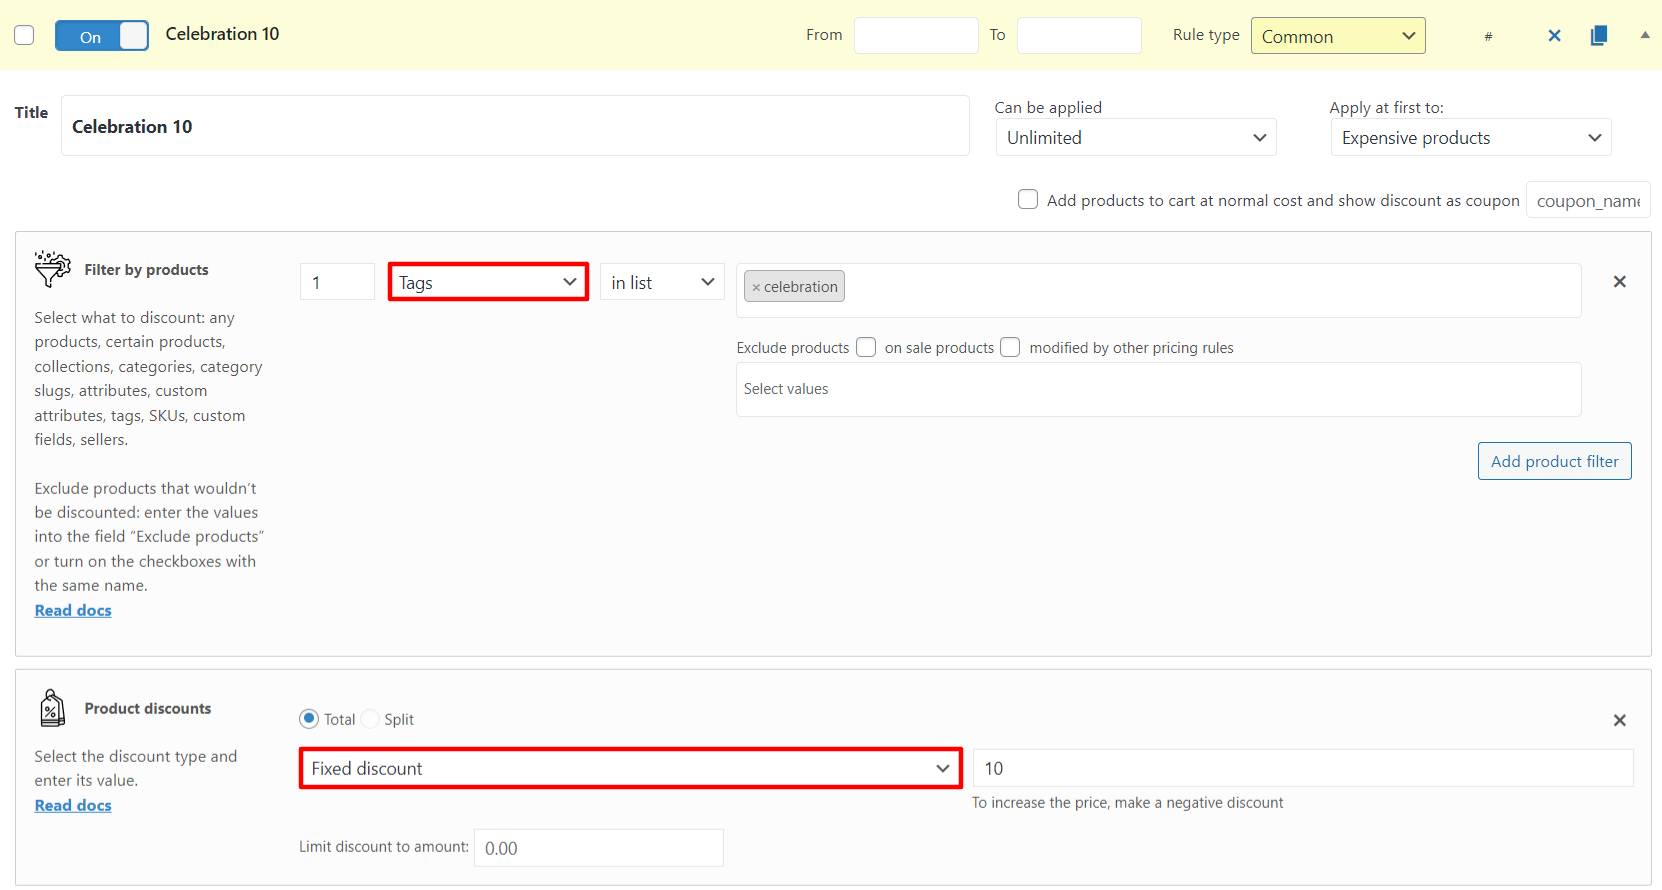
Using the plugin, you can create a rule by tag (for example, the Limited Edition tag).

Create a rule (Product discount type). Specify Tags in Product filter section. Choose the type of discount and its amount in Product discount section.
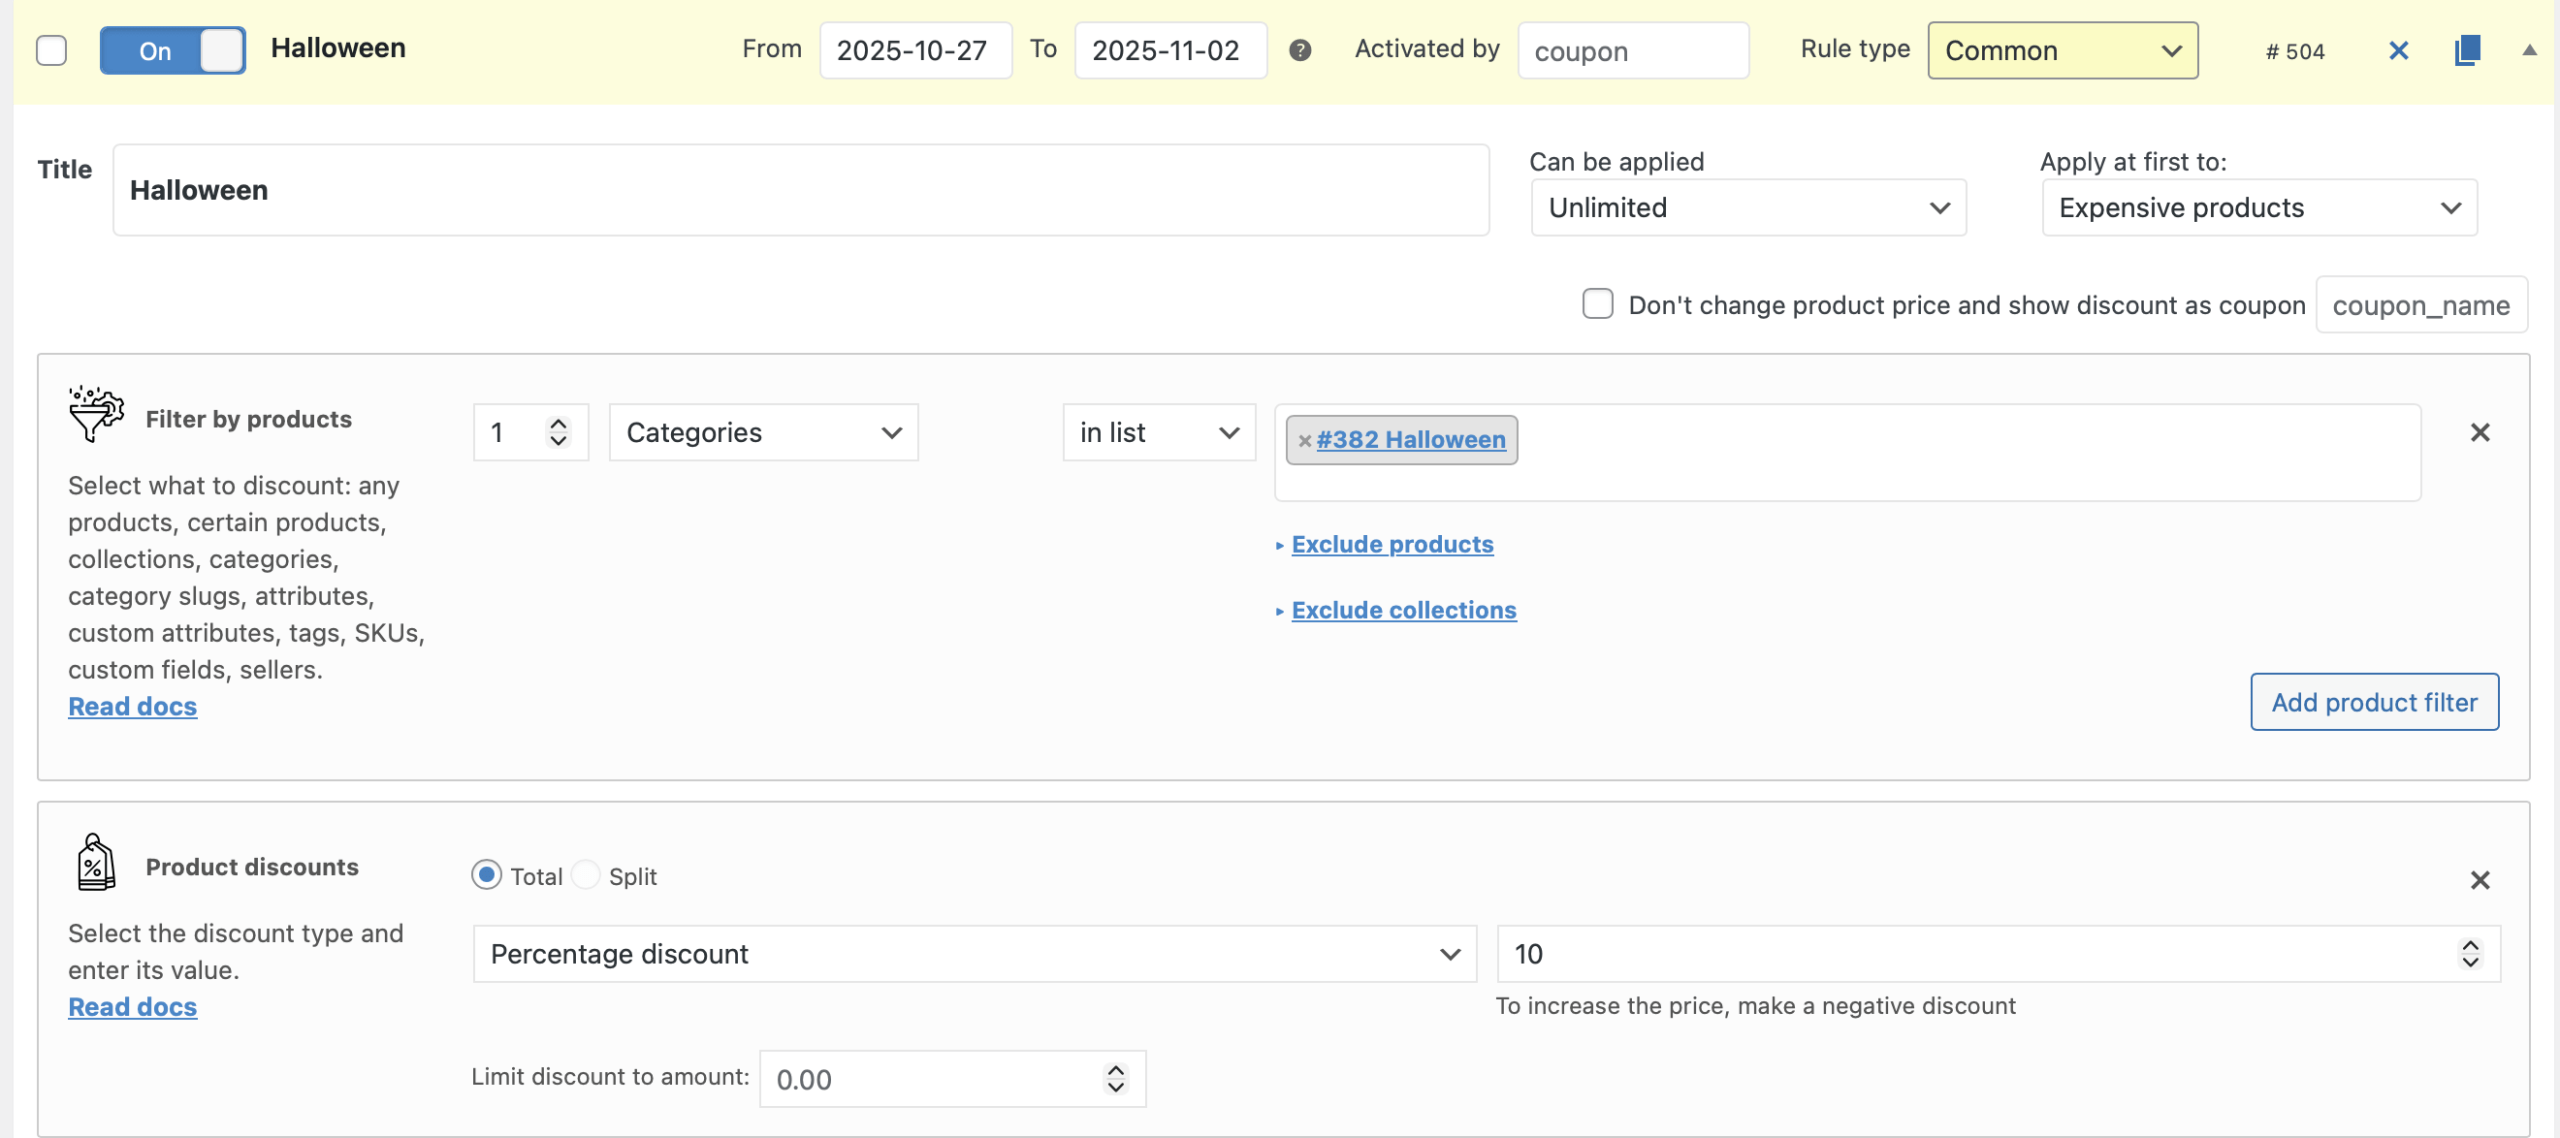
Flash Sales

Limited-time promotions or flash sales can create a sense of urgency and encourage customers to make a purchase.

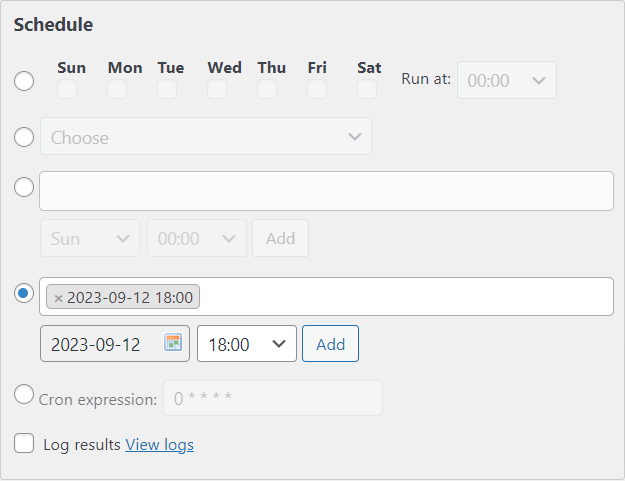
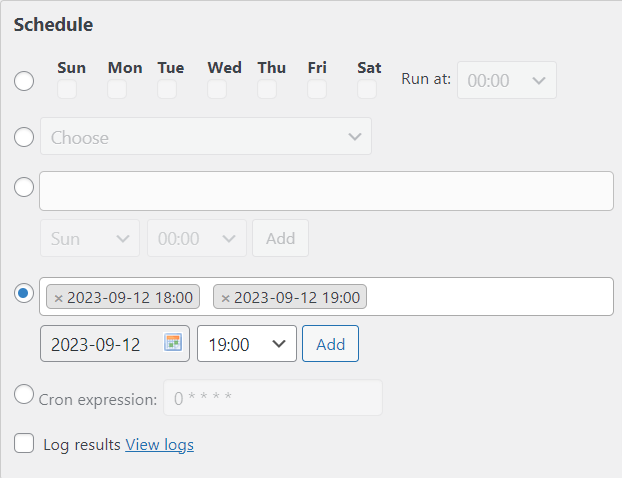
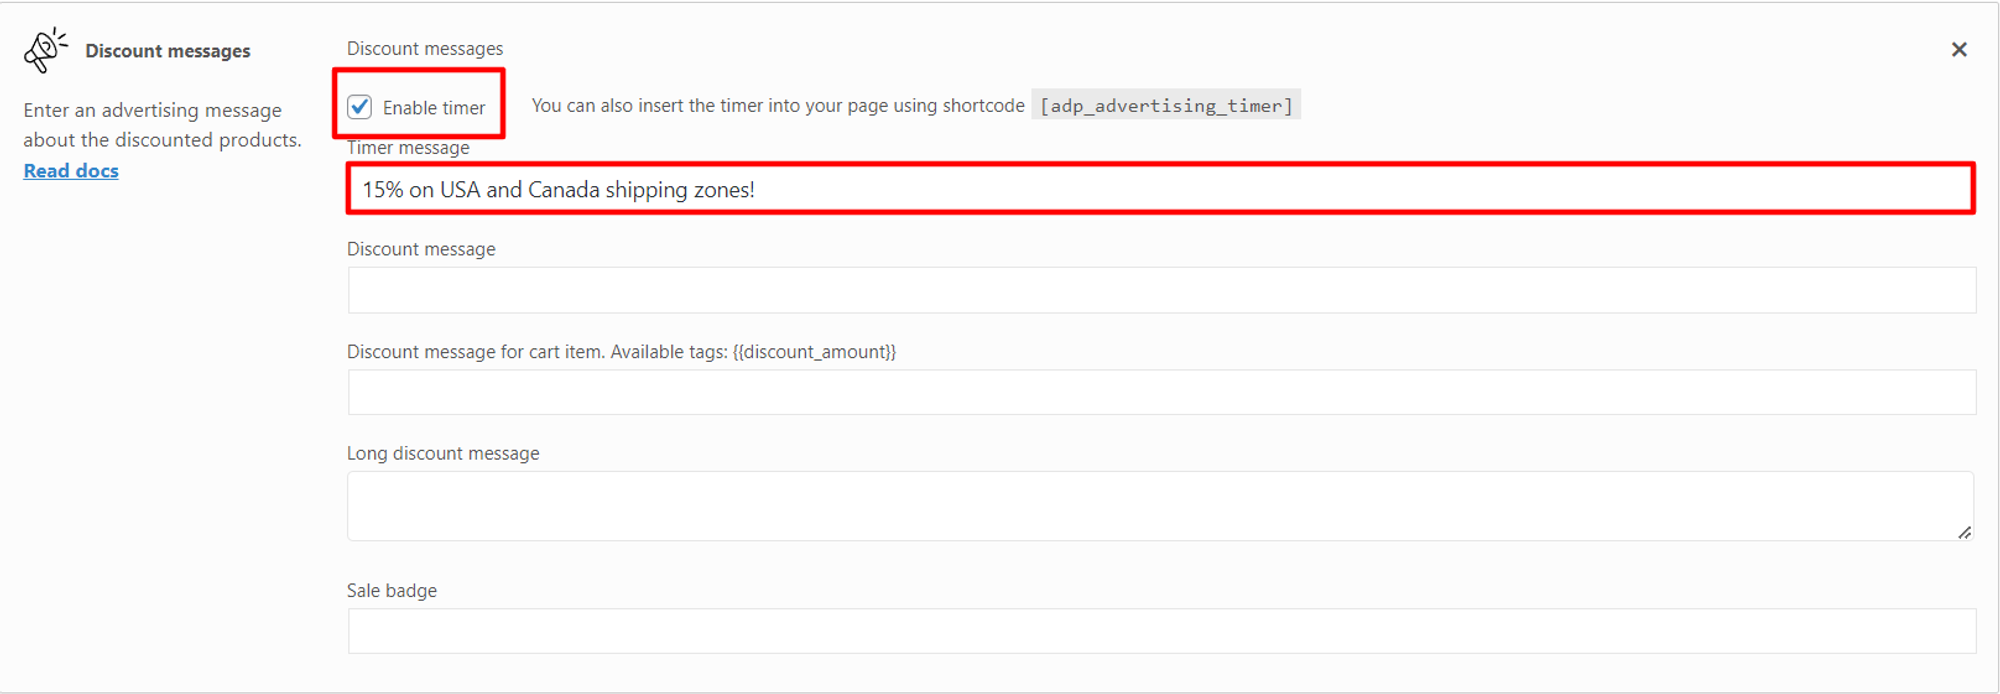
Don’t know how to show a timer on a product page? Add an Advertising block (ссылка) to your rule!

Note: Be sure to include the date range of your rule.

Related Products

Let’s imagine that you have a clothing store. You have been on the market for a long time and have identified a general pattern – in more than 20% of jeans purchases, cuscromers wanted to purchase a belt to go with them.

How to increase this percent? Start a “buy jeans and belt at a discount” company.

Solution via Advanced Dynamic Pricing for WooCommerce:

You can create such a rule in several ways.

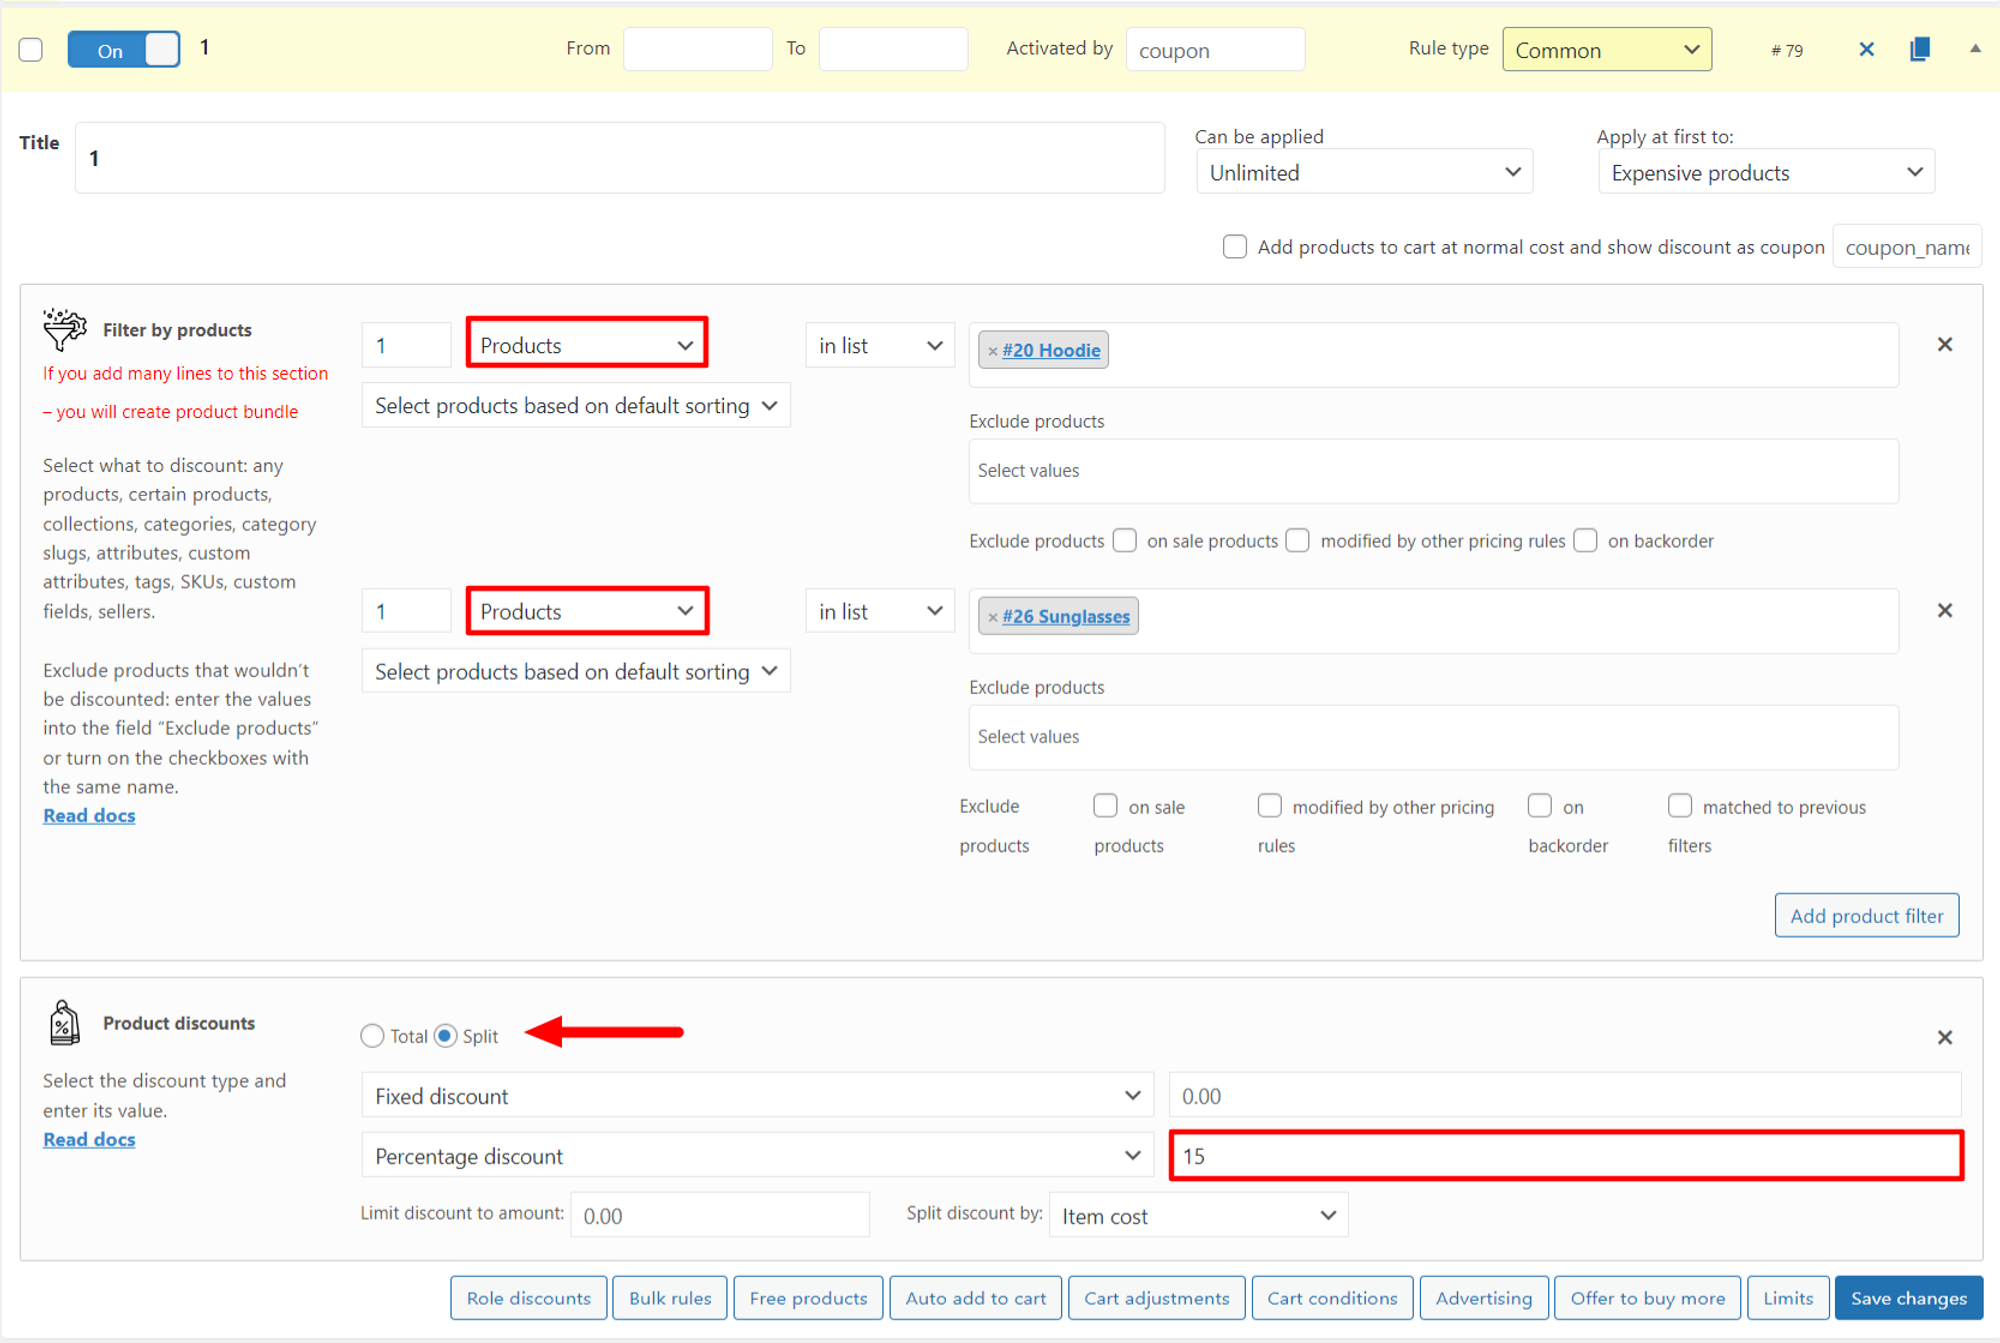
  1. Create a rule (Product discount type). Specify Product type in Product filter and select, for example, hoodie. Add a similar filter, but select sunglasses. In Product discount section check Split flag. Enter a percentage discount for the second item.
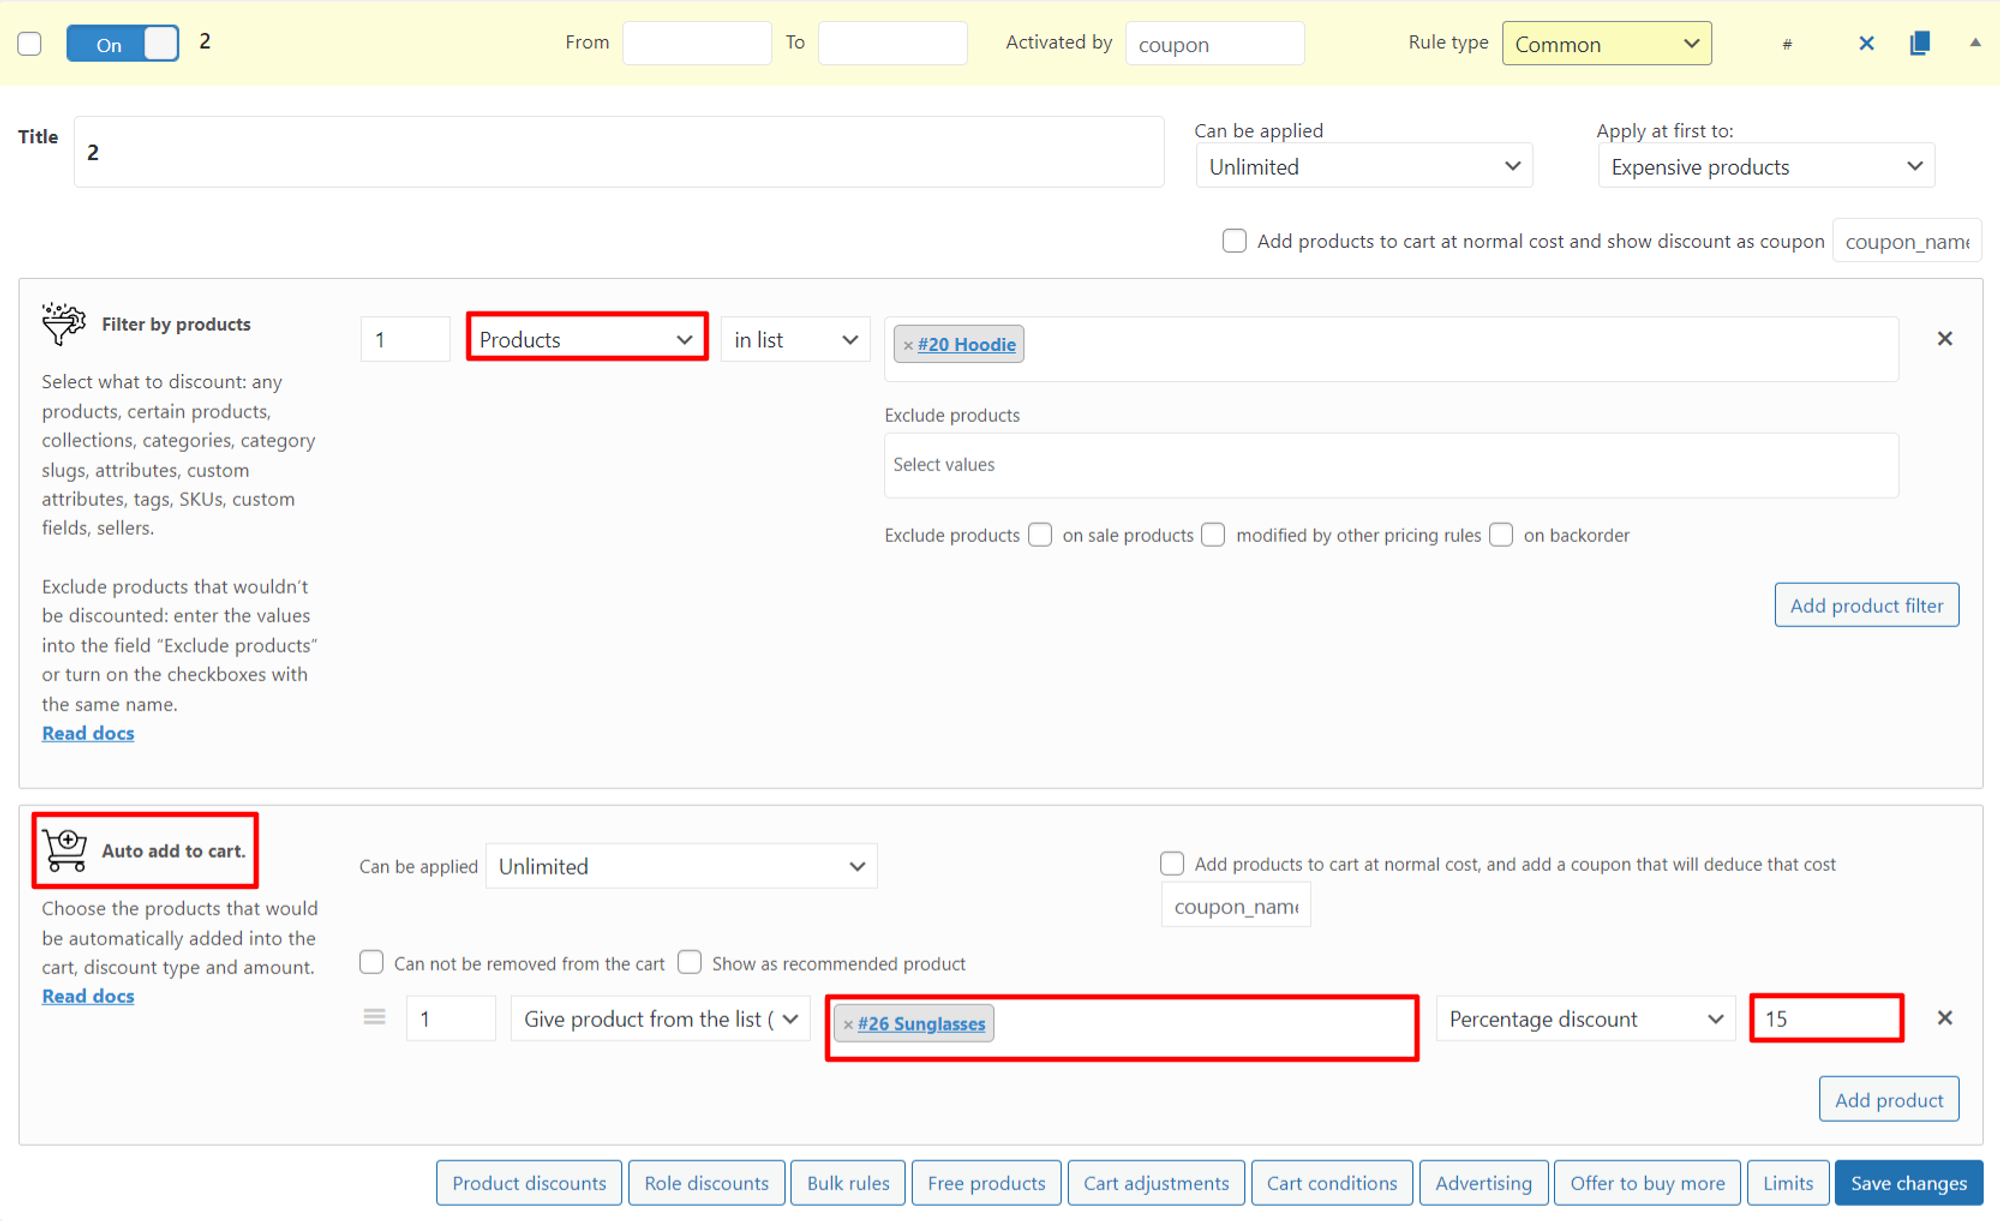
  1. Create a rule (blank). Add Product filter section and specify Product type. Choose, for example, a hoodie. Add Auto add to cart section. Select sunglasses and enter its discount.
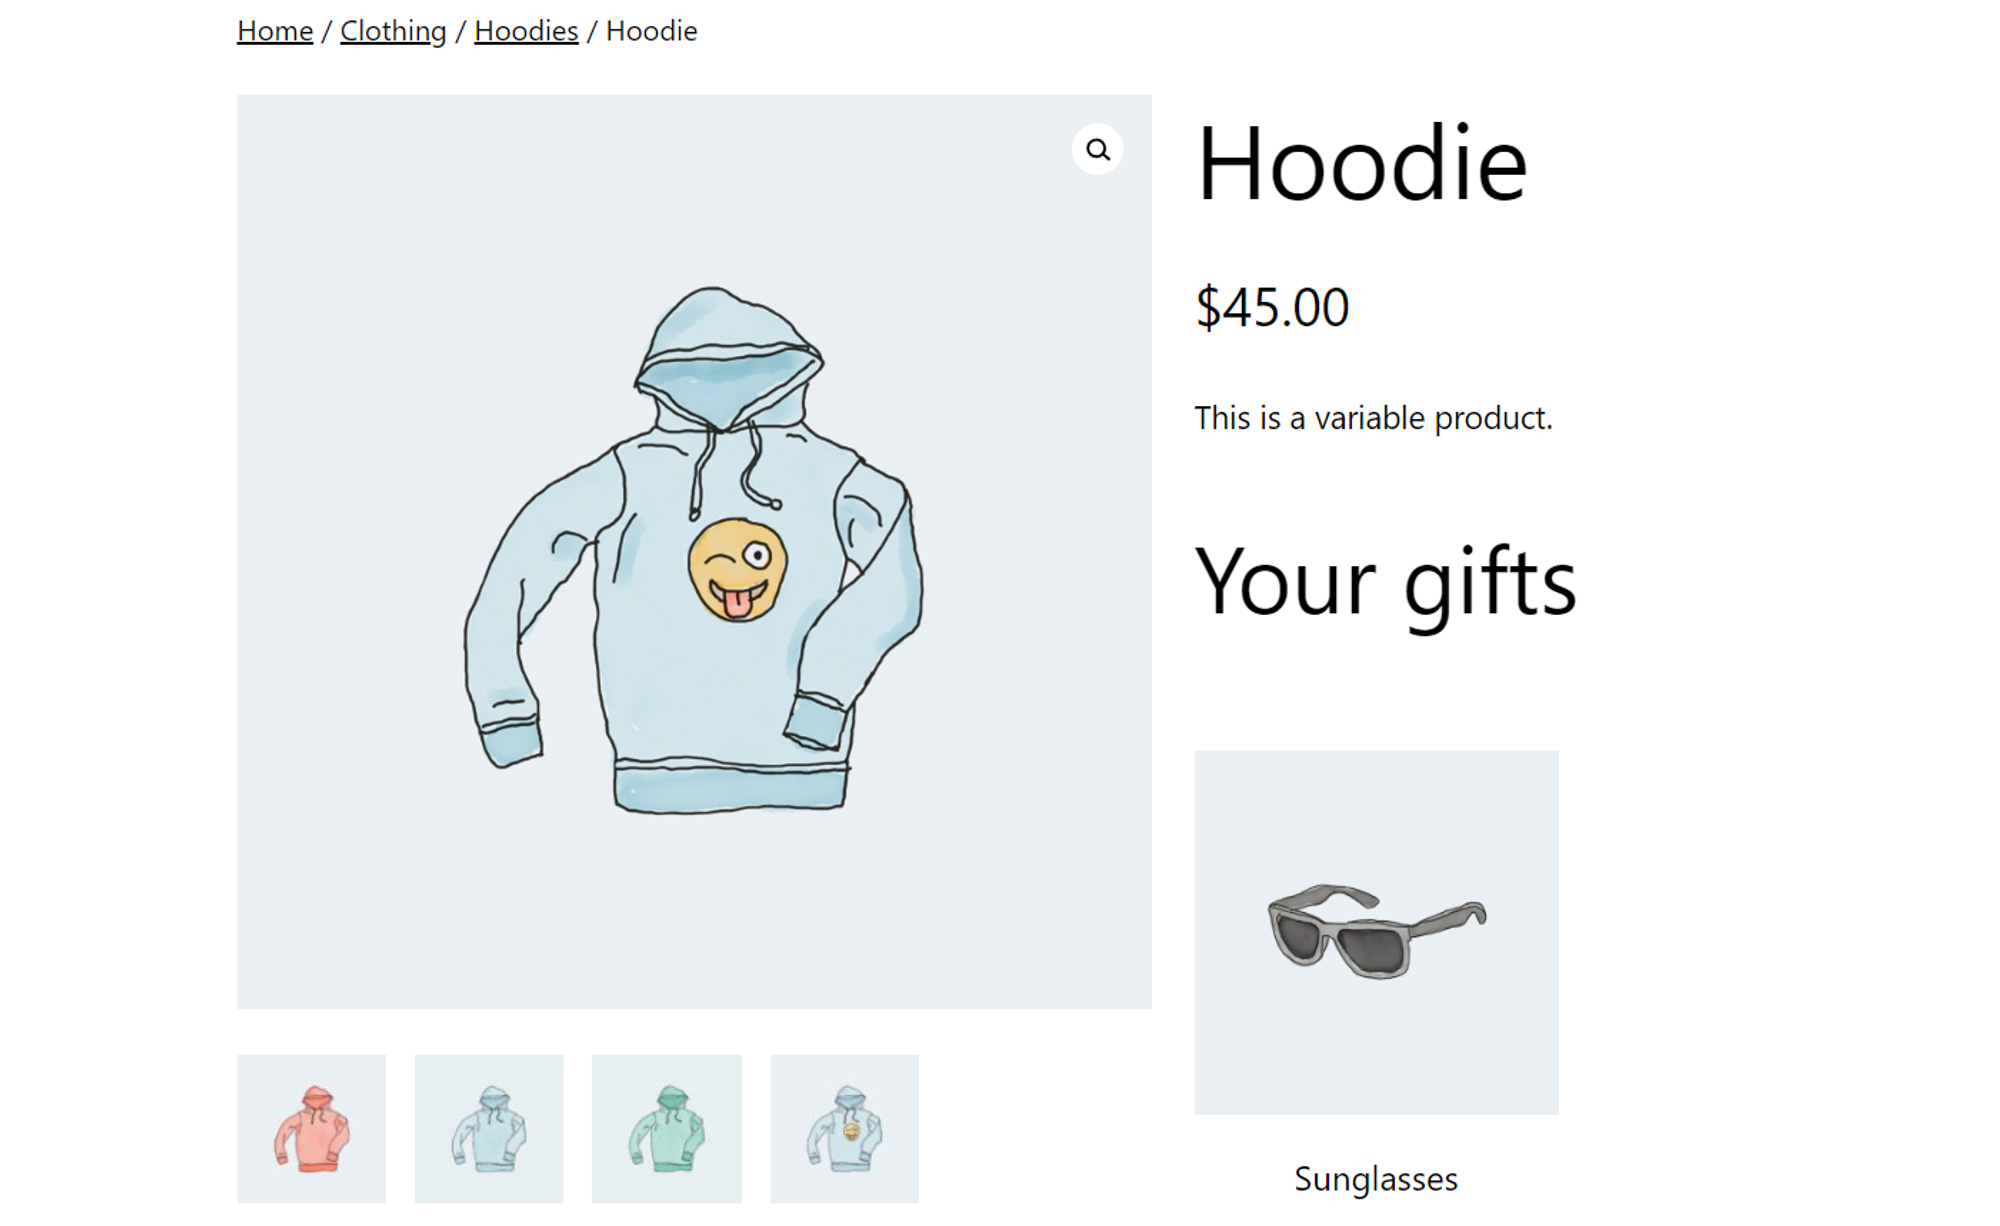
  1. Create a rule (BOGO (free) type). Specify Product type in Product filter and select, for example, hoodie. In Free products section, select sunglasses.

We show you the gift option because it has the benefit of being visible on the product page.

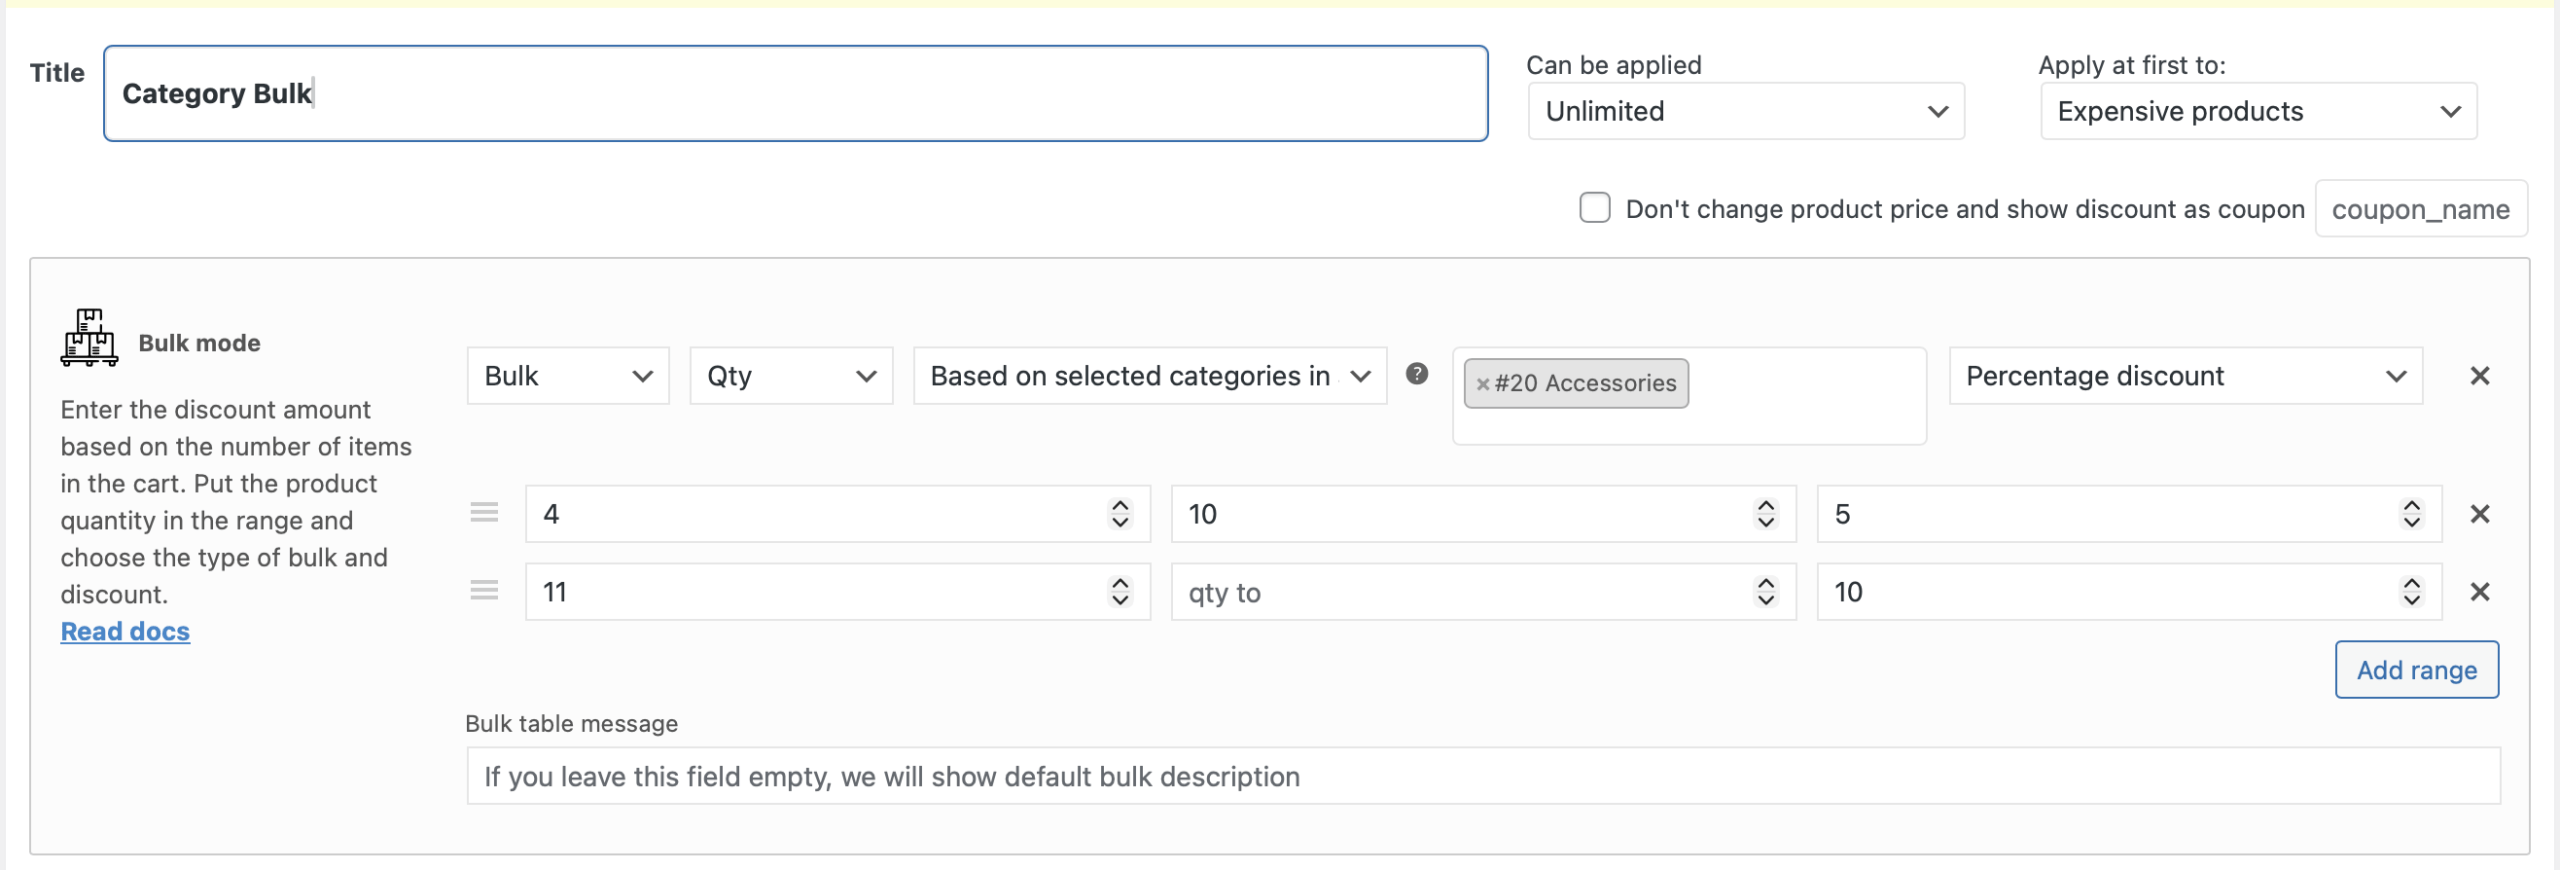
Encourage to buy more

For example, you own a jewelry store and your main goal is to sell as much product as possible. But time passes, and there are no sales. What to do?

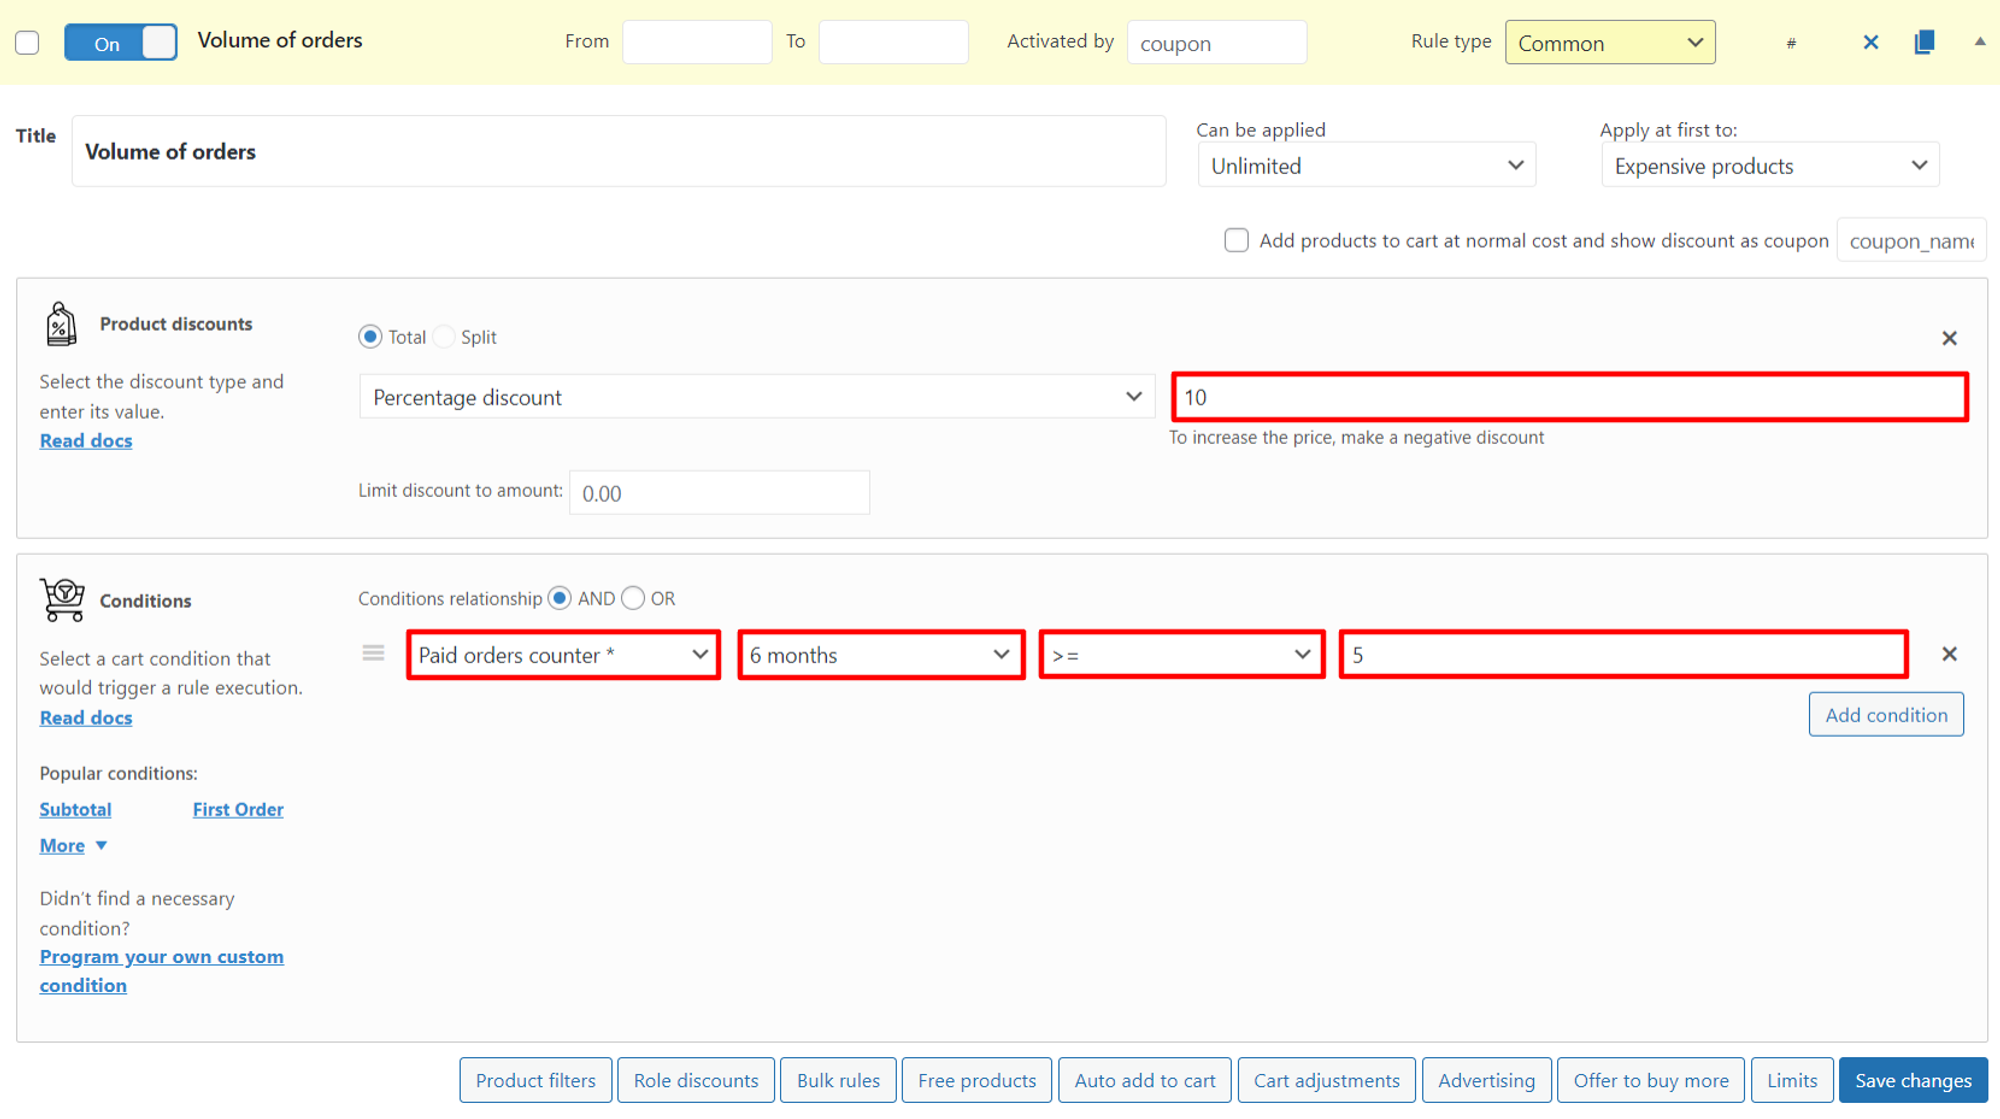
Let customers know that they will receive a discount for their volume of orders.

Create a rule that gives customers a 10% discount if they have made more than 5 orders in the last 6 months.

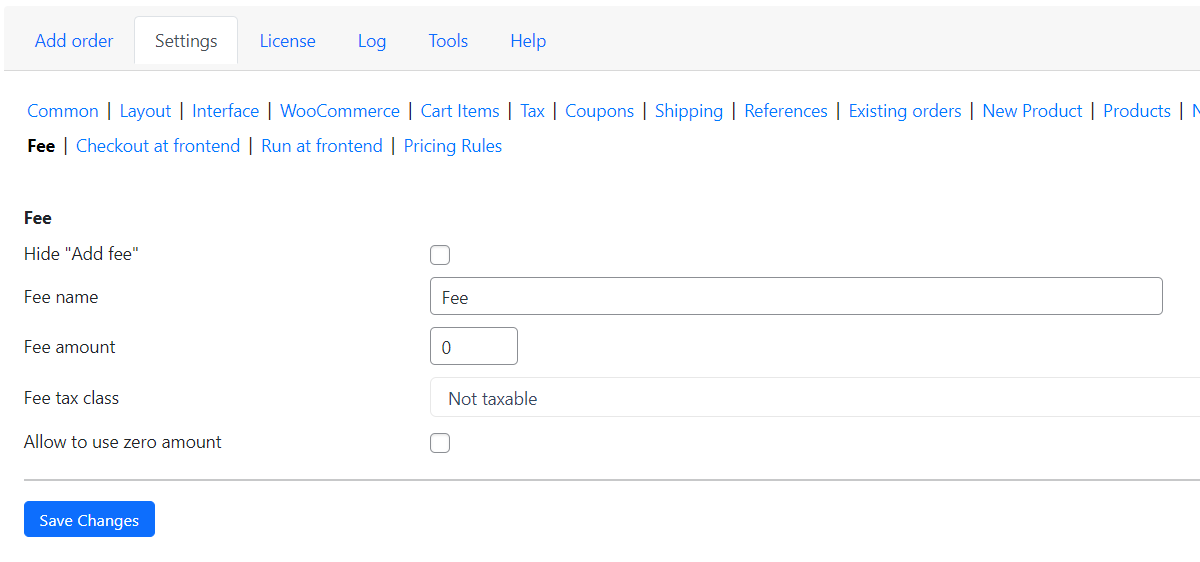
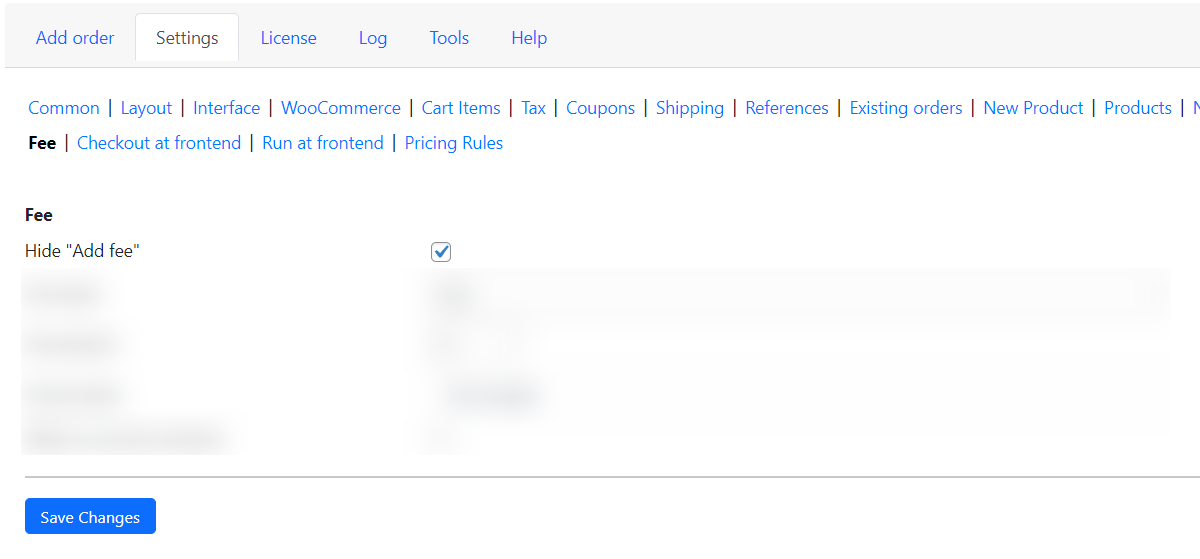
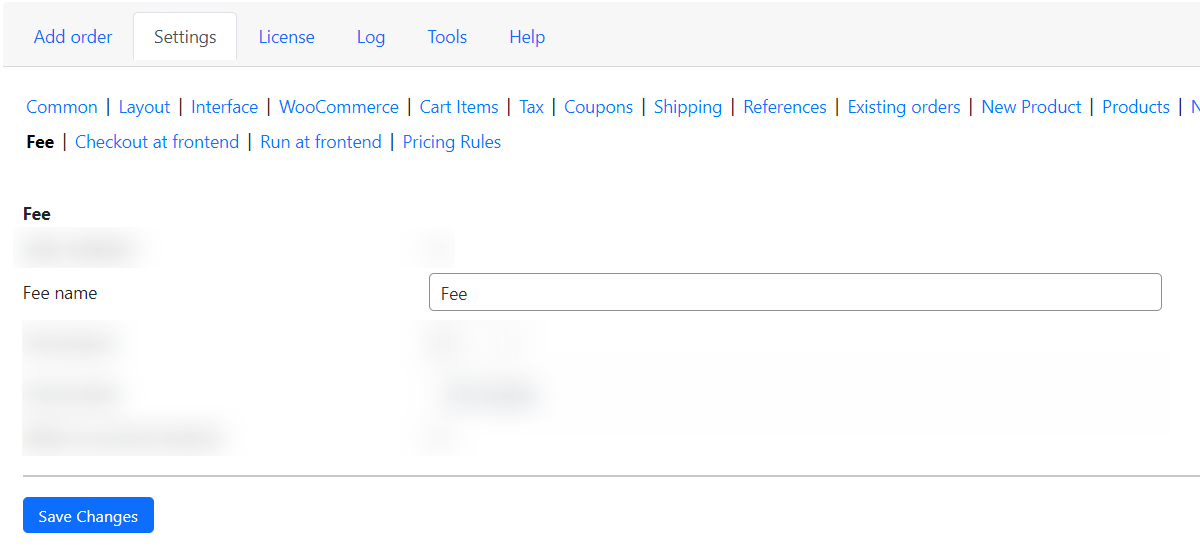
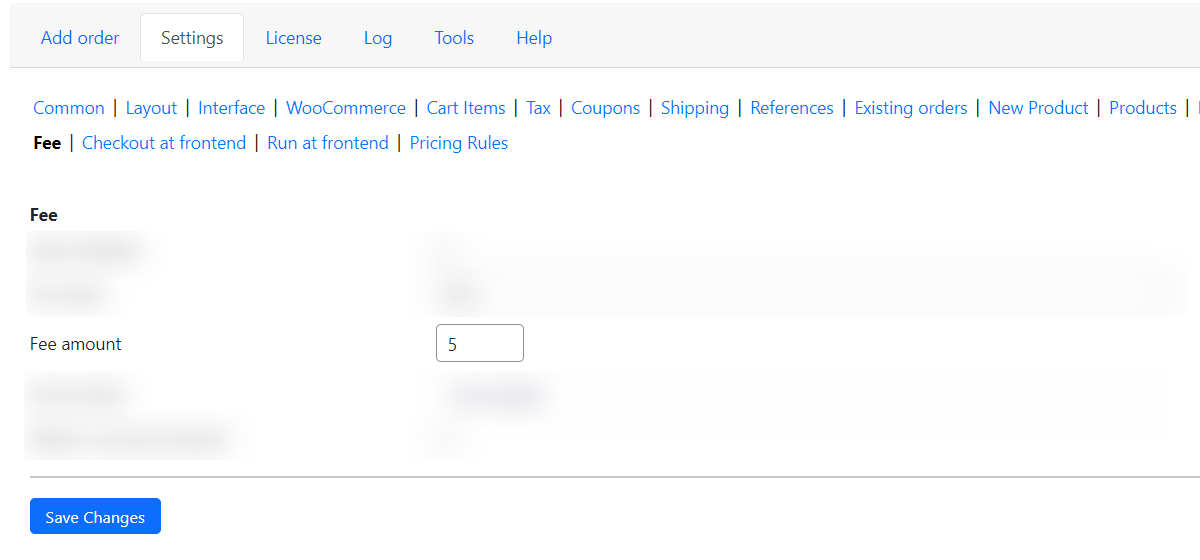
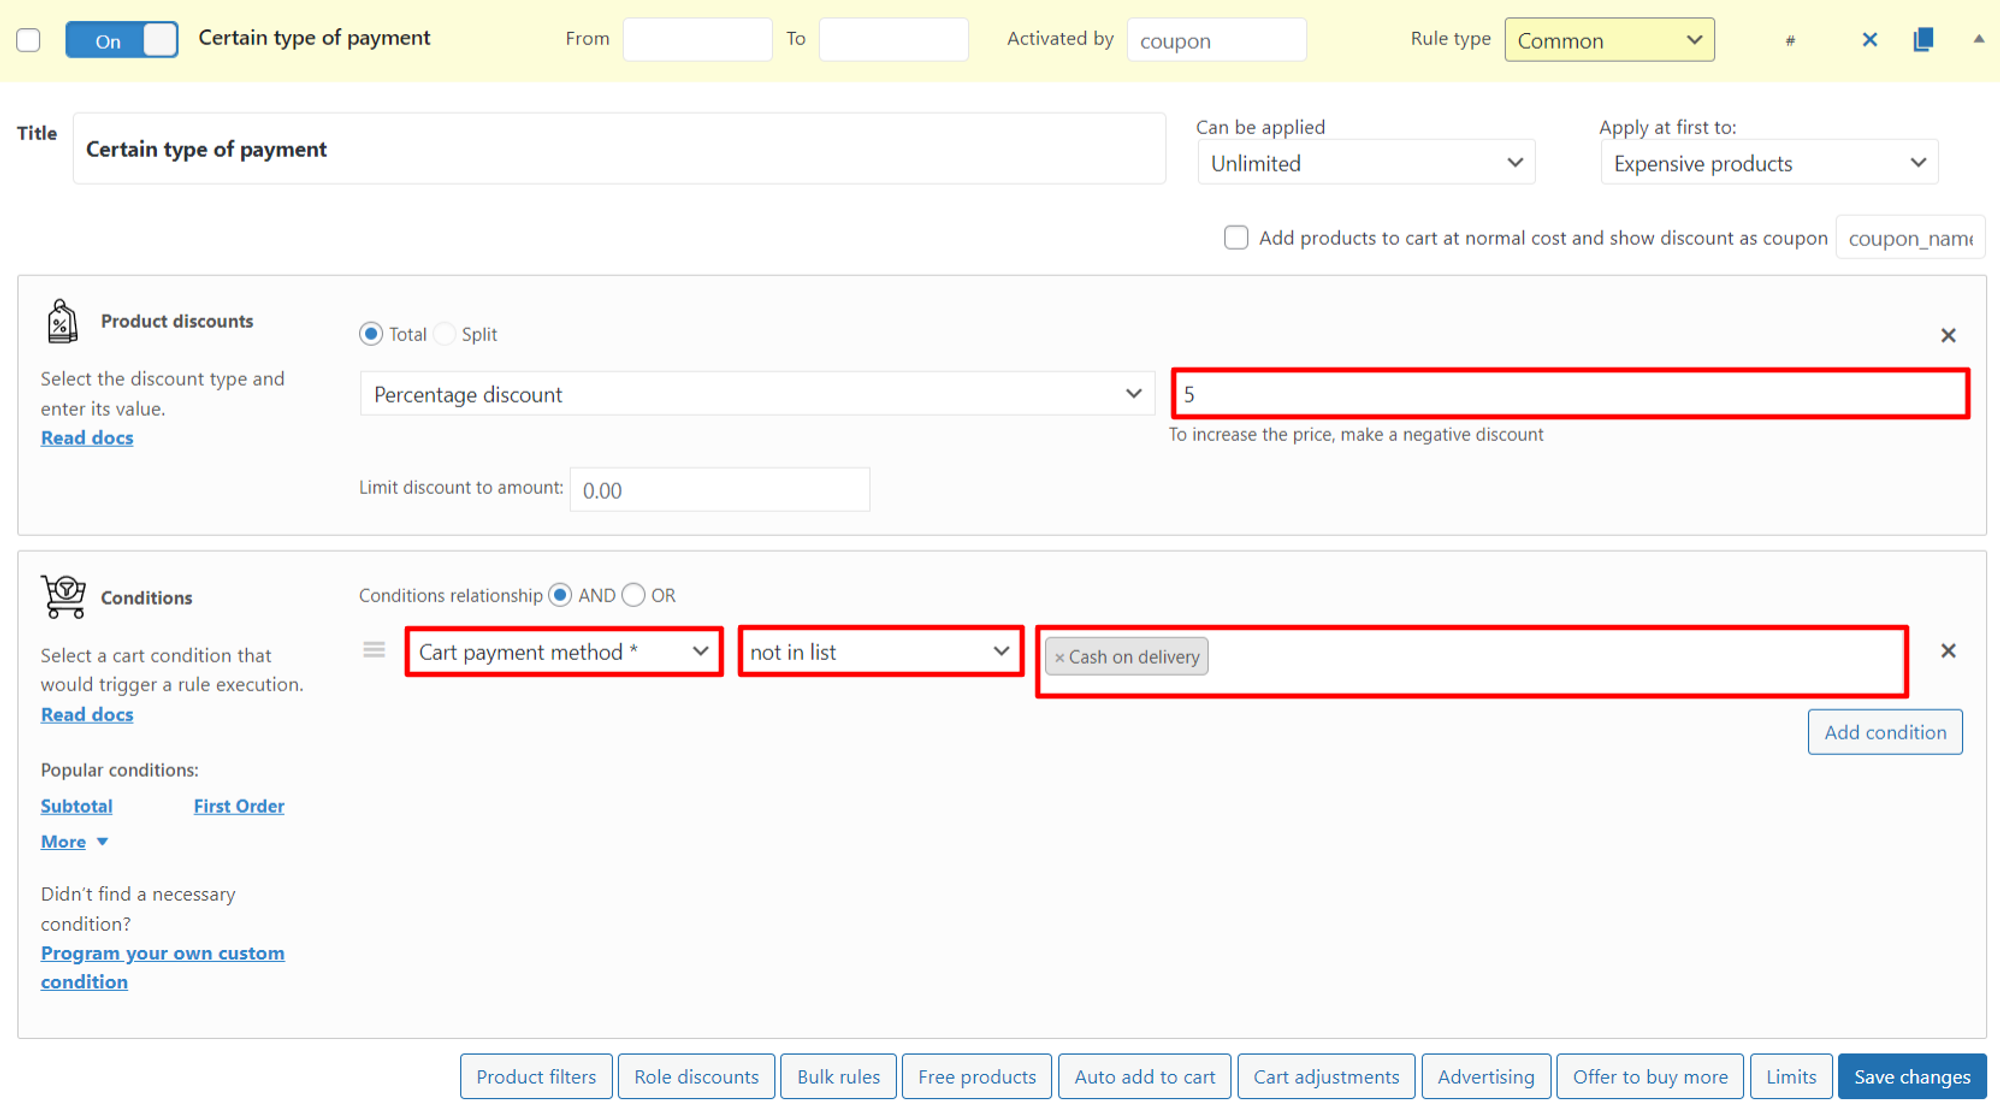
Payment-based Pricing

It happens that your store does not have an offline point of sale. Then it makes sense that your priority would be to keep your revenue in digital form. In addition, it is safer for you if the buyer pays for the goods immediately. However, not every customer is ready to agree with this.

Encourage them to pay online and immediately. All you need for this:

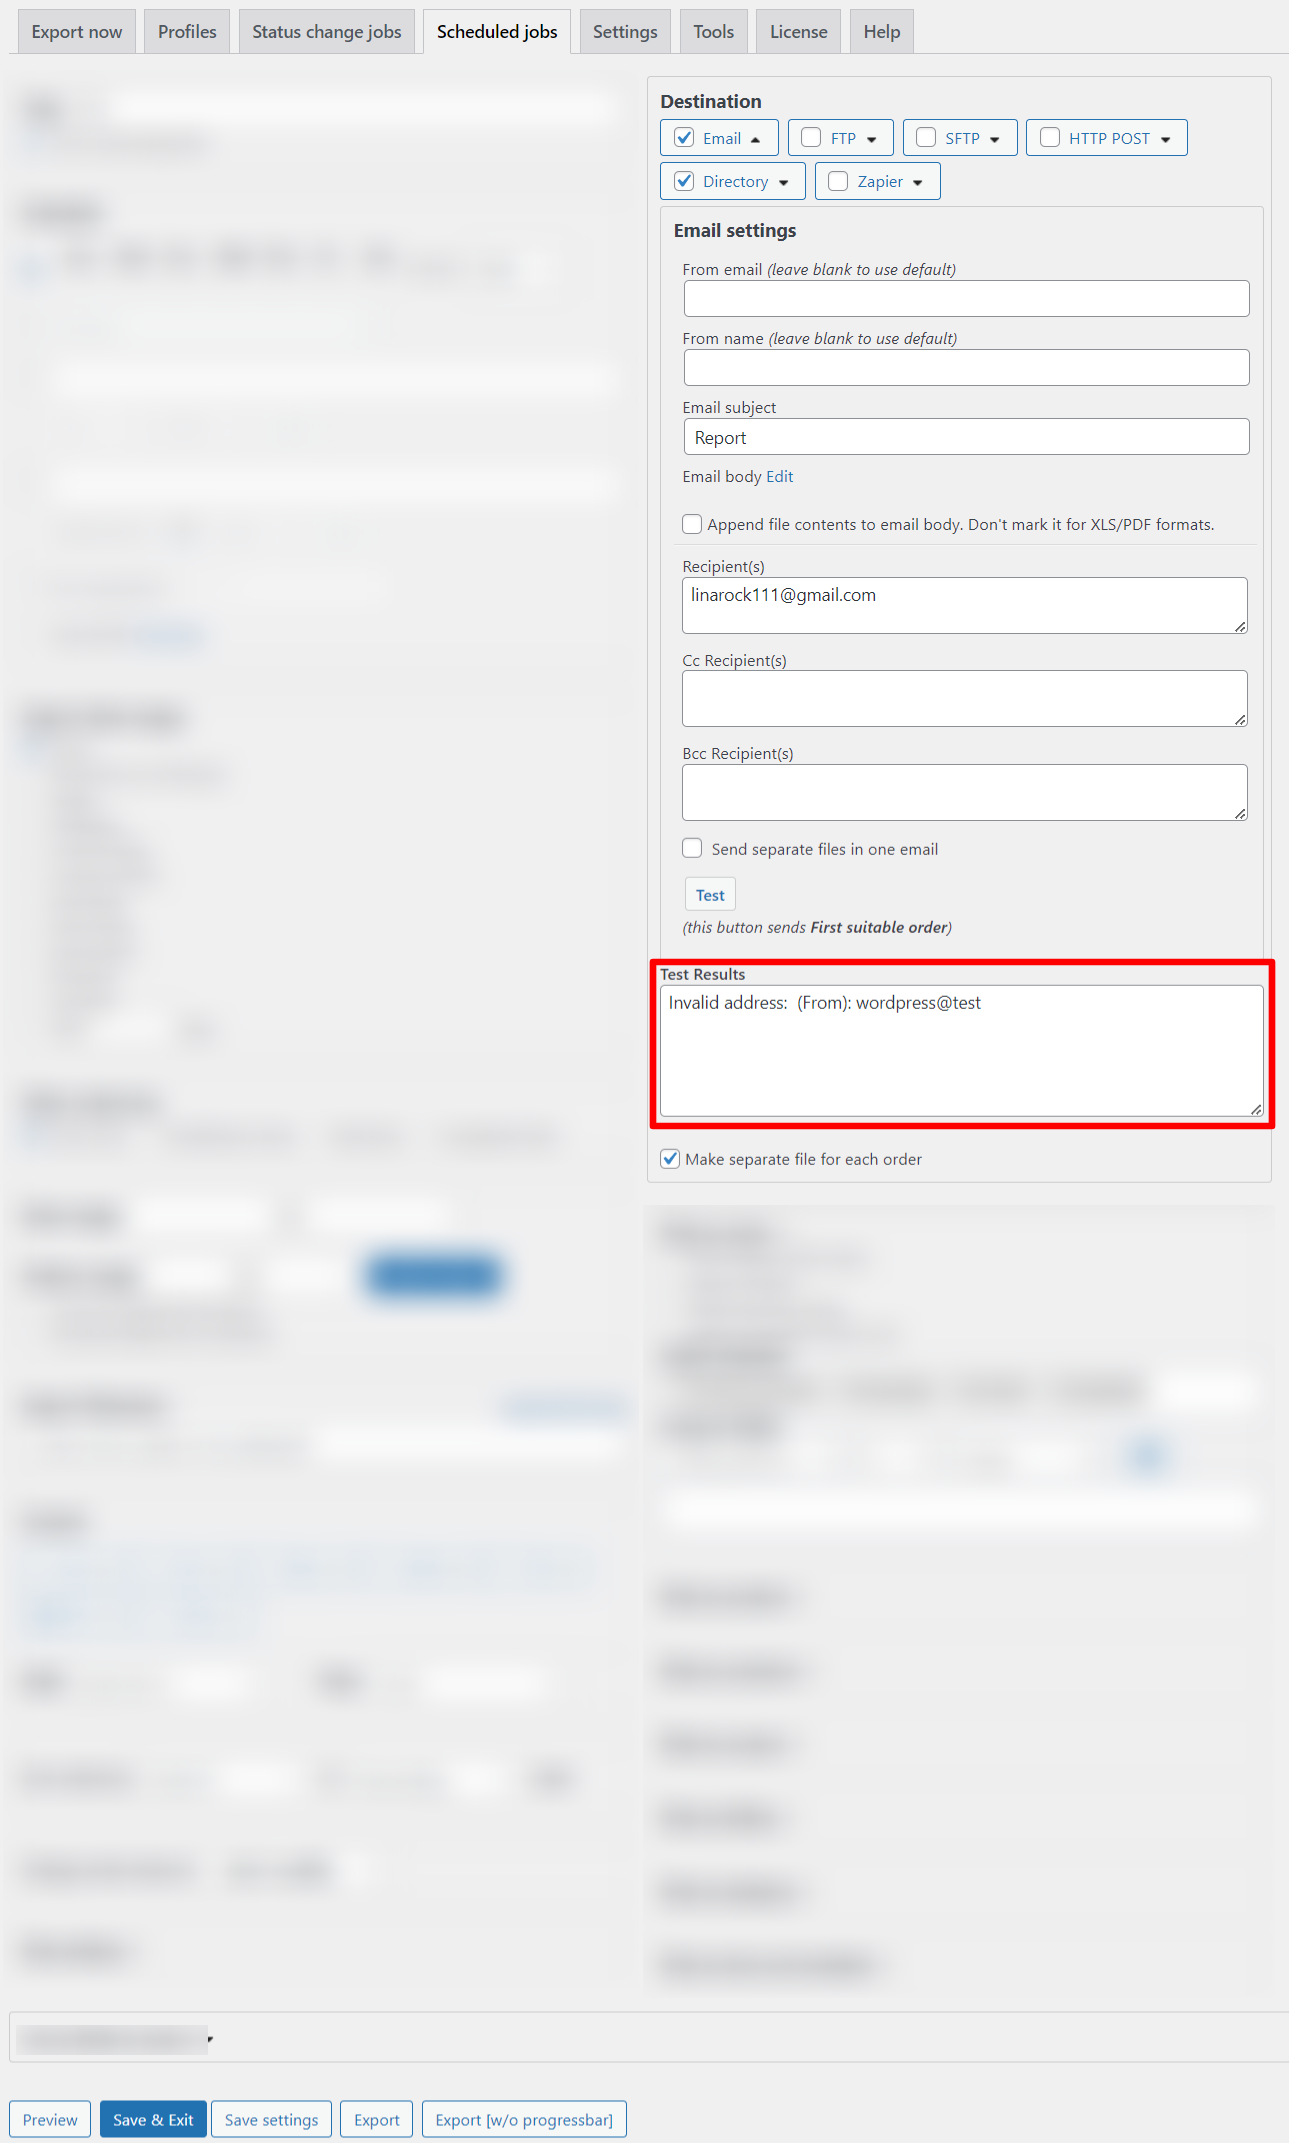
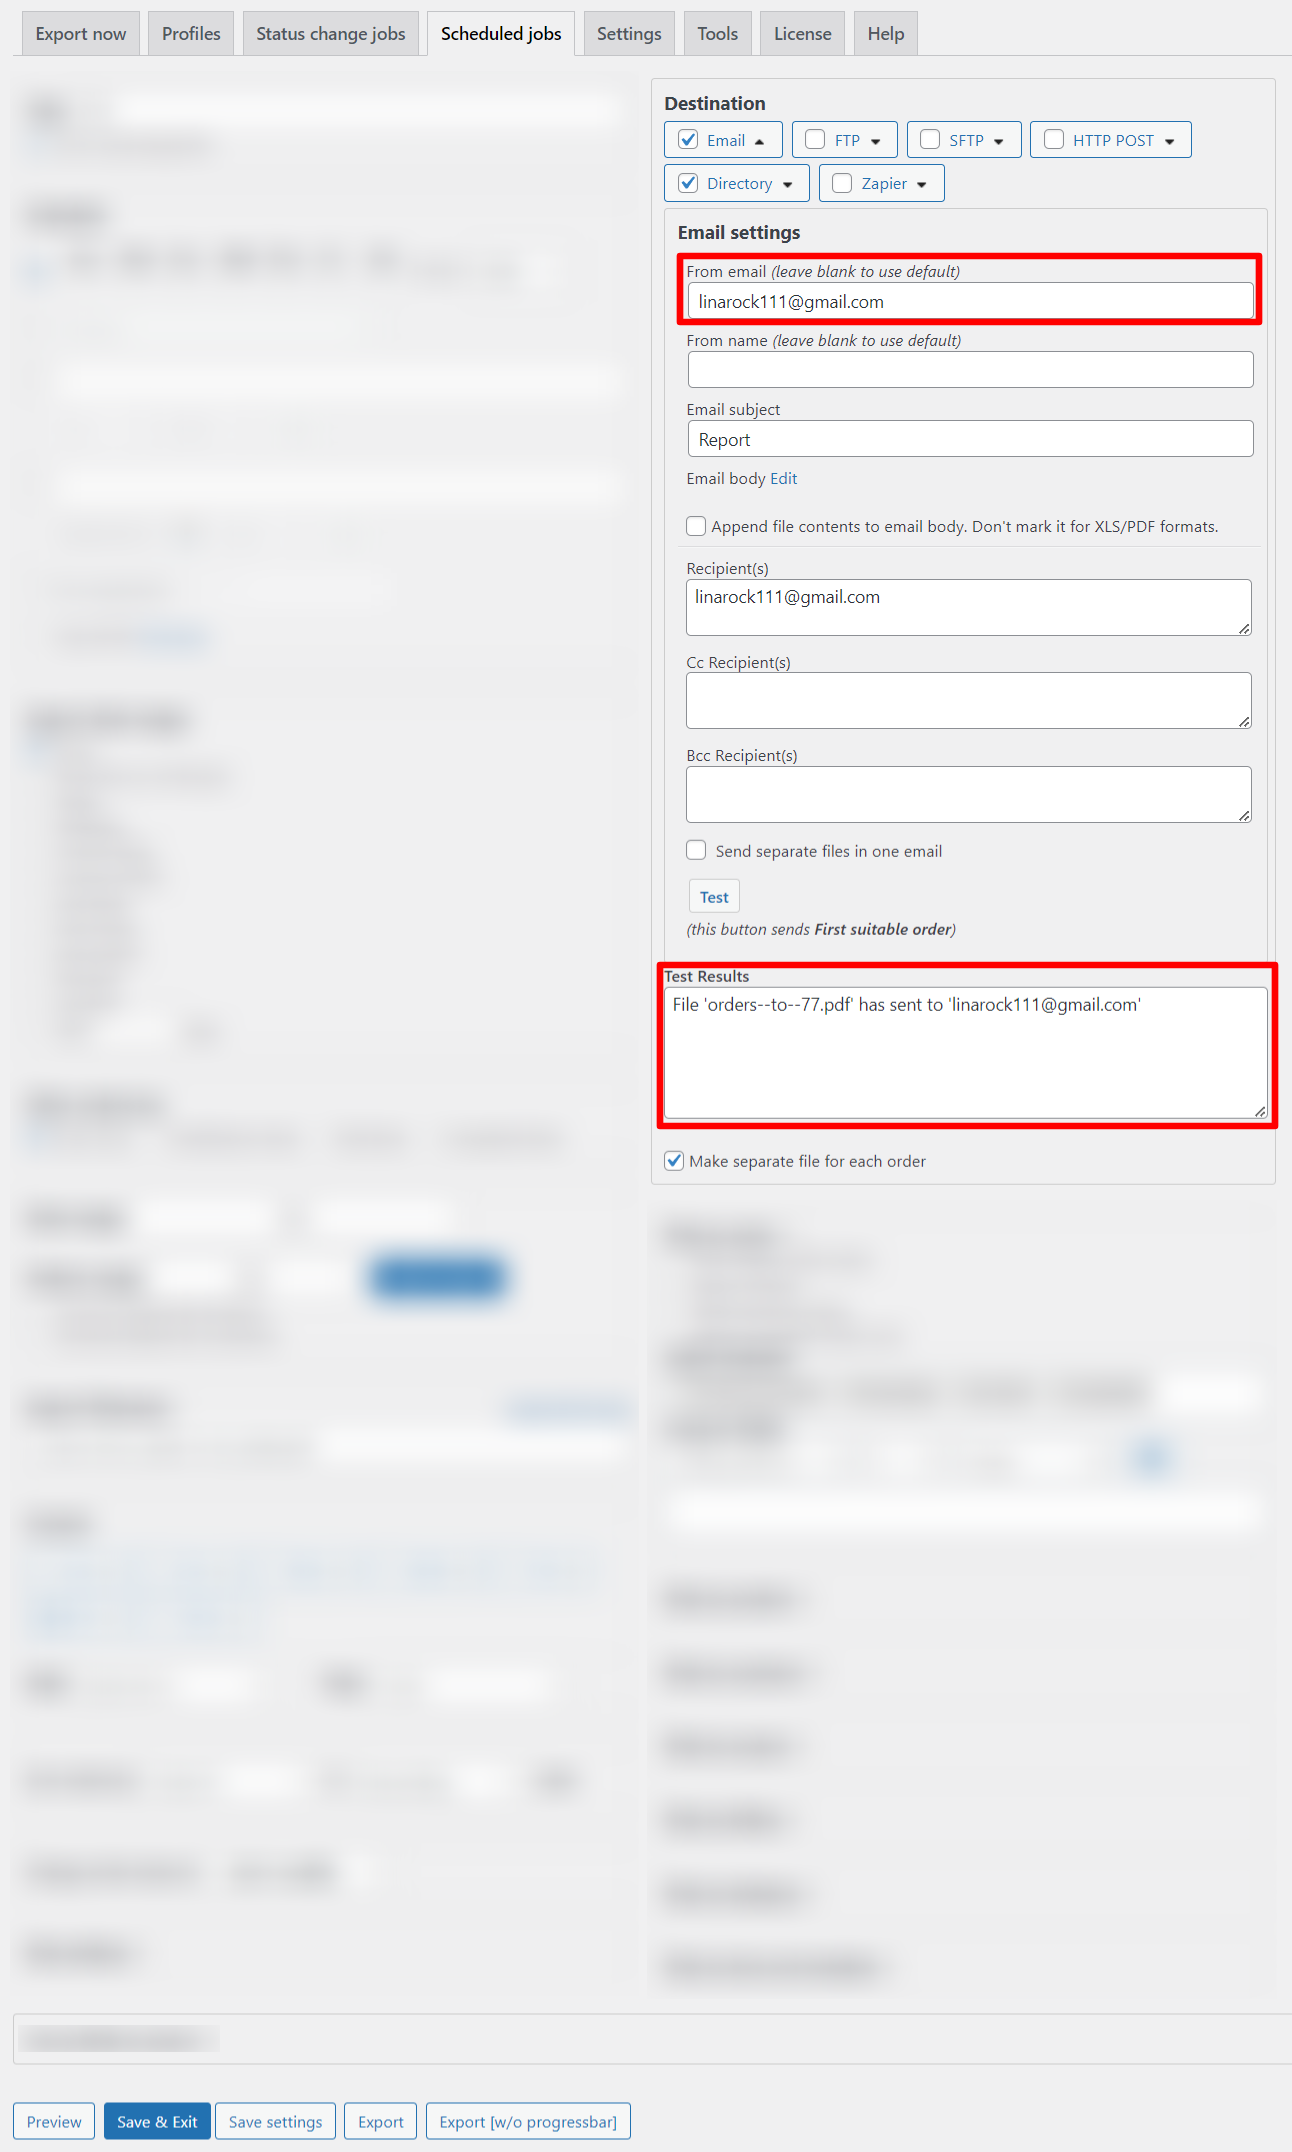
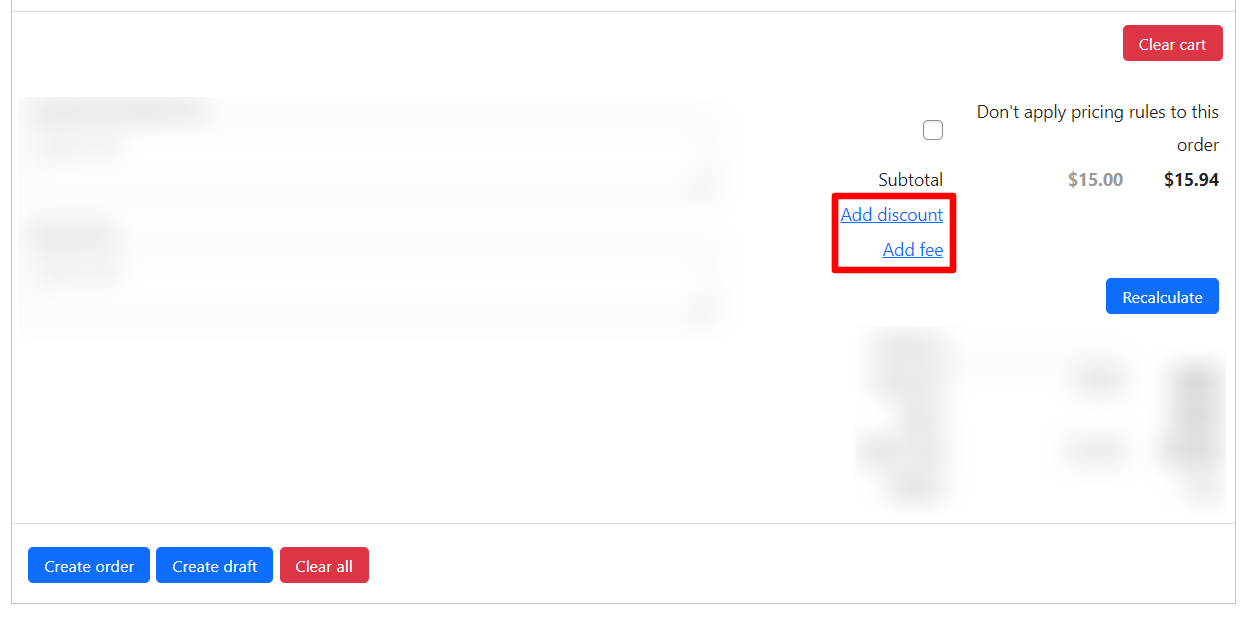
Create a rule (blank). Add Product Discounts section and enter a discount. Add Conditions section, select the Card payment method and the method itself.

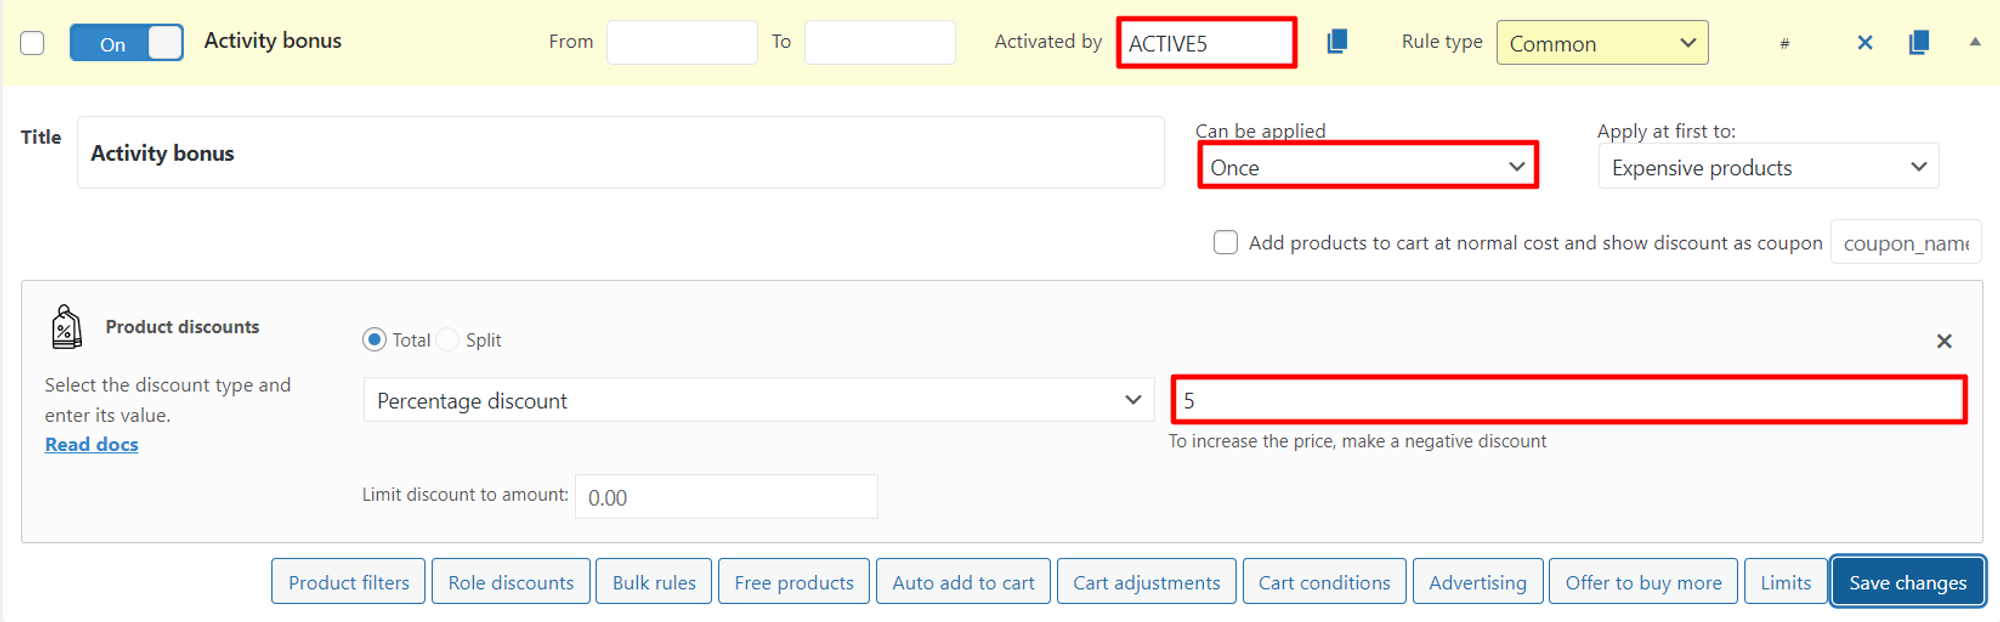
Organize a contest or giveaway

It’s no secret that contests increase brand awareness and attract new customers. Organize a giveaway on a social network (for example, Instagram) or on your store’s website. Determine the lucky winner and give him a discount as follows:

Note: check Once in Can be applied to limit the customer.

Get customers to be active

What increases the status of a brand in the eyes of other buyers? Only reviews from customers like themselves!

We are not suggesting that you generate reviews; instead, encourage customers (both new and old) to take a targeted action on the site. It could be:

  • Like
  • Filling out the form
  • Writing a review

Such activity benefits both newly opened businesses and those who have been on the market for a long time.

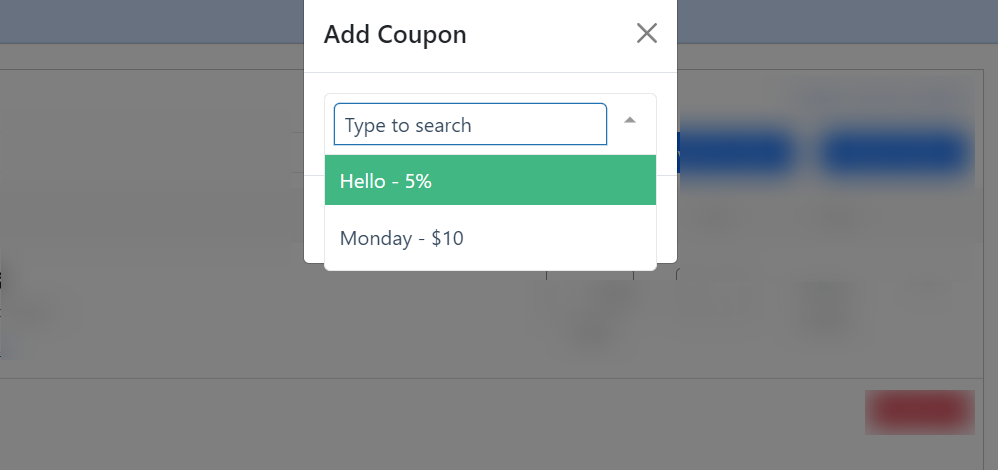
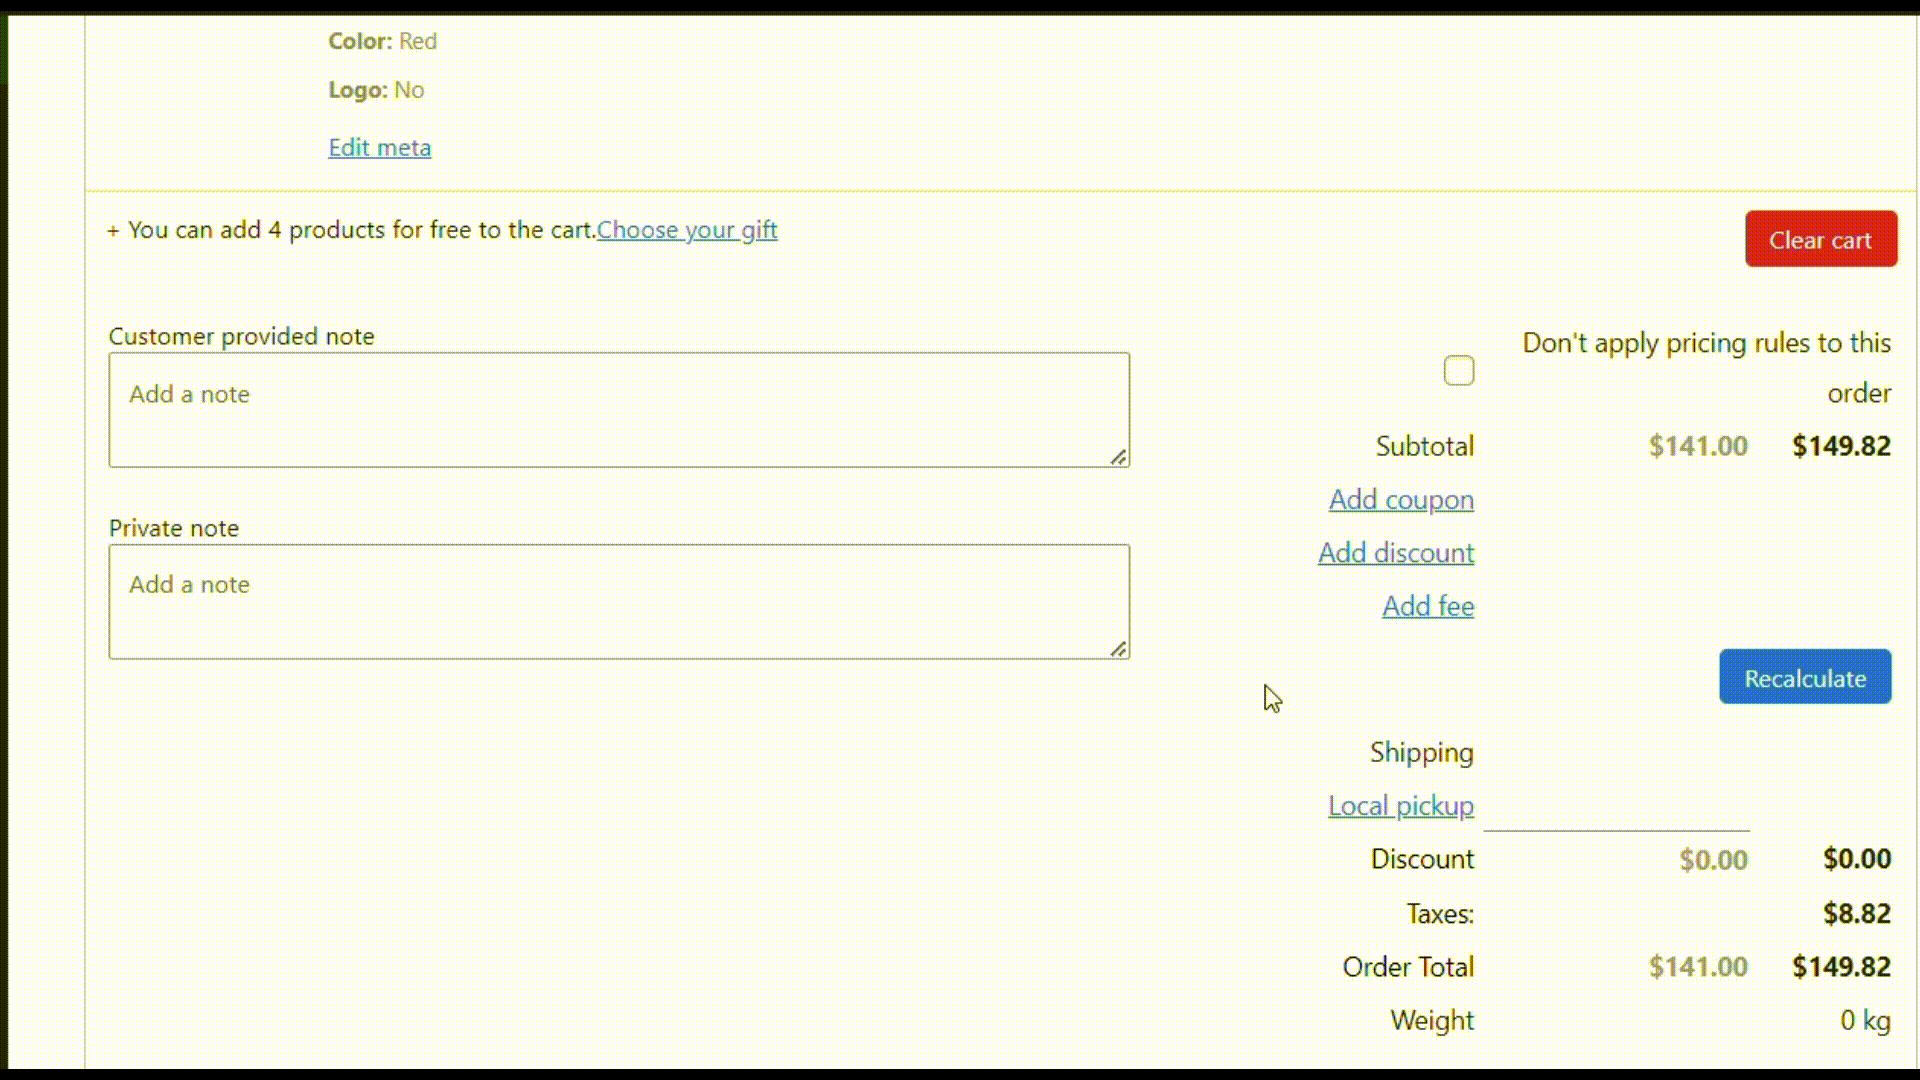
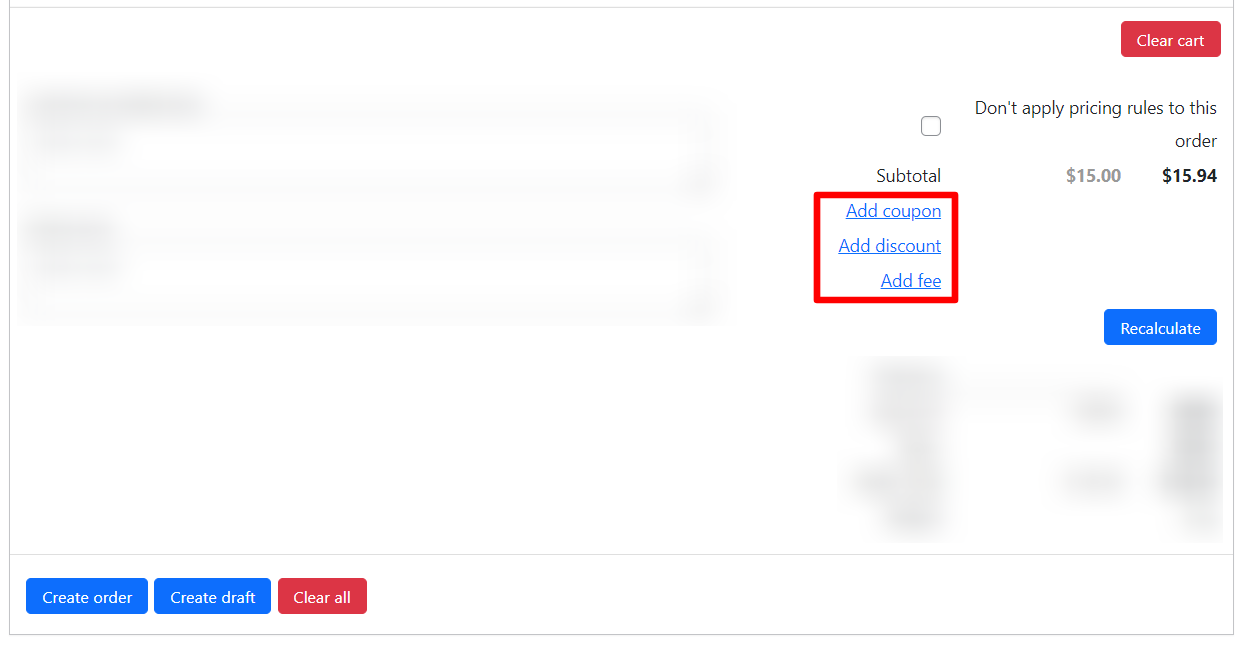
Give a coupon to everyone who is active. Create a rule (example below) and send a coupon to the subscriber by email.

Or you can use the link through which the coupon will be activated automatically.

All you need to do is:

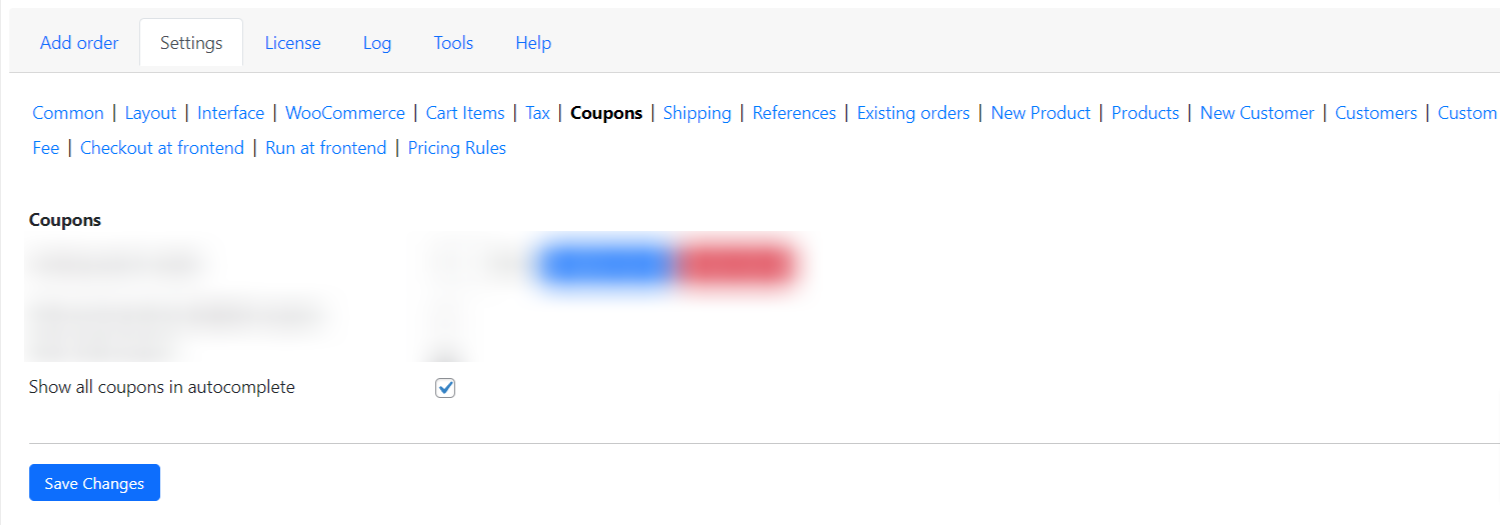
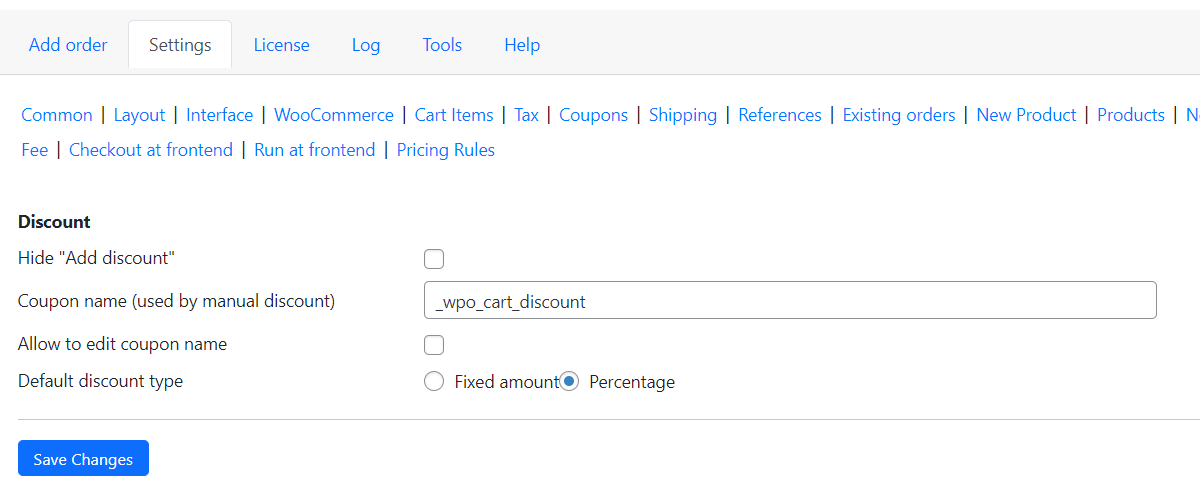
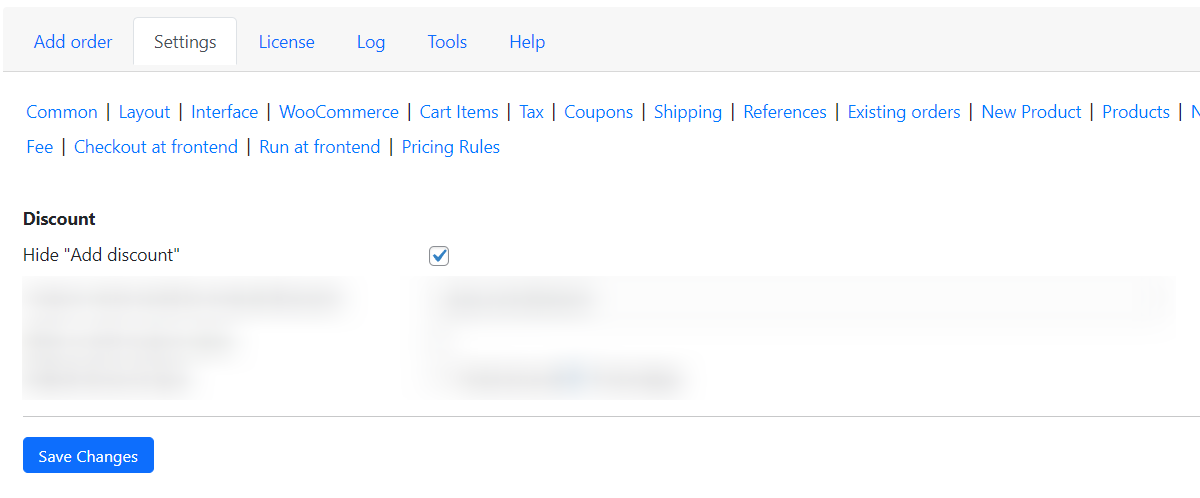
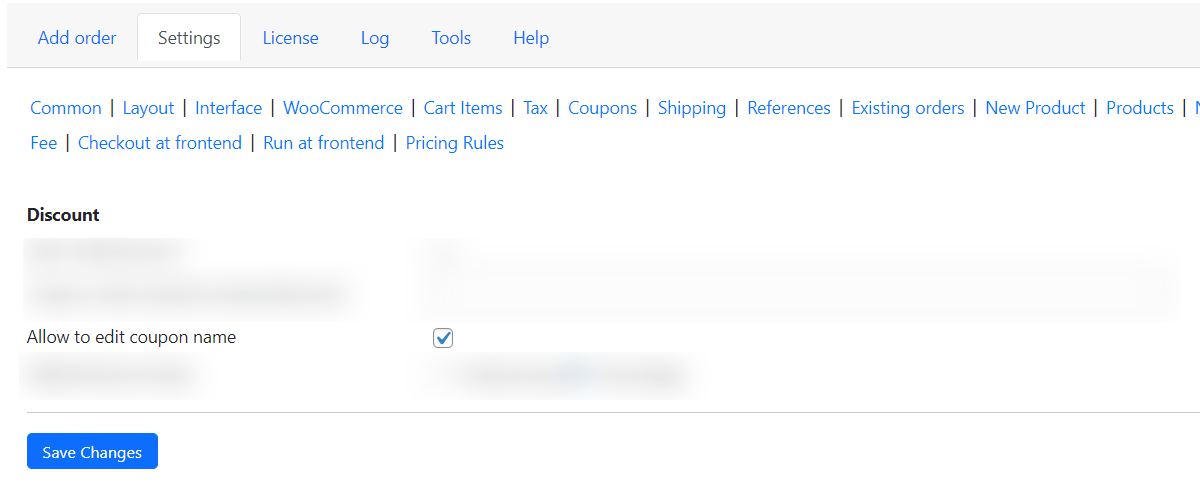
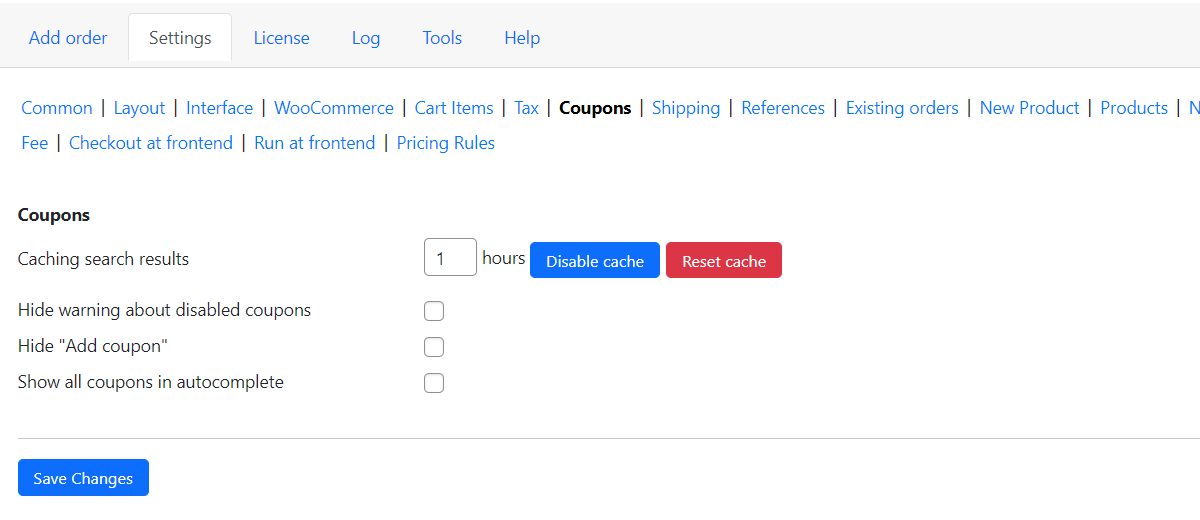
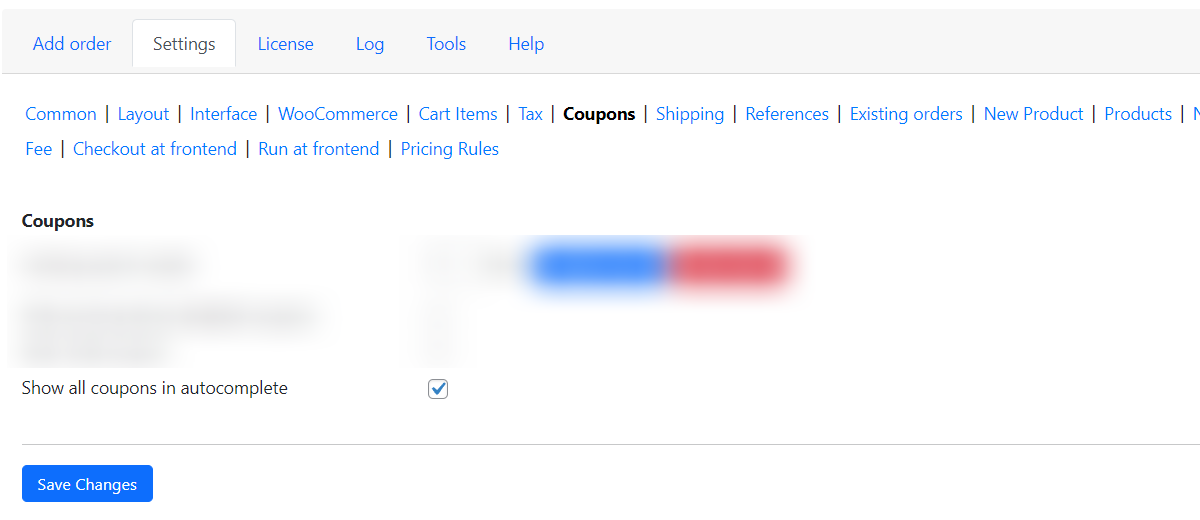
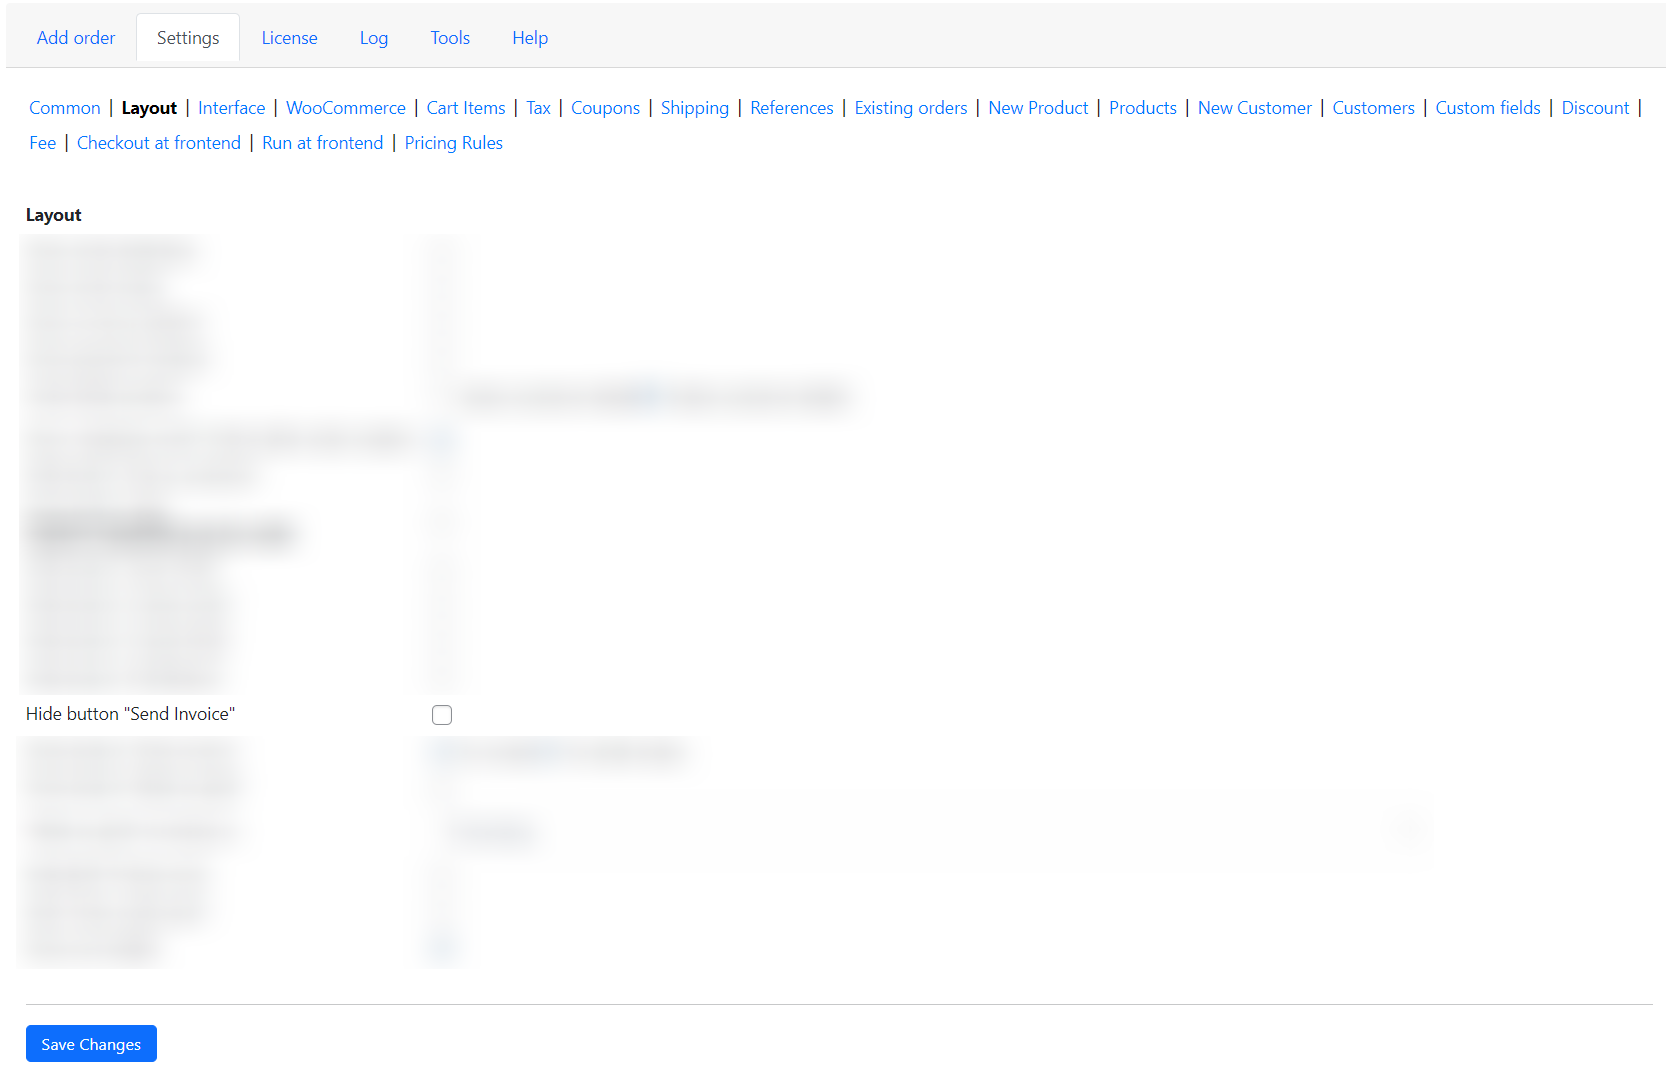
  1. Go to Settings>Coupons and tick “Enable “Activated by coupon” links” option.
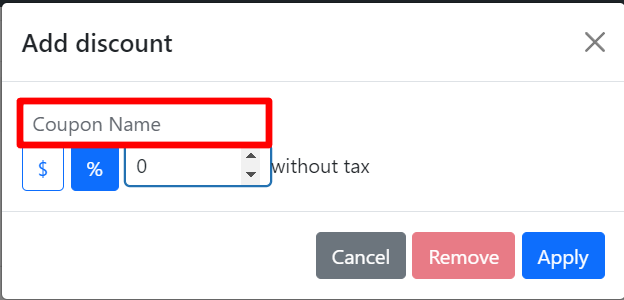
  1. Enter the coupon name in the field at the top of the rule.
  1. Copy the URL by clicking the button next to it.
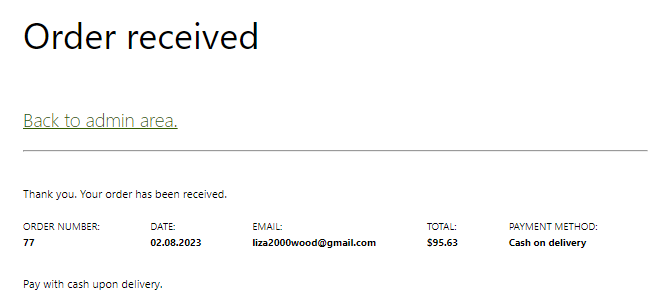
  1. Send an email to the lucky winners with this link. They will see the following message if they click on the link.

In conclusion, Advanced Dynamic Pricing for WooCommerce is a game-changer for businesses looking to optimize their pricing strategy and stay ahead of the competition. With these 10 inspiring ideas, businesses can take advantage of dynamic pricing and drive more sales, increase profits, and attract and retain customers. As technology continues to evolve, we can expect to see even more innovative and inspiring Advanced Dynamic Pricing for WooCommerce ideas in the future.

10 useful settings Phone Orders for WooCommerce (Pro)

Phone orders are an essential tool for any business that wants to take orders over the phone. With Phone Orders for WooCommerce (Pro) plugin, you can easily set up a system to take phone orders, streamlining the process for both customers and employees. Here are 10 useful settings you can use to get the most out of the plugin:

Show “Duplicate Order” button after order creation

This button allows customers to easily duplicate the order, making it easier for them to make multiple orders with the same information. This is especially useful for customers who want to place orders in bulk, as they can easily clone their order and make changes to the quantity or other details without having to re-enter all of the information.

To activate it, go to Settings>Layout and tick Show “Duplicate Order” button after creation.

Show “Duplicate Order” button after creation

After creation a new order, you have the “Duplicate Order” button.

The “Duplicate Order” button

Show cart weight

This feature makes it much easier for customers to get the right products without having to come into the store and weigh them. With phone orders, customers can order quickly and accurately from the comfort of their own home. They can also get the exact weight of their products, so they can make sure they are ordering the right amount. This makes it easier for customers to get the products they need, without the hassle of going to the store.

To activate it, go to Settings>Layout and tick Show cart weight.

Show cart weight

Next to the order details is the order weight.

Order weight

Allow to rename cart items

This feature is beneficial for businesses that take phone orders and need to customize the names of items in the cart to match the customer’s preferences or specifications. By enabling this setting, businesses can provide a more personalized and tailored shopping experience for their customers, enhancing customer satisfaction and potentially increasing sales.

To activate it, go to Settings>Cart Items and tick Allow to rename cart items.

Allow to rename cart items

In the process of creating an order, it becomes possible to rename the product.

Rename the product

Add products by default

With the Pro version of this plugin, you can even add products to orders by default, so they are automatically selected when you enter a customer’s order. This feature is particularly useful for businesses who have a single product they offer over the phone.

To activate it, go to Settings>Cart Items and write items in the Add products by default line.

Add products by default

When creating an order, the product is added automatically.

Album as a default product

Show all coupons in autocomplete

It allows you to offer discounts to customers through coupons that show up in the autocomplete. This makes it easier for employees to find the coupon customers need and make sure they get the best deal.

To activate it, go to Settings>Coupons and tick Show all coupons in autocomplete.

Show all coupons in autocomplete

When you click on the search bar, a list of available coupons appears.

All coupons in autocomplete

Select optimal shipping method on each cart update

This setting allows plugin to assign an optimal shipping method to orders placed over the phone. This ensures that customers don’t have to select a shipping method each time they order, saving time for both customers and employees.

To activate it, go to Settings>Shipping and tick Select optimal shipping method on each cart update.

Select optimal shipping method on each cart update

Note: if this option is enabled, you cannot change the delivery method manually.

Change the delivery method manually

Select optimal shipping method

Show products as default search result

By displaying products as default search results, businesses can enhance the user experience and streamline the ordering process, ultimately leading to increased sales and customer satisfaction.

To activate it, go to Settings>Products and write items in the Show products as default search result line.

Show products as default search result

When you click on the search bar, the belt appears as the default product.

Belt as a default search result

Default customer

If you have a customer who frequently places orders over the phone, you can assign them as the default customer for phone orders. This saves time for employees, as they don’t have to enter in the customer’s information each time.

To activate it, go to Settings>Customers and write customers in the Default customer line.

Default customer

When you create an order, a customer is defined by default.

Liza Wood as a default customer

Show order history for the customer

This feature enables businesses to access and view the complete order records of their customers, providing valuable insights and information. This functionality can greatly enhance customer service and support, as businesses can quickly refer to past orders and assist customers more effectively.

To activate it, go to Settings>Customers and tick Show order history for the customer.

Show order history for the customer

There is a Order History link in the client settings block now.

When you click on it, a list of customer orders is available to you.

List of customer orders

Default discount type

This feature is beneficial for businesses that frequently take phone orders and want to provide discounts to their customers. By setting the default discount type, businesses can streamline the ordering process and ensure that the correct discount is automatically applied to phone orders.

To activate it, go to Settings>Discount>Default discount type and tick Fixed amount or Percentage.

Default discount type

Conclusion on 10 useful settings Phone Orders for WooCommerce (Pro)

In conclusion, the 10 useful settings for Phone Orders for WooCommerce (Pro) offer a range of options that can greatly enhance the user experience and streamline the phone ordering process. With these settings, businesses can effectively manage and track phone orders, ensuring a smooth and efficient ordering process for both customers and staff.

Advanced Dynamic Pricing For WooCommerce: Implementing different pricing models

Implementing different pricing models can significantly impact a business’s success by aligning its revenue strategies with market dynamics, customer behavior, and competitive landscapes. Various models cater to different business needs—whether it’s attracting price-sensitive customers or maximizing revenue from premium products.

Integrating various discount models in a WooCommerce store can yield significant profits for both the business and its customers, ensuring a mutually beneficial shopping experience through strategic pricing. Let’s review the most favourite dynamic pricing scenarios for the WooCommerce store and how to implement them using our Advanced Dynamic Pricing and Discount Rules for WooCommerce plugin.

Sitewide discount

One of the best strategy for the business is a sitewide discount. For the business, offering a sitewide discount can rapidly increase sales volume, clear inventory, and enhance brand visibility. Customers benefit by enjoying discounted prices across the entire store, encouraging them to explore and purchase more products.

It’s very easy to implement that kind of discount using Advanced Dynamic Pricing and Discount Rules for WooCommerce: just click the button “Add rule” and choose the “Product Discount” rule’s template. Then change the Product Filter’s value to the “Any Product”, choose the discount’s type and amount and click “Save changes” button. That’s all you need to do to make a sitewide discount with Advanced Dynamic Pricing and Discount Rules for WooCommerce!

Cart Discount

The Cart Discount discount strategy is also widely spread in the WooCommerce stores. With the cart discounts businesses can boost average order values and reduce cart abandonment rates. Customers appreciate the savings applied at checkout, making them more likely to complete their purchases in the WooCommerce store.

Advanced Dynamic Pricing and Discount Rules for WooCommerce can help you to create a cart discounts too: click the “Add rule” button and choose the “Cart Discount” template. There are a various cart discounts type that can be provided for your customers: from fixed discount coupon to the free shipping and tax exemption (only pro version).

Product Discount

By applying discounts to specific products on the WooCommerce store, you can efficiently manage stock and amplify sales of targeted items. The exact products list to discount can be managed by the stock quantity or, for example, by the season. Customers gain access to lower pricing on the products they have been wanting to buy for a long time, increasing their satisfaction and likelihood of returning.

Simple Product Discount rule can be created by the Advanced Dynamic Pricing as the same way as in the first case, a Storewide Discount. But the only difference is in choosing the products that should be discounted in the Product Filter section. Also, there’s a tool that allows to import the CSV file with the products list and the discounts that should be applied on it, read about this tool more on our documentation site.

Category Discount

Category discounts enable businesses to spotlight certain product ranges, driving traffic and sales in those areas. There’s also a possibility in the WooCommerce to create a separate category for the season sales, for example, Halloween products, and make a discount only by this category on the Halloween. Customers benefit from reduced prices on items within specific categories, encouraging exploration and trials.

Let’s create a discount for the Halloween category of the products on the Halloween week with the Advanced Dynamic Pricing and Discount Rules for WooCommerce. It’s also need to choose the Product discount template and find the “Category” value in the “Product filter” drop-down. Let’s find the “Halloween” category. Also, let’s limits the rule’s applying only on the Halloween week and input the dates near the rule’s name.

Role Discount

Providing discounts based on user roles fosters loyalty among key customer segments, such as members or wholesale buyers, boosting long-term profits for the store. Customers in these roles enjoy special pricing, enhancing their loyalty to the WooCommerce store.

One of the frequently asked rule for the role discount model is a discount for the wholesalers. In Advanced Dynamic Pricing and Discount Rules for WooCommerce plugin it’s possible to create in a few clicks: just choose the template “Role discount”, find the “Wholesaler” role and input the discount value and type.

Bulk Discount

Encouraging bulk purchases increases overall sales and reduces inventory for the business. Customers benefit from reduced pricing on large quantities, making it attractive for them to buy in bulk and save more.

Let’s create a simple bulk discount for the filtered product with the Advanced Dynamic Pricing and Discount Rules for WooCommerce: click “Add rule” button and choose “Bulk” template. There are a lot of bulk modes and discount modes for the bulk rules, read more about them all on our doc site.

Bulk Discount for Category

This strategy increases the movement of products within specified categories, generating profits for the business. Customers find value in purchasing bulk quantities at discounted prices within chosen categories. It’s easy to create the bulk rule for category: just change the Product Filter type in the example above, or change the bulk’s mode to the “Qty based on the selected category”:

Bulk Discount for Role

Employing bulk discounts for specific roles optimizes sales and loyalty among segmented customer groups. Role-specific customers enjoy additional savings on bulk purchases, underscoring their value to the store.

For creating a bulk role rule, just choose the “Role Bulk” template:

BOGO (Buy One Get One)

BOGO deals enhance customer engagement and inventory turnover, boosting store profitability for your WooCommerce store. Customers enjoy receiving additional products for free, enticing them to purchase and return for future offers.

Using the Advanced Dynamic Pricing for WooCommerce you can create a BOGO rule using the corresponding template: “BOGO (free)”. It’s easy to choose the product that will be added to the cart for free with the filtered product.

Gift Discounts

Offering discount strategies on gifts can increase store traffic during special occasions, maximizing seasonal revenue. Customers benefit by obtaining potential gifts at reduced prices, making shopping more appealing and economical.

You can give as a gift a small merch of your brand for every customer who will buy on $20 and more. That’s how to implement it with the Advanced Dynamic Pricing and Discount Rules for WooCommerce:

Cart Fee (for payment gateway)

Some banks get an additional fees for the transactions. Although not a typical discount, strategically incorporating a cart fee for payment gateways helps businesses offset transaction processing costs, maintaining overall profitability. Customers are made aware of the transparent pricing structure, increasing their trust in the WooCommerce store.

To create a cart fee for the selected payment method rule, you need PRO version of the Advanced Dynamic Pricing and Discount Rules for WooCommerce plugin. Then, click “Add rule” button and choose “Cart Discount” template. Then find a “Percentage fee” in the “Cart/Shipping discount” section and the Cart condition “Cart payment method”. Input the necessary values and get the additional fee for the payment gateway.

You can choose any discount and pricing strategies to harmonize business and customer interests, ensuring profitability and customer satisfaction, our Advanced Dynamic Pricing and Discount Rules for WooCommerce plugin helps you to implement it on your WooCommerce store.

Advanced Order Export for WooCommerce: A Quick Overview

Exporting orders from WooCommerce is often straightforward and efficient for basic e-commerce needs, allowing store owners to quickly access and manage their sales data. However, as your online store grows or encounters unique requirements, this process can present a variety of challenges that necessitate more sophisticated approaches and tools. In this quick guide, we’ll kick things off with a step-by-step walkthrough of performing a simple order export, ensuring even beginners can get started without hassle.

Your Options to Export WooCommerce Orders

Exporting orders is a key feature for sales analysis, reporting, and integration with external systems. To export WooCommerce orders, you can use various plugins:

  • Advanced Order Export for WooCommerce by AlgolPlus. This is a highly versatile plugin with strengths in comprehensive customization, automation, and advanced features like bulk actions, scheduled exports, real-time triggers on status changes, and support for multiple formats (CSV, XML, JSON, PDF). It excels in filtering by orders, products, and customers, with summary modes and templates for efficiency. Functional capabilities include destinations like email, FTP, and HTTP, making it ideal for large-scale stores needing robust integration.
  • Built-in WordPress Export Tool. Strengths lie in its simplicity and no-cost availability, as it’s included in WordPress. It allows basic export of posts, pages, and users, but for orders, it’s limited to general data without WooCommerce-specific fields. Weaknesses include lack of customization, no advanced filters, and inability to export in multiple formats or automate processes. Functional capabilities are minimal, suitable only for very basic data dumps without analysis or integration features.
  • WP All Export by Soflyy. Strengths include user-friendly interface and support for exporting any WordPress data, including WooCommerce orders, with drag-and-drop field mapping. It offers scheduling and real-time exports, along with multiple formats like CSV and XML. Weaknesses are fewer WooCommerce-specific optimizations compared to dedicated plugins, potential performance issues with large datasets, and a premium cost. Functional capabilities cover custom filters and destinations like email and FTP, but it’s less focused on order-specific automation.
  • Order Export & Order Import for WooCommerce by Webtoffee. Strengths are in its dual export/import functionality, making it great for data migration, with support for CSV format and basic filters by date, status, and products. It includes scheduled exports and is relatively affordable. Weaknesses include limited format options (mainly CSV), no real-time triggers or advanced destinations, and less customization for complex reports. Functional capabilities focus on straightforward exports for small to medium stores, with import features to complement order management.
  • WooCommerce Customer / Order / Coupon Export by SkyVerge. Strengths include easy setup and support for exporting orders, customers, and coupons in CSV format, with basic filters and scheduling. It’s reliable for simple reporting. Weaknesses are the lack of advanced formats, automation like real-time exports, or destinations beyond downloads, making it less scalable for growing businesses. Functional capabilities are basic, ideal for quick exports without deep integration or customization.

In this article, we’ll explore the main options for exporting orders in WooCommerce, covering basic and advanced exports. We’ll outline the steps step-by-step by using plugin Advanced Order Export for WooCommerce by AlgolPlus.

How to Handle a Basic WooCommerce Order Export

Basic export is a straightforward way to export orders without complex configurations. It’s perfect for quick data analysis.

Step 1: Filter orders

Start by filtering orders to export only the relevant data. The primary filter is the Order Date filter. Also, you can choose Modification Date filter, Paid Date filter, Completed Date filter.

Step 2: Configure file format

Choose the file format for export, for example, Excel (XLS or XLSX), which is convenient for viewing in spreadsheet applications like Microsoft Excel or Google Sheets.

Step 3: Choose Your Order Export Columns

Specify which columns to include in the export: order ID, date, amount, status, etc.

Step 4: Preview

Review the data before exporting. This step displays a preview of the file to ensure all columns and filters are applied correctly. It helps prevent errors in the final file.

Step 5: Complete Your Order Export and Download Your Export File

Click the “Export” button (at the bottom of the interface). After processing, the file downloads automatically.

Advanced Order Export Sections

Advanced order export offers more flexibility for larger stores. It includes addition functions such as templates, realtime order export, scheduled exports and etc.

Summary modes

Summary modes allow you to aggregate data by customers or products. For example, you can get a report on purchase totals by customers or product popularity. This is useful for marketing analysis and inventory optimization.

Configure Formats

Select the file format: CSV (for simple text export), XML (for structured data), JSON (for API integrations), or PDF (for printable reports). Each format has unique benefits: CSV is universal, XML for complex structures, JSON for web apps, and PDF for presentations.

Setup Fields

Define the fields to export, divided into sections: Common, Billing, Shipping, and others. This lets you customize the export to your needs, such as including only shipping addresses.

Filtering Your WooCommerce Order Exports

Set filters for precise selection: by orders (status, amount), products (category, price), customers, coupons, billings, shippings, metadata.

Templates to save time

Templates are essential for saving export settings to avoid repeating them each time. They streamline workflows for regular tasks.

Unique option: the “as Bulk actions” mode, allowing you to apply exports to selected orders directly in the WooCommerce admin. This speeds up operations for frequent exports.

Realtime order export, on order status change

This tool automatically exports orders when their status changes (e.g., from “Processing” to “Completed”). It’s crucial for integrating with external systems like CRM or inventory management, ensuring real-time data sync. Unique options: triggering for specific statuses (pending payment, processing, completed, on hold, cancelled, refunded, failed, draft).

Scheduled exports

Scheduled exports automate exports on a set schedule (e.g., daily or weekly). They’re necessary for consistent reporting without manual intervention. Unique options: export ranges (by dates or order quantities).

Destinations supported by realtime and scheduled exports

Exported files can be sent to various destinations: Email (direct sending to inbox), FTP (uploading to a server), HTTP (integrating with APIs), SFTP, Directory and Zapier. It also possibility to make separate file for each order. This function is available for realtime and scheduled exports.

The email functions allow users to automate the delivery of export files (e.g., CSV, XLS, or PDF reports on orders) directly to inboxes, with customizable sender details, content, and recipients. Key functions include:

  • From Email & Name Fields: Customize sender details (blank uses site defaults for a professional touch).
  • Subject Field: Sets the email’s title (e.g., with dynamic placeholders like {date}).
  • Body Editor: Crafts the message content; note avoids XLS/PDF references for clean formatting.
  • Append File Contents Checkbox: Embeds export data inline in the body (unchecked; best for simple previews, not complex files).
  • Recipient Fields (To, CC, BCC): Specify primary and secondary emails (comma-separated; empty here) for targeted delivery.
  • Test Button: Sends a sample export of the first order to verify setup without full processing.

In conclusion, exporting WooCommerce orders is an essential capability for any online store owner looking to gain insights into sales performance, streamline reporting, and integrate with external tools like accounting software or CRMs. Whether you opt for the simplicity of the built-in WordPress tool for quick basic exports or the robust features of plugins like Advanced Order Export for WooCommerce by AlgolPlus for automation and customization, the right choice depends on your store’s size, technical needs, and budget. For small operations, free or low-cost options like the built-in tool or SkyVerge’s plugin suffice, while larger businesses will benefit from AlgolPlus’s advanced scheduling and real-time triggers. Remember to test exports with sample data to ensure accuracy, and always prioritize data security when handling customer information. If you’re unsure which plugin fits your workflow or need help setting one up, feel free to reach out — our technical support here to assist!

Advanced Order Export: Free vs Pro

Introduction

Advanced Order Export is a powerful and versatile tool that makes it easy to export orders from your online store in a variety of formats. With the free version of Advanced Order Export, you can export orders to CSV, XML, and PDF formats, as well as to various platforms. You can also filter orders by date range, order status, and other criteria. The free version also includes basic mapping options, allowing you to map the exported data to your own custom fields. However, the free version does not offer support any of the more advanced features.

Features of Pro

Advanced Order Export Pro is an invaluable plugin for any store owner looking to make the most out of their WooCommerce store. The automation that the pro version has can save you time and money in the long run, allowing you to focus on other aspects of your business.

All key functions of the pro version are presented in the table:

Features Free Pro
Profiles +
Status Change Jobs +
Scheduled jobs +
Destination Block +
Advanced settings +

Profiles

Profiles are a block containing saved export settings. With it, you can easily create different profiles to export your WooCommerce orders into various formats.

Status Change Jobs

The plugin also has a feature that allows you to export orders based on their status, such as processing, refunded, or completed.

Scheduled jobs

With the advanced order export scheduled jobs, store owners can easily automate the process, saving them time and resources. This allows them to focus on other aspects of their business, such as marketing and customer service.

Destination Block

This feature is ideal for businesses that need to quickly and accurately transfer order data from one platform to another. It allows for the export of orders to a wide variety of destinations, including HTTP, XML, FTP, and even direct to a web service.

Advanced settings

With its advanced settings, you can customize your order export process in detail. It allows you to configure General, Interface, Jobs, Failed Export, Zapier and HTML.

Conclusion

The Advanced Order Export plugin for WooCommerce is a great way to keep track of orders and export data quickly and easily from the store. While the free version is a great starter tool for basic data export needs, the pro version offers more features and options for more advanced data export tasks. In the professional version, you can configure and save multiple export settings, schedule automatic exports, and even export orders to different destination blocks. For those with more complex export needs, the pro version is the best choice. It offers more features and options for faster and more efficient order export tasks.

Barcode scanning in Phone Orders

Introduction

Black Friday is a quite busy time! To serve your phone orders even faster on this hot day, use bar code scanner mode. This mode allows you to scan the bar code of any item you wish to purchase, and it automatically adds the item to the customer’s order. The ability to connect a scanning device helps to optimize and reduce service time for each client.

Prepare in advance for the holiday and enable this mode!

Note: this feature is available in the pro version.

How to activate bar code scanner mode

All you have to do is buy a scanner, connect it to your computer and activate the bar code scanner mode:

  1. You simply need to go to the Phone Orders tab in the WooCommerce settings.

  1. Next go to the Settings>Products.

  1. Tick the barcode scanner mode.

How to use bar code scanner mode

After you have activated the mode, the following message will appear on the order creation page:

Barcode mode enabled! Product search works only after pressing the Enter key

Let’s try to find a product.

  1. Scan the barcode. The product will immediately appear in the drop-down list.

  1. Let’s click on it. The product is added to the order.

Can’t scan barcode: reasons

If you are unable to scan an item, it may be due to the following common reasons:

  • Unsuitable conditions: insufficient lighting, too far from the scanning module to the barcode, incorrect position of the reader relative to the graphic image.
  • Device malfunction: phone camera or scanner. You need to make sure there are no scratches or other damage to the glass of the module. Dirt such as stains and fingerprints can be removed with a degreaser. If you cannot solve the problem yourself, you need to contact a service center.
  • The problem with the barcode. Not all devices can read low-quality images (insufficient contrast, blurred, with printing defects). Much depends on the type of scanning module. For example, some are “tailored” to reading small identifiers, while others cannot recognize even large ones if they are poorly printed.

If the problem still persists, then write to our support. We will resolve the situation.

Conclusion

Now you can activate the scanner, bring it to the barcode and in a second it will determine what product it is, its price, and then it will all go to the receipt. Adding products to an order will no longer take much time. This Halloween, no one will be left without good service!

Discounts, coupons and fees in Phone Orders for WooCommerce

Table of Contents

Phone Orders for WooCommerce is a plugin that allows customers to place orders over the phone. The plugin provides various features such as discounts, coupons, and fees to enhance the phone ordering experience. Customers can avail discounts on their purchases by applying coupon codes provided by the store. Additionally, the plugin allows store owners to add fees to orders, such as shipping fees or handling charges. These features make it convenient for customers to place orders over the phone. Moreover, it avails the same benefits and discounts as they would while ordering online.

Let’s look at how to manage discounts, fees and coupons in Phone Orders for WooCommerce.

Note: all settings described below are available only in the pro version.

Discounts

Discounts are located in Settings>Discount.

To remove the discount option, check the Hide “Add discount” checkbox.

Now there is no Discount field in order creation.

In the Coupon name (used by manual discount) field, enter the default coupon name.

For additional convenience of creating orders, enable the “Allow to edit coupon name” option. This way you can change the coupon name in the order editor.

Set the default discount type (fixed amount or percentage) so you don’t have to spend more time choosing. Check the box next to “Default discount type”.

Coupons

Coupons are located in Settings>Coupons.

To hide the warning about disabled coupons, simply tick the box provided. This will prevent any notifications from appearing when a coupon is disabled. This feature is useful for users who do not want to be bothered by unnecessary warnings and prefer to manage their coupons independently.

If your business does not have coupons, then check the Hide “Add coupon” option.

The “Show all coupons in autocomplete” option allows you to automate the manual search for coupons and optimize the time spent searching for the desired coupon.

Fees

Fees are located in Settings>Fee.

The feature Hide “Add fee” provides greater transparency to customers as they will not be surprised with any unexpected charges.

To specify the default fee name, fill in the “Fee name” field.

The “Fee amount” option helps set the default value for fees.

When it comes to taxes for the fee, you must choose an existing tax class. The “Fee tax class” option allows you to set one of 4 classes: Not taxable, Standard rate, Reduced rate and Zero rate.

Enabling the “Allow to use zero amount” checkbox will give you the ability to use zero fees when carrying out transactions. This function may be useful for small payments or charity donations, where even small transaction fees can cut deeply into the amount of money being donated.

Conclusion on discounts, coupons and fees in Phone Orders for WooCommerce

In conclusion, the use of discounts, coupons, and fees in Phone Orders for WooCommerce can greatly benefit both customers and businesses. By offering discounts and coupons, businesses can attract more customers and increase sales. These incentives can also encourage customer loyalty and repeat purchases. On the other hand, implementing fees for specific services or order types can help businesses cover additional costs or provide premium services. However, it is important for businesses to carefully consider the impact of these discounts, coupons, and fees on their overall profitability and customer satisfaction. By finding the right balance and effectively communicating these offers to customers, businesses can successfully leverage these strategies to drive growth and success in the WooCommerce platform.

How to set different price based on country

In the dynamic world of e-commerce, personalized pricing strategies have become a key driver of competitiveness and profitability. One particularly effective approach is using geographic data to tailor prices according to regional factors. This article explores the significance of using geographic data in dynamic pricing and provides insights into implementing this strategy on WooCommerce, one of the leading e-commerce platforms.

Understanding Geographic Data in Dynamic Pricing

Geographic data refers to information that identifies the location and characteristics of natural or constructed features on the Earth’s surface. In the context of dynamic pricing, it includes factors such as:

Market Demand: Demand for products or services can vary significantly across different regions due to factors like population density, income levels, cultural preferences, and local economic conditions.

Competitive Landscape: Local competitors, market saturation, and pricing strategies employed by competitors in specific regions influence the pricing decisions of e-commerce businesses.

Regulatory Environment: Legal and regulatory differences between regions, such as taxes, tariffs, and shipping regulations, impact pricing and profit margins.

Adapting Prices to Regional Features on WooCommerce

  1. Geolocation Tools Integration: Integrating geolocation tools into your WooCommerce store allows you to identify the location of website visitors accurately. By knowing the geographic location of users, you can customize the pricing displayed to them based on their region.
  2. Market Research and Analysis: Conduct thorough market research to understand the unique characteristics and demands of different regions. Analyze demographic data, consumer behavior patterns, and competitor pricing strategies to inform your pricing decisions.
  3. Dynamic Pricing Rules: Implement dynamic pricing rules that take geographic data into account. For example, you can set rules to adjust prices based on the cost of living index, local currency fluctuations, or demand-supply dynamics specific to each region.
  4. Targeted Promotions: Use geographic data to create targeted promotional campaigns tailored to specific regions. Offering discounts, promotions, or incentives that resonate with the preferences and needs of local customers can boost sales and customer loyalty.

How to do it in Advanced Dynamic Pricing?

Change the terms of the wholesale discount for each country. To do this:

  1. Find out the current exchange rate to adjust the required amount for the discount. For example, the buyer must have a purchase worth 50 US dollars. To convert this to Danish kroner, you need to do a mathematical calculation: 50 * 0.15 = 7.5, where 0.15 is the ratio of the krone to the US dollar.
  2. Specify the country in the Conditions section. In our example, we do not specify a filter for products so that the discount applies to the entire store.

  1. Monitoring and Optimization: Continuously monitor the performance of your dynamic pricing strategies across different regions. Analyze sales data, customer feedback, and market trends to identify opportunities for optimization and refinement.

Note: in this case, you can use Advanced Order Export for WooCommerce. Read more about setting up this plugin there.

Benefits of Geographic-Based Dynamic Pricing

Improved Competitiveness: Adjusting prices to reflect regional demand and competition, businesses can stay competitive and capture market share more effectively.

Enhanced Customer Experience: Personalized pricing based on regional preferences enhances the customer experience, leading to higher satisfaction and repeat purchases.

Maximized Profitability: Optimizing prices according to regional factors enables businesses to maximize profitability by capturing value where demand is highest and adjusting prices where necessary.

Conclusion

In the era of data-driven decision-making, geographic data in dynamic pricing has emerged as a powerful strategy for e-commerce businesses operating on platforms like WooCommerce. By understanding regional features, adapting pricing strategies accordingly, and harnessing the capabilities of modern technology, businesses can gain a competitive edge, enhance customer satisfaction, and drive sustainable growth in the global marketplace.

How to Set Up Advanced Order Export for Woocommerce (Pro): Beginner’s Guide

How to install Advanced Order Export for Woocommerce (Pro)

Before installing the plugin, you need to buy it on our website. Select the appropriate tariff and click on the “Purchase” button.

Tariffs

As stated in the instructions, first we will remove the free version of the plugin, if it was installed earlier.

Next, go to the “Plugins” tab and click on “Add new”.

At the top of the page, click on “Upload” and choose the plugin archive. The plugin will appear in the “All plugins” tab. Activate it.

How to set up Advanced Order Export for Woocommerce (Pro)

We wrote about how to configure the plugin in this article. The settings are the same in both versions.

How to save report settings to your own Profile in Advanced Order Export for Woocommerce (Pro) 

Once you’ve set up your report, you can save them to your Profiles. 

To do this, click on the “Save as a profile” button

The “Save as a profile” button

You can create several such settings for different types of reports.

How to configure Status Change Jobs in Advanced Order Export for Woocommerce (Pro) 

The “Status change jobs” tab enables you to automatically export orders whose status has been modified to the designated location.

For example, let’s take the First situation from the last article.

There are two ways to create a job in the “Status change jobs” tab: 

  1. On the “Profiles” tab, you can click on the “Copy to a Status change jobs” button.

The “Copy to a Status change jobs” button

  1. On the “Status change jobs” tab you can click on the “Add job” button.

The “Add job” button

Then click “OK” on the message window.

The message window

In both cases, at the end you will see the window with the status job settings.

The status job settings

If you have already set up your “Profile” earlier, then you only need to specify “From status” and “To status” for the jobs. Let’s select the statuses “Processing” and “On hold” in the line “From statuses” and “Completed” in the “To status”.

“From status” and “To status”

Save settings.

How to configure Scheduled Jobs in Advanced Order Export for Woocommerce (Pro) 

You can configure the “Scheduled Jobs” tab to have reports exported on a schedule.

There are two ways to create a job in the “Scheduled Jobs” tab: 

  1. On the “Profiles” tab, you can click on the “Copy to a Scheduled Jobs” button.

The “Copy to a Scheduled Jobs” button

  1. On the “Scheduled Jobs” tab you can click on the “Add job” button.

The “Add job” button

In both cases, finish setting up the scheduled job on this window.

The scheduled job

By default, an empty file will not be sent.

The “Don’t send empty file” option

And the directory path is your site’s folder.

The directory path

You can choose another export destination (or destinations). For example, Email and Directory. To set up the Email, be sure to include a recipient. Then click on the ”Test” button.

The Email

If you have a similar error, then enter email in the “From email” field.

Error in Test Results

If the submission was successful, you will receive the following message.

Successfull Test Results

Schedule settings are quite flexible and understandable.

Schedule settings

Let’s imagine that you have to send a report on a certain day of a certain month. Choose date and time and click on the “Add” button.

Choose date and time

Click on the “Add” button

Do the same if you want to add another date.

Add another date

Set the period for which data will be loaded into the report in the “Export date range” section.

The “Export date range” section

Conclusion on how to set up Advanced Order Export for Woocommerce (Pro)

Now you figured out how to configure Advanced Order Export for Woocommerce (Pro). It also has many other equally useful settings. You can read about all of them in our plugin documentation.

How to set up Phone Orders for WooCommerce (Pro): Beginners Guide

How to install Phone Orders for WooCommerce (Pro)

The pro version of the plugin is paid. To purchase it, follow this link: https://algolplus.com/plugins/downloads/phone-orders-woocommerce-pro/

Select the appropriate tariff and click on the “Purchase” button.

Click on the “Purchase” button

After payment, you will receive an email with the plugin archive and activation key.

Purchase Receipt

Please, deactivate the free version of the plugin and install the pro version instead of it.

Then go to the “Plugins” tab and click on “Add new”.

Click on the “Upload” button at the top of the page and choose the plugin archive. The plugin will appear in the “All plugins” tab. Activate it.

How to configure fields and default values while adding new customers

In the guide about the free version of the plugin, we told you about how to specify the shipping / billing address for the customer.


If you need to select your required fields, then follow the next steps.

Click on “Settings” the tab and choose the ”New customers” link. You will see this panel.

The “New customers” tab

To hide fields, check fields with a checkmark next to them.

The “Hide fields” option

You can select required fields. The selection algorithm is similar to the previous one.

The “Required fields” option

Choose the default city, postcode, country, state for every new customer.

Choosing the default values

Now, you don’t need to fill in the required field while placing the order, because they have default values.

Required fields and default values in the “New Customer” editor

How to define products that can be sold

Click on the “Settings” tab and choose the ”Products” link. You will see this panel.

The ”Products” tab

Tick the “Sell “out of stock” product” option to allow selling the products that currently are out of stock.

The “Sell “out of stock” product” option

Tick the “Don’t sell products with no price defined” option if you wish to omit products without a specified price from search and order results.

The “Don’t sell products with no price defined” option

Tick the “Sell disabled variation” option to allow selling the disabled variations.

The “Sell disabled variation” option

Now, even if the product is out of stock, it can be sold.

We can choose out of stock product

How to use feature “Pay order as customer”

Click on the tab “Settings” and choose the ”Layout” link. You will see this panel.

The ”Layout” tab

Make sure the checkbox is disabled.

The “Hide button “Pay as customer””option

The order of using the “Pay order as customer” function:

  1. Fill in the order details and customer details. Click on the “Create order” button.

The “Create order” button

  1. The button “Pay order as the customer” is shown now. Click on it to continue the payment.

The “Pay order as the customer” button

  1. You will see the customer payment page. Choose a payment method and click on the “Pay for order” button.

The “Pay for order” button

  1. If the payment was successfully paid, you see the following message.

“Order received” message

Note: To return to the admin panel, click on the “Back to admin area” link.

How to send invoice to the customer

Click on the “Settings” tab and choose the ”Layout” link. You will see this panel.

 The ”Layout” tab

Make sure the checkbox is disabled.

The ”Hide button “Send Invoice”” option

You can also tick the “View invoice for orders” and “View invoice for draft orders” checkboxes to see what the invoice will look like.

”Show button “View Invoice”” options

Now, after clicking on the “Create order” button, you can both send an invoice and view it.

Send invoice

View invoice

How to add additional blocks to the interface

Click on the “Settings” tab and choose the ”Custom fields” link. You will see this panel.

The ”Custom fields” tab

There is advice in the settings on how to create a custom field. Use the following format:

Label Text|custom_fieldname

For example, let’s create a new line “Pickup at” in the “Order fields” block using the following code:

Pickup at|pickup_time|time

Creating a new line

You will find the new field in “Order details” on the “Add order” page.

The new field in “Order details

Conclusion on how to set up Phone Orders for WooCommerce (Pro)

This article shows only a small part of all the possibilities of using Phone Orders for WooCommerce. I am planning on writing more articles about the plugin and the features that make it easier to work with it. Keep an eye out for them!